RabbitMQ Installation
Overview
RabbitMQ is an open-source message broker that provides a lightweight, reliable, and easy-to-deploy platform for enabling secure, asynchronous communication between Atria service components. It transmits messages over encrypted channels using AMQPS, an industry-standard protocol for secure messaging.
RabbitMQ runs as a background service and, by default, is installed on the Provisioning Server.
Find out more at https://rabbitmq.com.
Follow this guide step-by-step to correctly install and configure RabbitMQ for Atria.
Set RabbitMQ_BASE Path
- On your provisioning server, create a directory to where RabbitMQ_BASE path will be pointed going forward
We recommend: C:\AtriaRabbitMQ
- Run the following commands in an administrative PowerShell session to set the Environment Variable:
$rabbitdir = 'C:\AtriaRabbitMQ'

[Environment]::SetEnvironmentVariable("RABBITMQ_BASE", $rabbitdir, "Machine")
-
Restart your PowerShell session
-
Verify that the EnvironmentVariable is set properly:
[Environment]::GetEnvironmentVariables()
Install Erlang
Before installing RabbitMQ, you will need to install Erlang. Erlang is the underlying programming language that RabbitMQ is built upon. Erlang is regularly updated and it's important that you install a version that is supported by RabbitMQ. Check here to see the current versions and compatibility before installing.
- Navigate to the Erlang website (Downloads - Erlang/OTP) and select the Download Windows Installer button as shown below. Earlier versions can be found on the right-hand side of the page if required.
Erlang Download
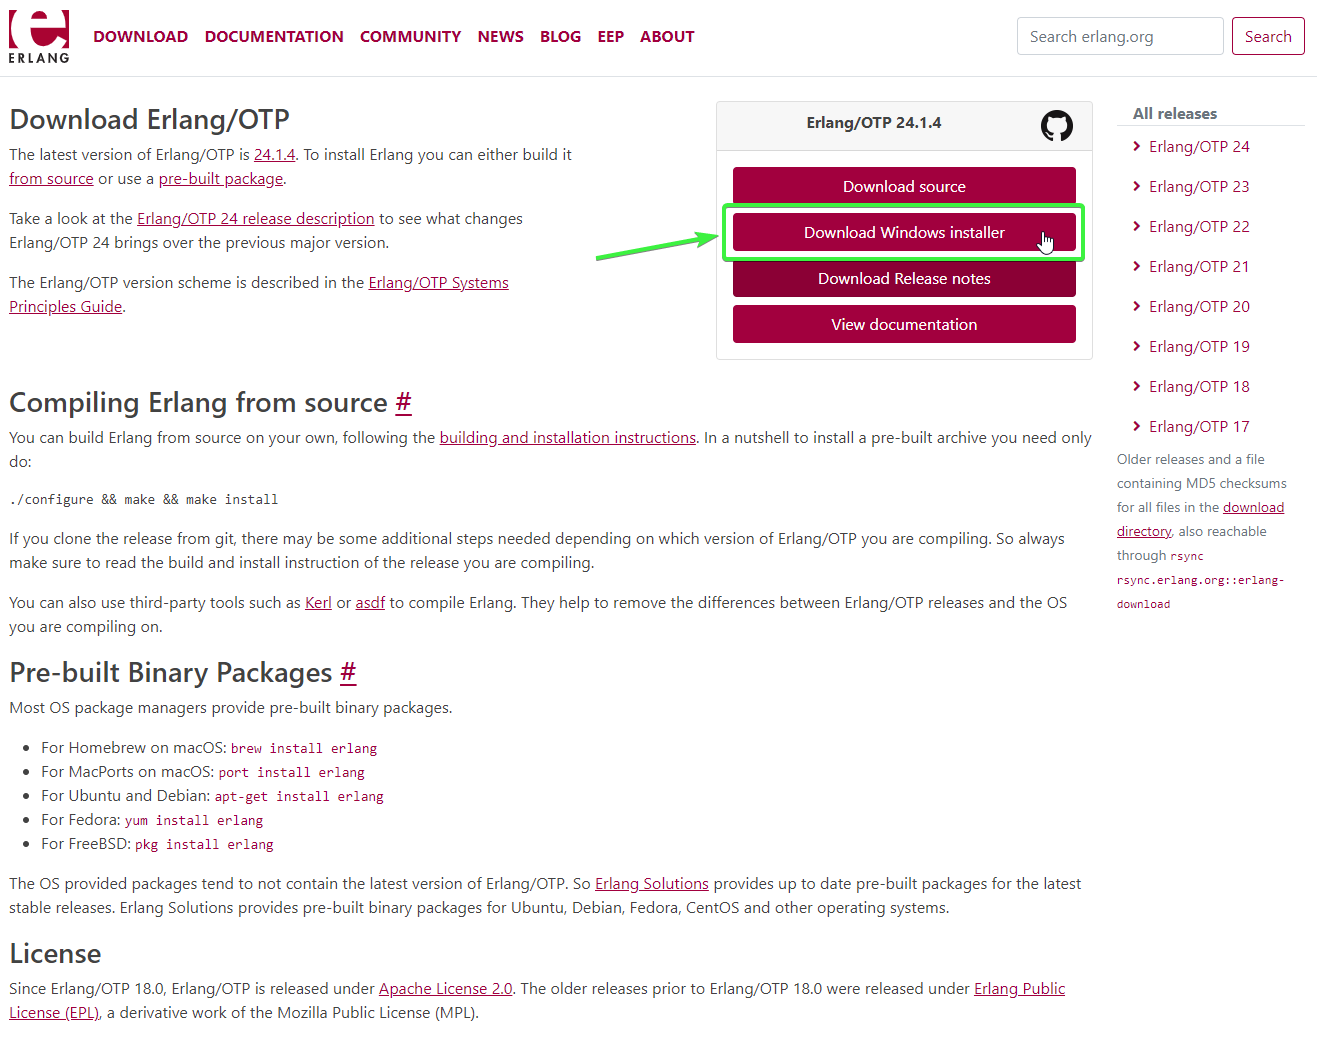
- Once downloaded, open the installer and proceed with the install of Erlang. If you experience any issues with the install of Erlang or compatibility with RabbitMQ, please contact our support at support@getatria.com.
Install RabbitMQ
RabbitMQ is a required core component and should be installed on the Provisioning Server. To download RabbitMQ, visit the official website.
- On the page, select the highlighted link (as shown in the screenshot below) to download the RabbitMQ application installer.
RabbitMQ Download
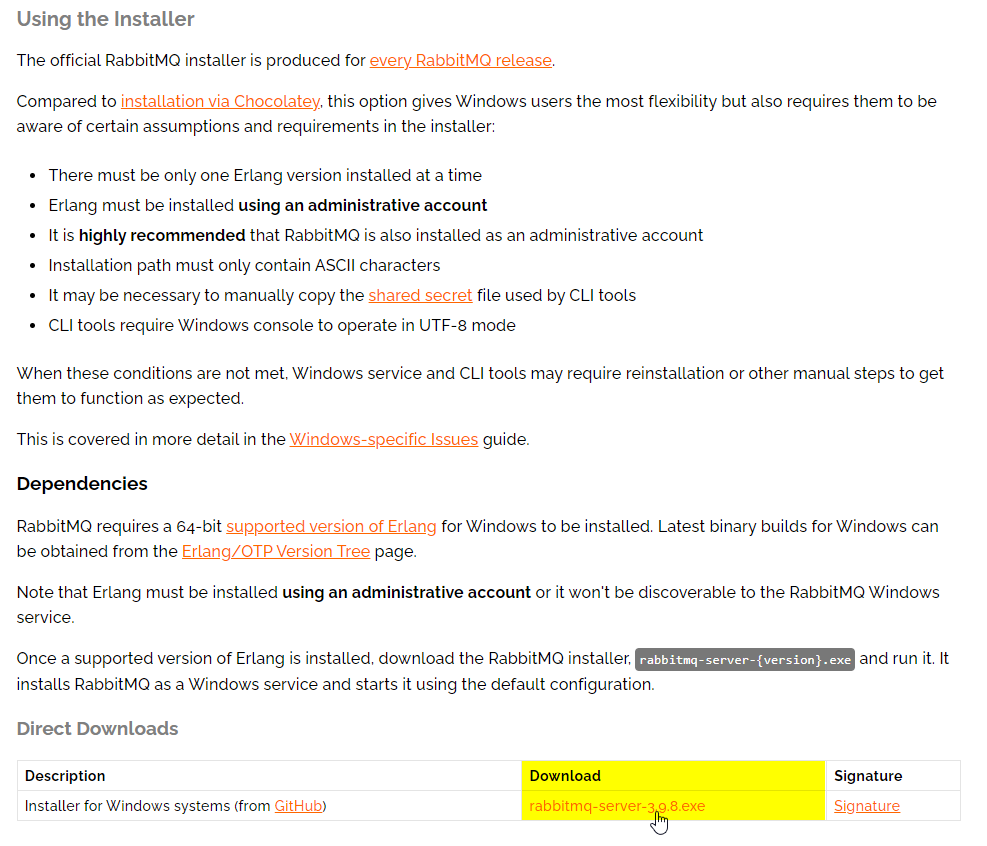
- Once downloaded, open the installer and proceed with the install of RabbitMQ.
Ensure Erlang and RabbitMQ are successfully installed before proceeding.
Enable Management Web UI
- Using PowerShell, navigate to the below file path, using the correct version number:
C:\Program Files\RabbitMQ Server\rabbitmq_server-'version'\sbin\
For example, we have RabbitMQ Server 3.8.11 installed, so we navigate to the following location:

- Run the following command:
.\rabbitmq-plugins enable rabbitmq_management
![]()
- Once the above command successfully runs, restart the RabbitMQ service.
You can then access the management environment. Navigate to: http://localhost:15672/.
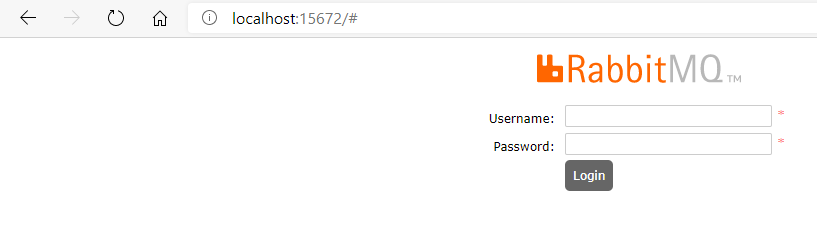
- Login with the default Username and Password:
- Username:
guest - Password:
guest
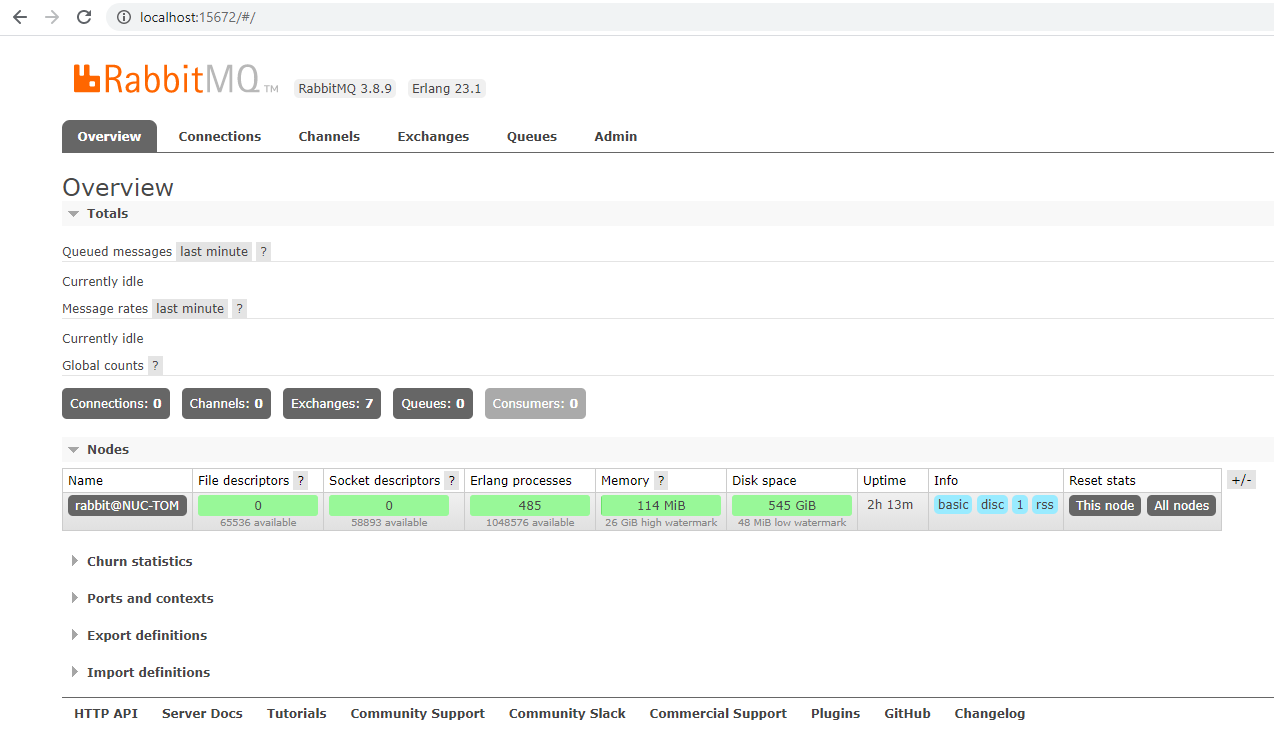
Management Dashboard
Create RabbitMQ Admin User
Run the following commands to create an administrator account for RabbitMQ. You will need to replace the values with a username and password. Make note of this credential as it will be used later:
.\rabbitmqctl add_user 'rabbitmq admin account username' 'rabbitmq admin account password'
.\rabbitmqctl set_permissions -p / 'rabbitmq admin account username' ".*" ".*" ".*"
.\rabbitmqctl set_user_tags 'rabbitmq admin account username' administrator
Examples
.\rabbitmqctl add_user 'rabbitmqadmin' '0|X~>49#4V3WpXgV'
.\rabbitmqctl set_permissions -p / 'rabbitmqadmin' ".*" ".*" ".*"
.\rabbitmqctl set_user_tags 'rabbitmqadmin' administrator
You will need to run these commands from:
C:\Program Files\RabbitMQ Server\rabbitmq_server-'version'\sbin\
Delete Guest User
Run the below command to delete the RabbitMQ guest account:
.\rabbitmqctl delete_user guest
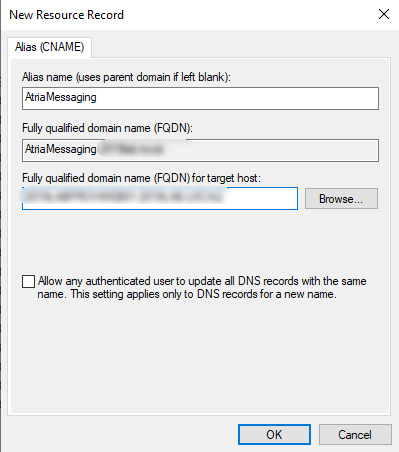
Setup RabbitMQ DNS Record:
Create a CNAME record in your DNS for AtriaMessaging to ensure Atria can access the RabbitMQ instance:
Ensure Network Connectivity for RabbitMQ
Use the following PowerShell command on the Web Server to test the network connectivity between the Web Server and Provisioning Server for RabbitMQ:
tnc -ComputerName atriamessaging -Port 5672
To ensure your configuration is correct, test the Web Management UI by navigating to:
http://atriamessaging.domain.local:15672
SSL Configuration
We strongly recommend configuring SSL for RabbitMQ.
This will ensure secure communication and is a mandatory requirement if you are managing private customers.
- Configure SSL for RabbitMQ by following the guide here
Whilst RabbitMQ can be run without SSL, generally we would only recommend this for test/demo environments.
Summary
You have now successfully installed and configured RabbitMQ for Atria. The next guide is for installing the Atria Platform.
You can read the below FAQ's or head to https://rabbitmq.com to learn more about RabbitMQ.
FAQ
Does RabbitMQ only need to be installed on the main provisioning server or also on remote ad provisioning servers?
RabbitMQ will only be installed and configured on the Main Provisioning Server
Do all provisioning servers need to be able to reach all provisioning servers via ports 15671 and 15672?
The ports, (15671 – HTTPS, 15672 – HTTP, 5671 – AMQPS, 5672 - AMQP) will only be for the main provisioning server.We can keep SSL and Non-SSL Ports in the meantime just in case issues arise when setting it up
Do remote AD Web Services need to be connected with open ports according to the specifications to the main provisioning server or to the remote ad provisioning server?
By default web services are passing through 8095 together with the ports to contact the web and main provisioning, as we move forward all request will pass through AtriaHTTPTunnel (8101) and AtriaExternalApi (front-end web server via 80/443)
For which domain names do the certificates for RabbitMQ need to apply?**
The RabbitMQ certificate will be under the main domain. It will then be configured for the remote environment to point to the FQDN of the RabbitMQ and be accessible.
Does the SSL certificate for RabbitMQ then needs to be trusted not only in the primary location but also in all remote Ads as well?
Yes, the SSL certificate for RabbitMQ should be trusted on all remote ADs. You need to add the aliases to the certificate SAN Example:
Internal FQDN: AtriaMessaging.internal.local
Public FQDN: AtriaMessaging.company.com
Server FQDN: prov01.internal.local
The copy of the internal RootCA will be applied on the remote ADs (if self-signed), otherwise if this is a known certificate signer (verisign, etc) The FQDN should be resolvable on the DNS of the remote AD.