Setting up a Remote Environment
Overview
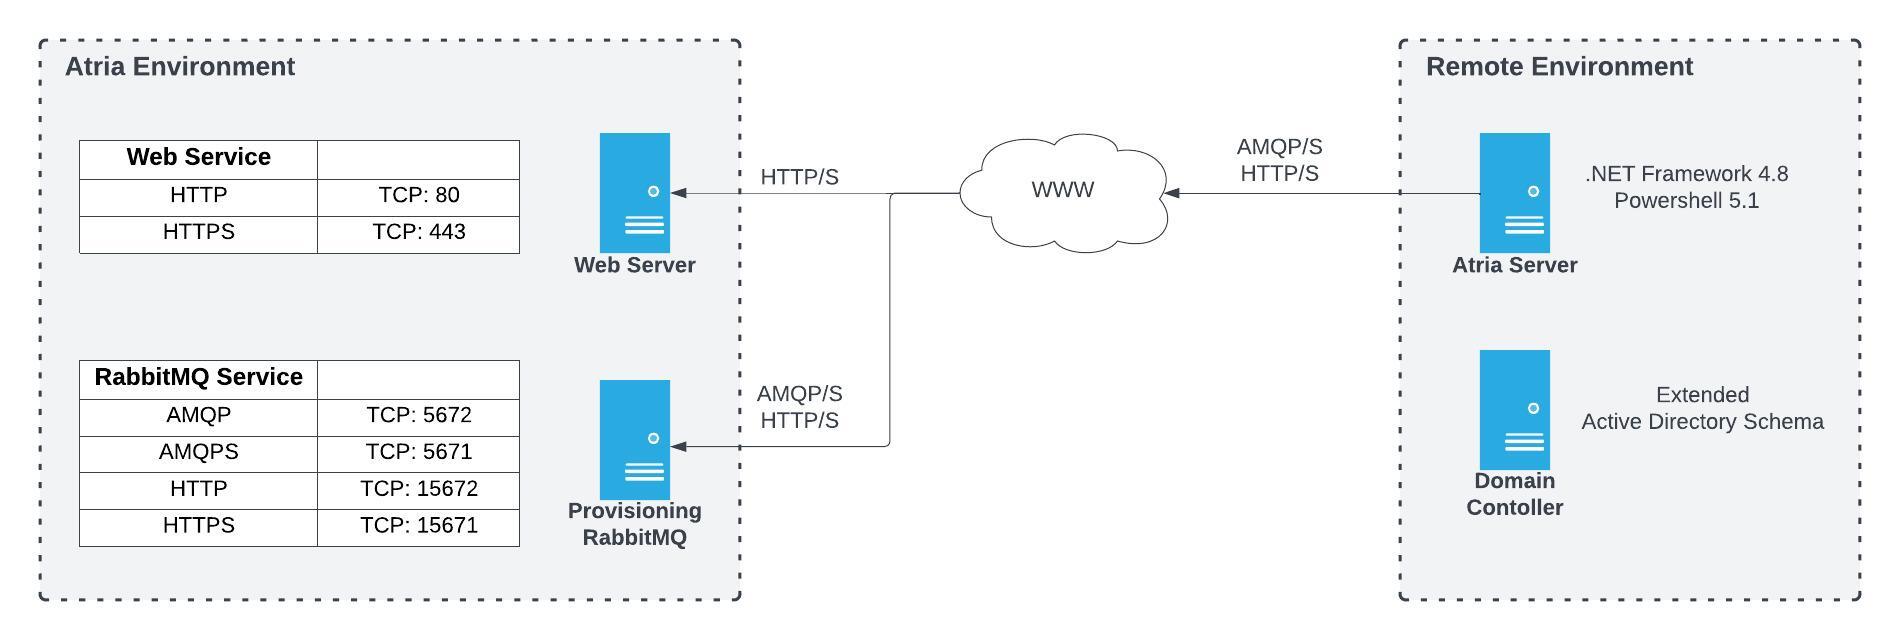
The Remote Environment feature has undergone substantial improvements in Atria v15 to simplify communication between environments and network infrastructure implementation. You can create a new customer environment by simply copying a script and pasting it into your customer's directory to establish a connection between Atria and their private environment. This document shows you how to prepare your environment for running remote environment setup scripts.
Location Types
Before following this guide, you will need to decide which location type you are setting up. A "Location" is a placeholder for customers to exist. Below is a description of the available location types:
- Private Location
- Shared Location
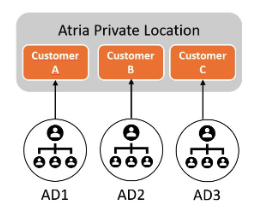
A Private Location is a dedicated, isolated environment configured specifically for a single customer. It provides exclusive infrastructure, ensuring that no resources are shared with other customers. This setup allows for tailored configurations, enhanced security, and complete control over the environment. It is ideal for organizations with strict compliance requirements or those requiring custom implementations.

A Shared Location is a multi-tenant environment where resources such as servers and services are shared among multiple customers. This setup allows for efficient use of infrastructure and reduced operational costs while maintaining data segregation and security through separate Active Directory Organizational Units. Shared locations are suitable for customers with standard configuration needs and less stringent customization requirements.
Prerequisites
Active Directory Schema Prep
For Atria to function correctly, the Active Directory schema must be extended to include the standard Exchange attributes. This is required to prepare the environment for multi-tenancy and is mandatory even if you do not intend to deploy Exchange.
To extend the Active Directory Schema, follow this guide: Extend Active Directory Schema with Exchange Attributes.
The guide will have you download the Microsoft Exchange Installation Media and run the following commands from a Windows Command Prompt:
> <Virtual DVD drive letter>:\Setup.exe /IAcceptExchangeServerLicenseTerms_DiagnosticDataOFF /PrepareSchema
> <Virtual DVD drive letter>:\Setup.exe /IAcceptExchangeServerLicenseTerms_DiagnosticDataOFF /PrepareAD /OrganizationName:”Your Organization”
Further Info
Extending the Active Directory schema ensures that essential attributes required for multi-tenancy and service integration, such as those used by Exchange, are available within the directory. This process allows the platform to function properly by enabling key features like user provisioning, email service configuration, and attribute synchronization. Skipping this step can cause critical failures in user provisioning, incomplete attribute assignments, and service integration issues.
Certificates Transferred
You need to ensure that your Root CA Certificate and RabbitMQ Certificate (If applicable) are copied over and installed on your remote domain. There are specific configuration requirements to be met during this process. It follows the same steps as transferring the Atria Root CA to the Web Server during installation so you can using this guide as a reference point: Transfer Atria Root CA Certification.
flowchart LR
    A[Export Atria Root CA cert on Provisioning Server] --> B[Transfer cert to Remote Domain] --> C[Import Atria Root CA cert on Domain]
DNS Entries and Firewall
You will need to configure your DNS so that the AtriaWeb domain resolves to the IP address of your Web Server and the AtriaMessaging domain resolves to the IP address of your Provisioning Server. You can confirm this is working by accessing the Web UI and RabbitMQ Management interface through a browser. Ensure you can access both sites before proceeding.
If setup as default, you should be able to access your Web UI at https://atriaweb/ and RabbitMQ Management at https://atriamessaging.(YourDomain):15671/. This may vary depending on your DNS setup, and which ports you are using.
Firewall Requirements
Ensure the following firewall rules are configured for your remote domain server:
| Port Direction | Protocol | Port | Purpose |
|---|---|---|---|
| Outbound | TCP | 443 | Secure data retrieval for installation (HTTPS). |
| Outbound | TCP | 5671 | Secure communication with RabbitMQ using AMPQs protocol. |
Step 1: Environment Setup Configuration Page
Before installing components in Remote Locations, installer packages need pre-setup configurations. This configuration page outlines how installer packages will communicate with Atria during component installation.
- Locate this page by navigating to
Configuration > System Manager > Environment Setup Configuration:
Environment Setup Configuration
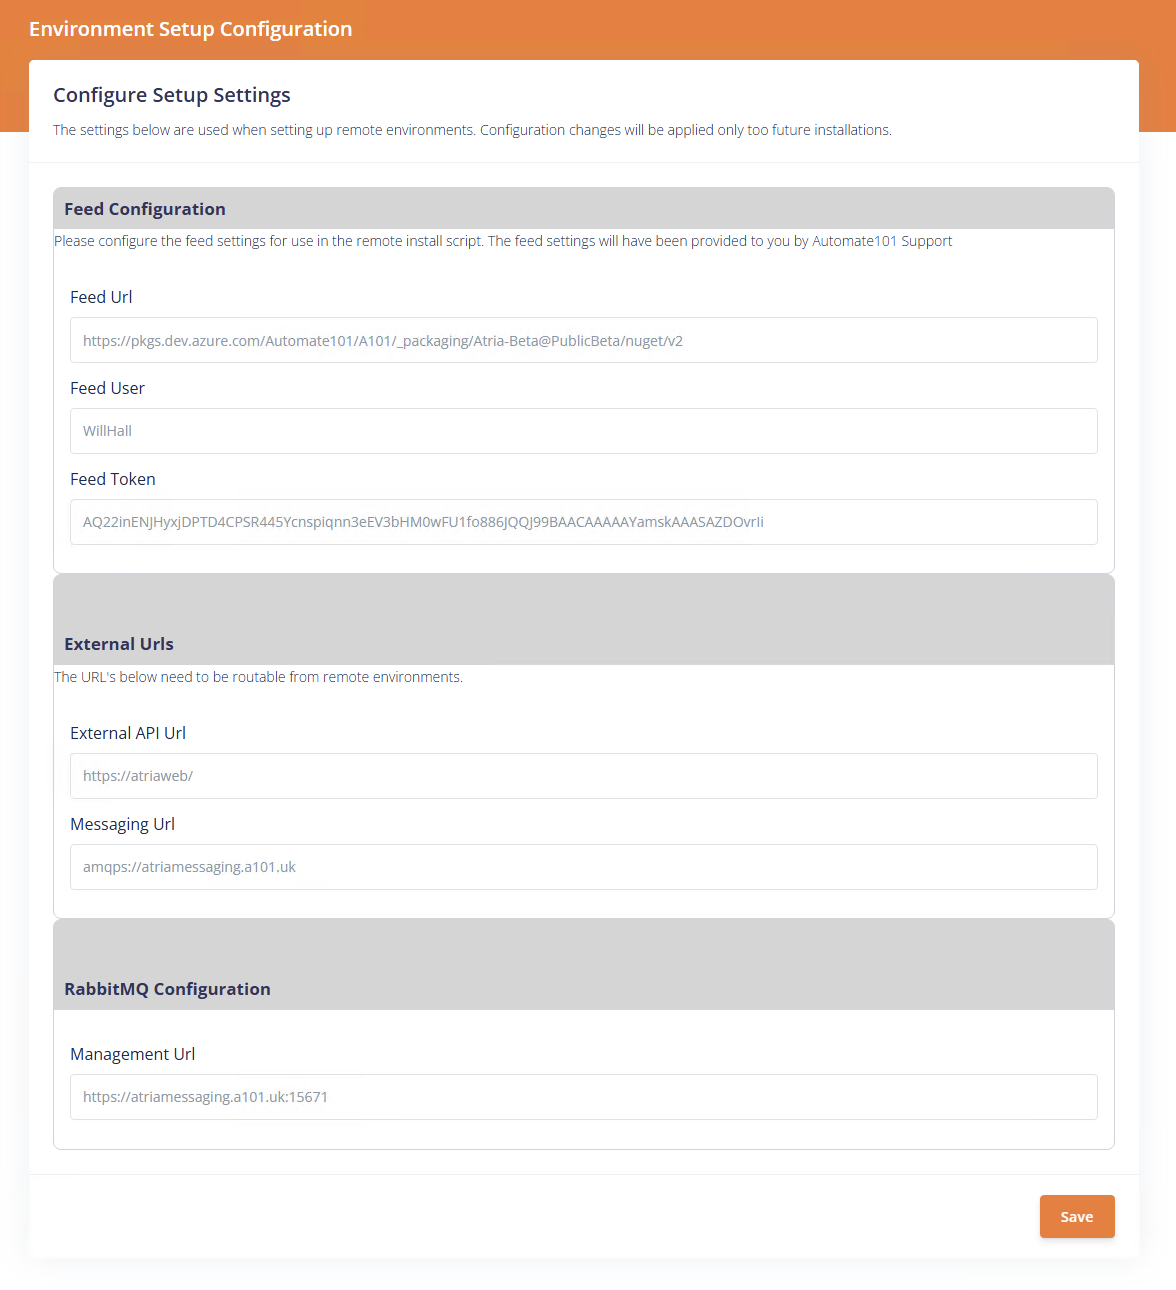
The screen has 3 sections:
- Feed Configuration
- External URLs
- RabbitMQ Configuration
-
Feed URL: The URL used to download installer packages
- Provided by Atria Support
-
Feed User: The user account used in Feed URL authentication
- An email address showcasing your domain
-
Feed Token: Token providing access to the Feed URL
- Provided by Atria Support
-
External API URL: Atria Portal URL
- This should be routable from your remote environment
-
Messaging URL: URL to the Provisioning Server hosting RabbitMQ service
- This should start with amqps if you are using SSL, or amqp if you are not. The rest of the URL should include the FQDN to your RabbitMQ environment.
- You do not need the port of the end of the Messaging URL.
- Management URL: URL to the Provisioning Server hosting RabbitMQ Management service
- Ensure you include the port at the end of the URL and that there are no trailing spaces or characters after the port number.
Enter the desired values in the fields and click Save to store them, making your environment ready to handle remote environment setup scripts.
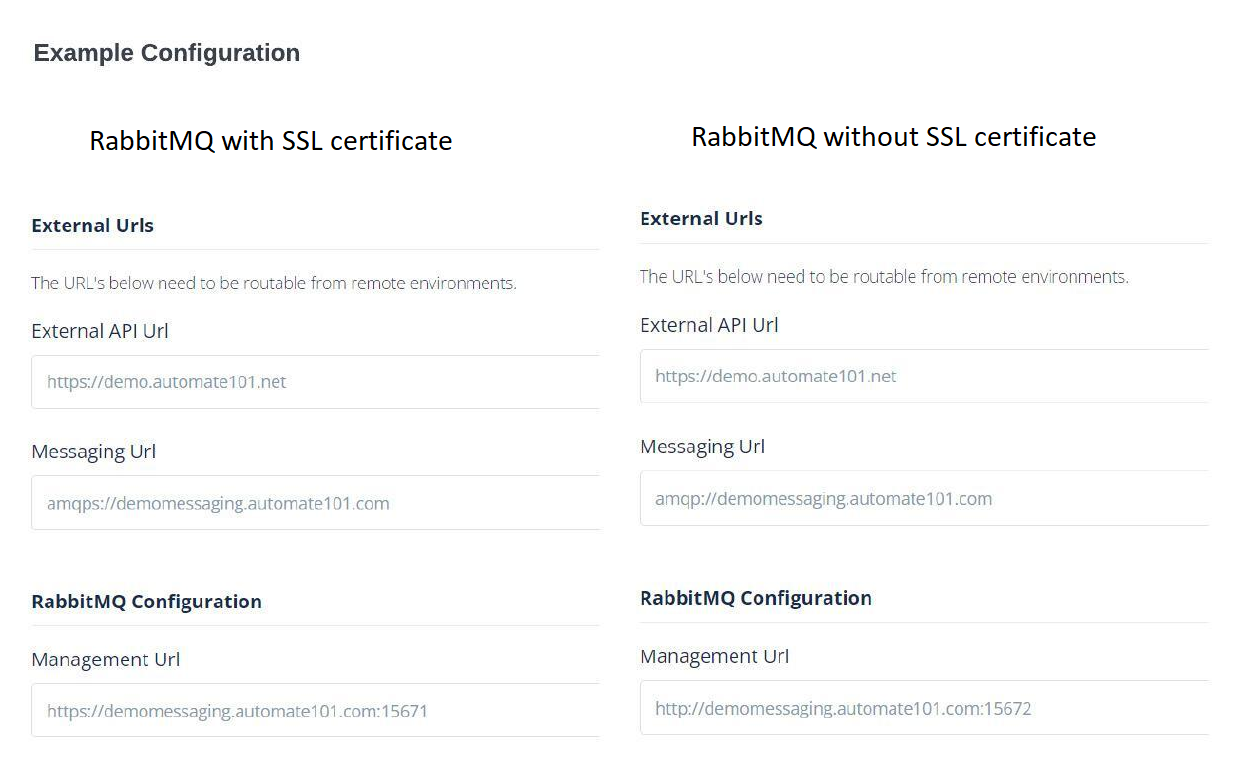
Example Configuration
Step 2: Remote Location Configuration
- Navigate to
Configuration > System Manager > Locationand click Add:
Add Location
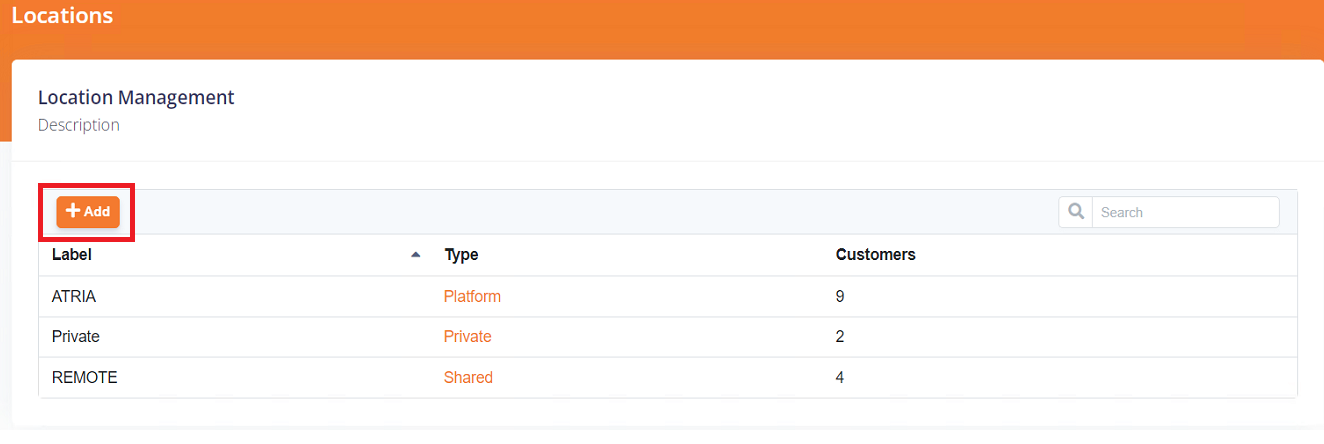
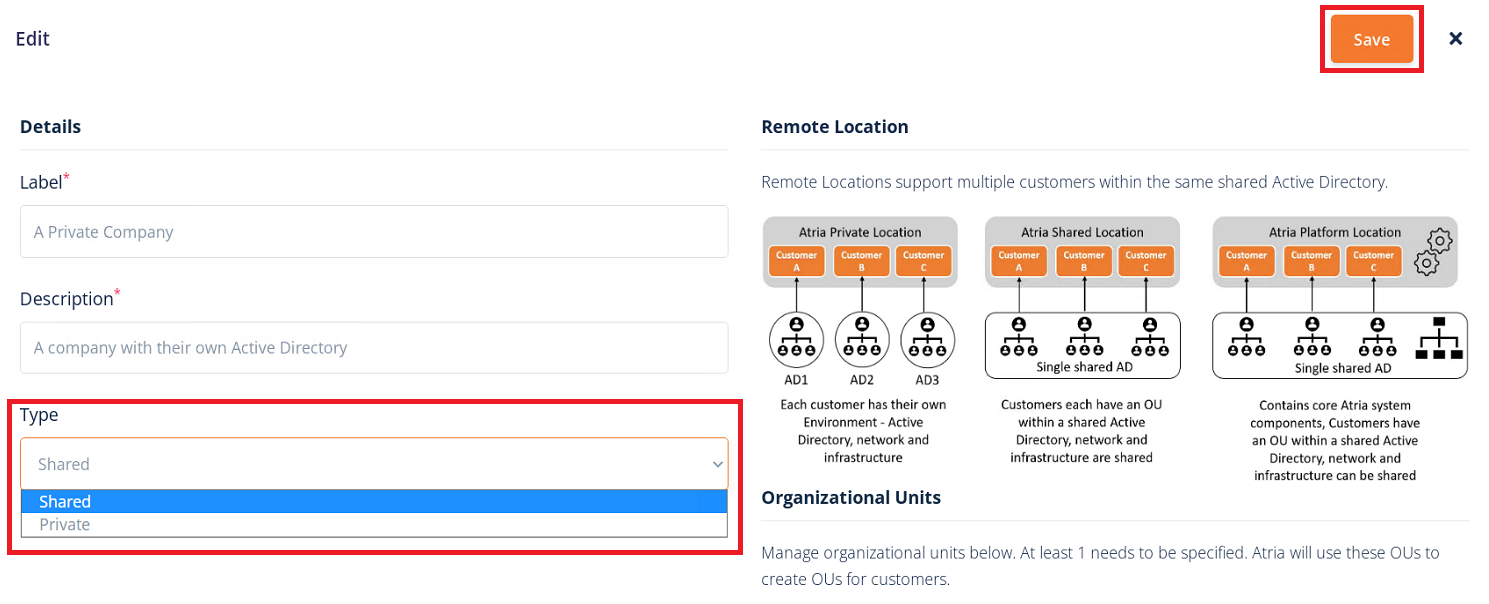
- Fill out the fields and specify the appropriate Location type that best describes the Remote Environment, then click Save:
Save Location Details
Step 3: Location Specific Configuration
The rest of this guide is split into 2 sections. Follow whichever one lines up with the location type you want to configure:
- Shared Location
- Private Location
Install the Atria Components in the Remote Environment
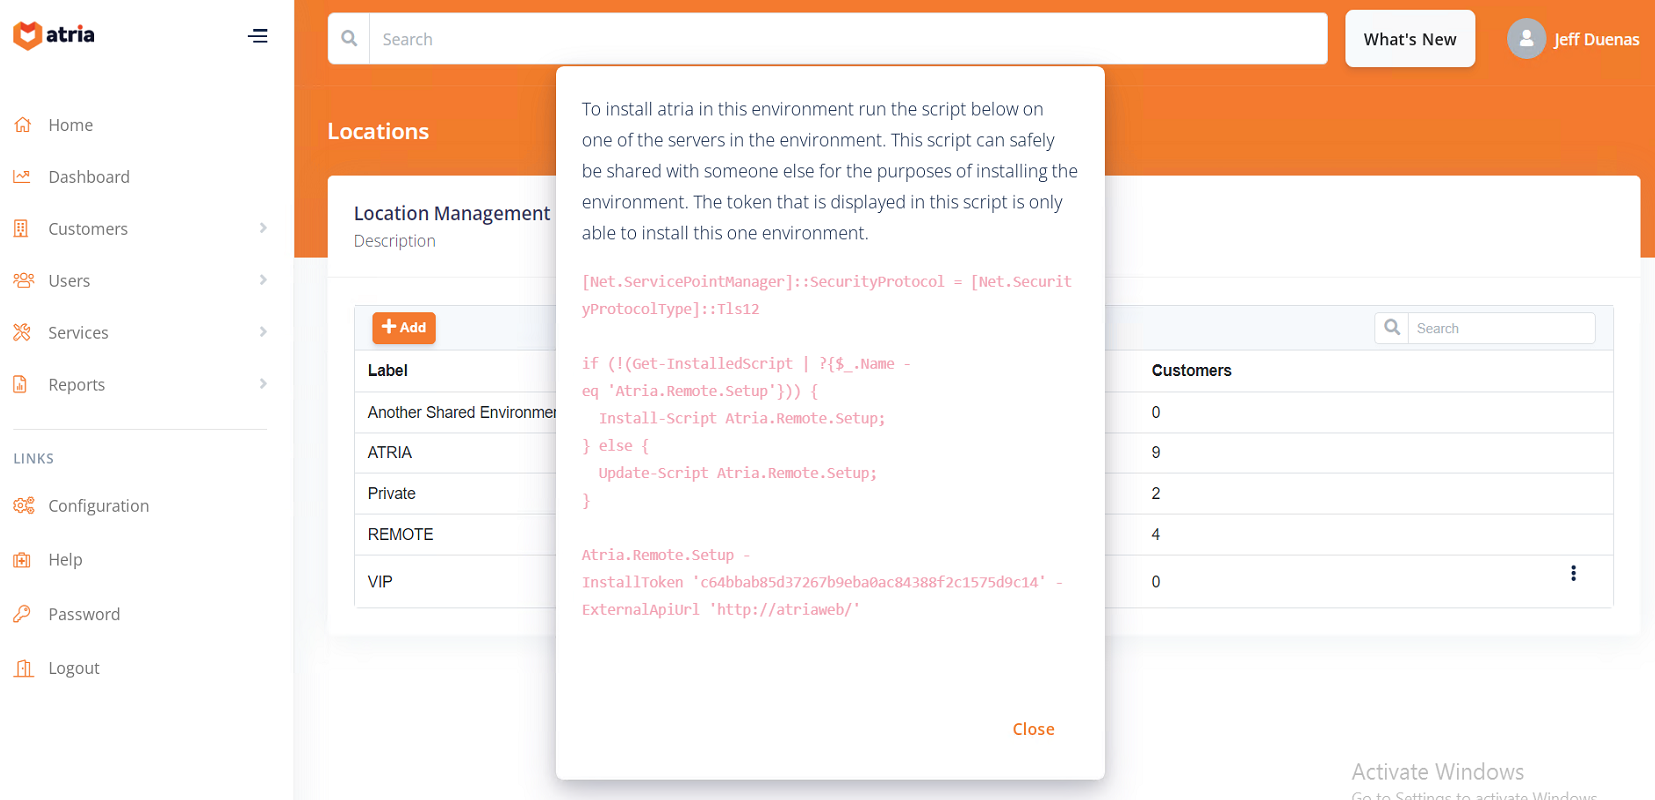
Using the generated installation script, run the script in the Remote Environment where you want the components installed.
Remote Environment Script
Verify Atria Components Installation
After installation, verify the status of the components in the Atria Portal under Configuration > System Manager > Environments.
You can view:
- The number of components installed on the Location.
- Any issues with the components.
Select the customer environment you created to see detailed information

- v15.23 or before
- v15.24 onwards
Create the Directory Server Connection
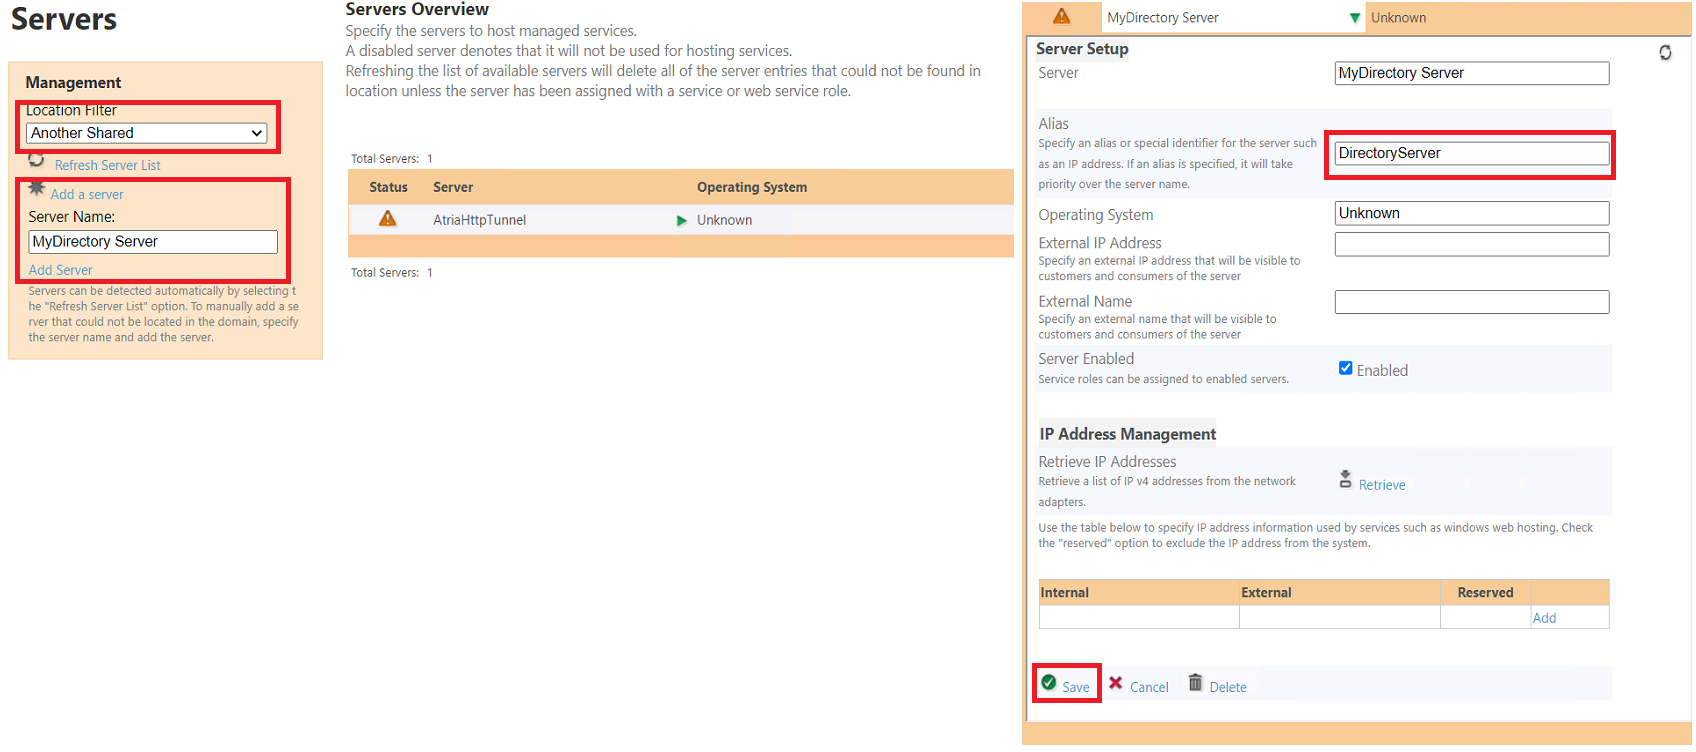
- Add the server:
- Navigate to Configuration > Servers.
- Select the appropriate Location Filter where the server will be added.
- Click Add Server, enter the Server name, and click Add Server.
- Ensure the Server Alias name is resolvable from the Atria Web and Provisioning Server, then click Save.
Server Configuration
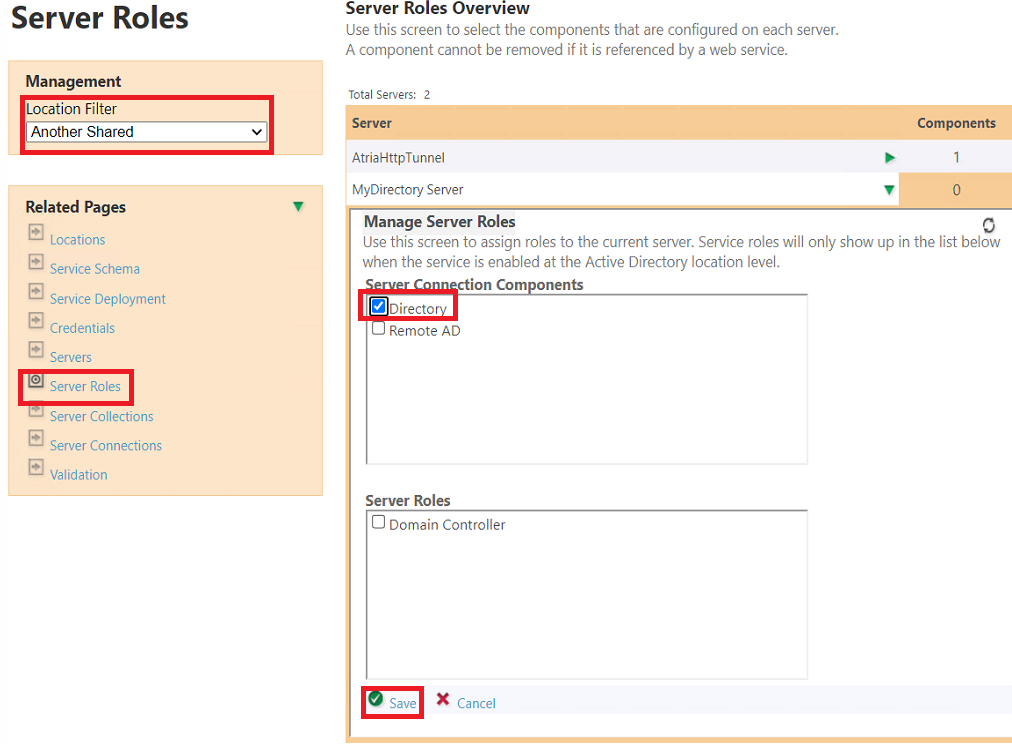
- Assign the Directory Role:
- Navigate to Configuration > Server Roles.
- Select the Server.
- Check the Directory role and click Save.
Server Role Configuration
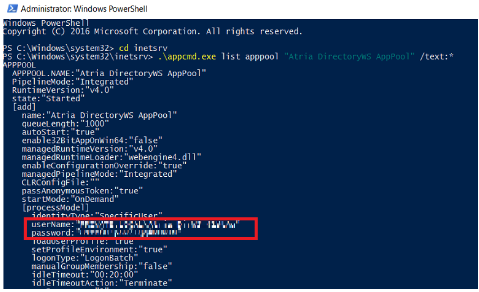
- Retrieve credentials:
- On the Remote Environment, open an elevated PowerShell window and run:
cd C:\Windows\System32\inetsrv
.\appcmd.exe list apppool "Atria DirectoryWS AppPool" /text: - Take note of the username and password:
Credentials
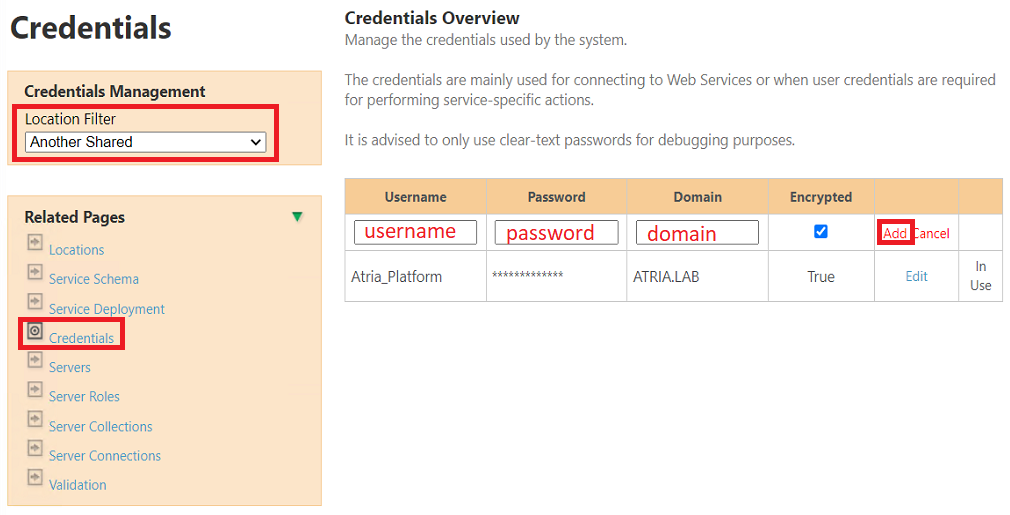
- Add credentials:
- Navigate to Configuration > System Manager > Credentials.
- Set the Location Filter to the new location you created.
- Enter the credentials retrieved from PowerShell and set the Domain to the FQDN of your remote environment.
Add Credentials
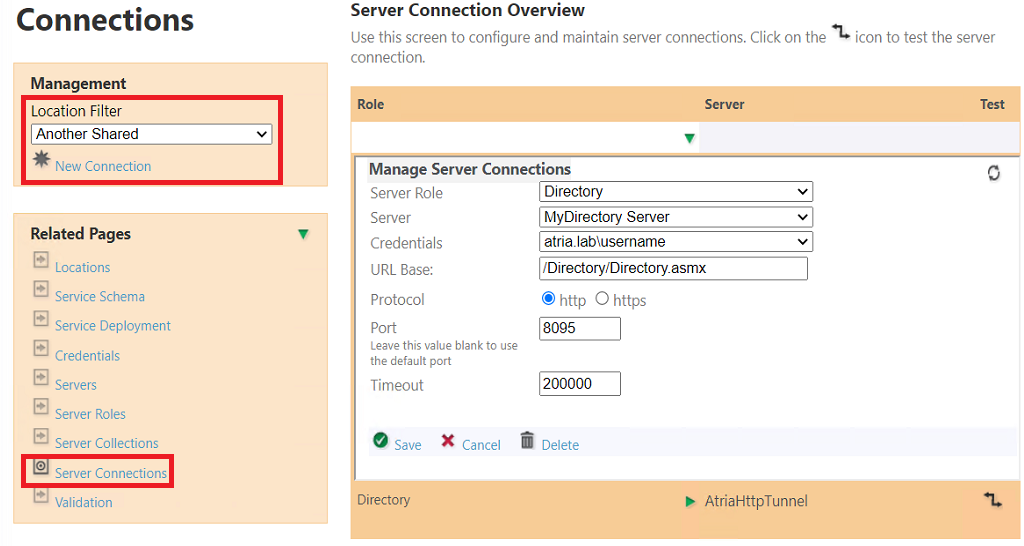
- Create the server connection:
- Navigate to Configuration > System Manager > Server Connections.
- Select Directory as the Server Role.
- Choose the appropriate Server and credentials.
- Specify the Protocol and Port (default: HTTP and port 8095), then click Save.
Server Connection
- Validate the connection:
- Click the Icon under Test Connection and Verify the connection status.
Due to the use of Group Managed Service Accounts (GMSAs) in Atria v15.24, the server connection is created automatically so your environment configuration is now complete. For more information about GMSAs, visit Use Group Managed Service Accounts for Atria Components.
Creating a Dedicated Customer
- First, Create the Customer in Atria by navigating to
Customers > New Dedicated Customer:
Dedicated Customer
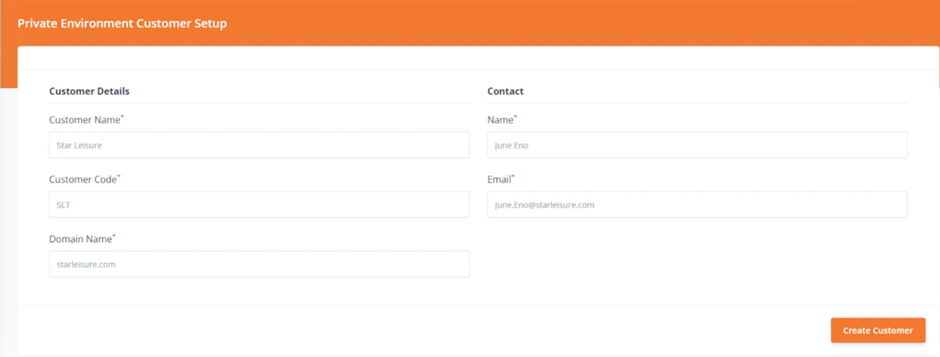
-
Fill in the required details for the Customer.
-
When you click on "Create Customer" you will be presented with an Installation script:
Installation Script
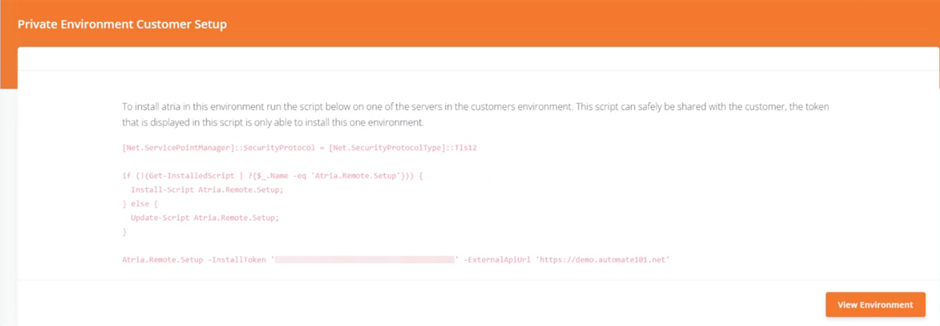
Install Atria Agent on the Clients Active Directory
-
Log on to a server in the Private Active Directory as a Domain Administrator.
-
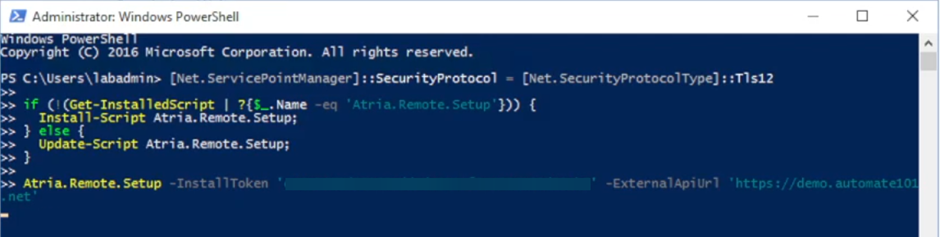
Start an administrative PowerShell window, and copy and run the following script:
Script
- This will prompt you 2-3 times regarding permissions. Please provide the answer “Y” to each of these values.
Script Prompt
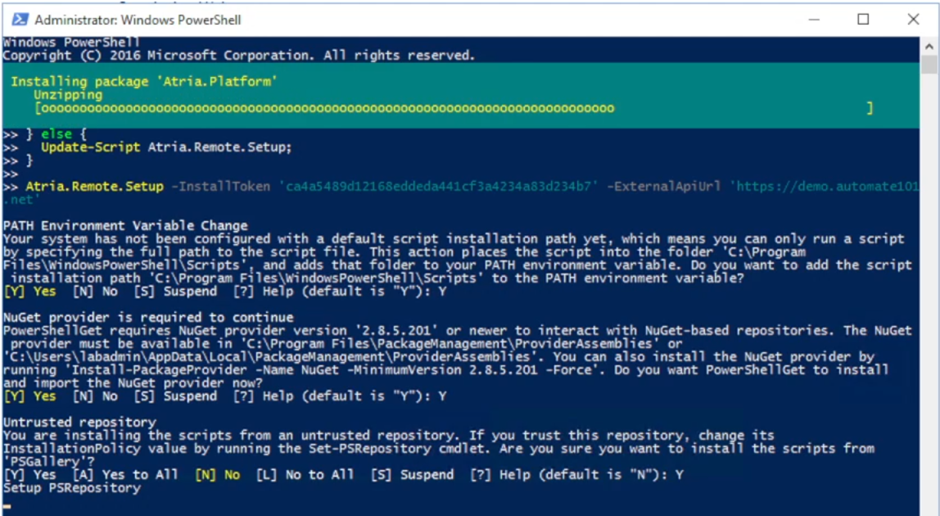
- Now the agent install process will run, it will look something like this:
Agent Install
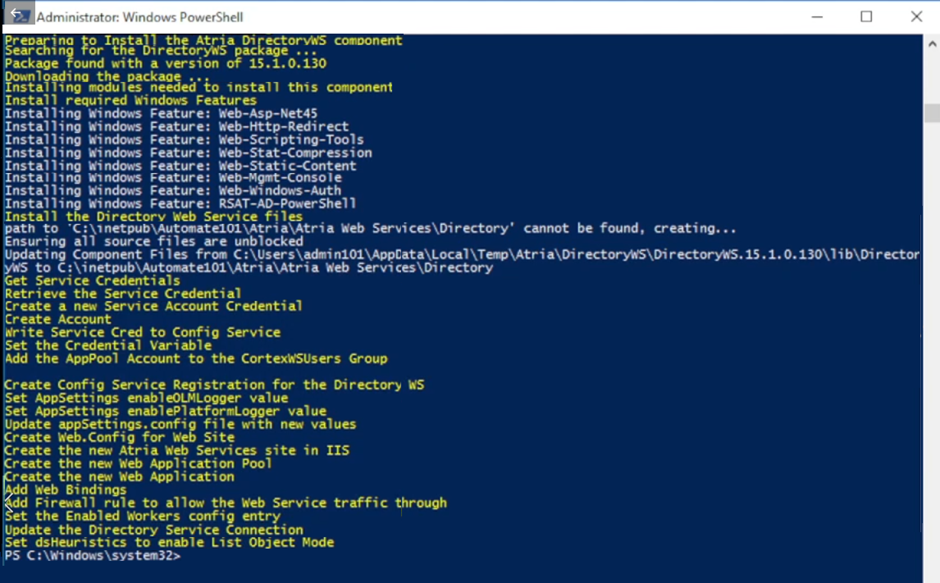
- Once completed, the script will end. Now, head back to the Atria Portal.
Check Agent Status
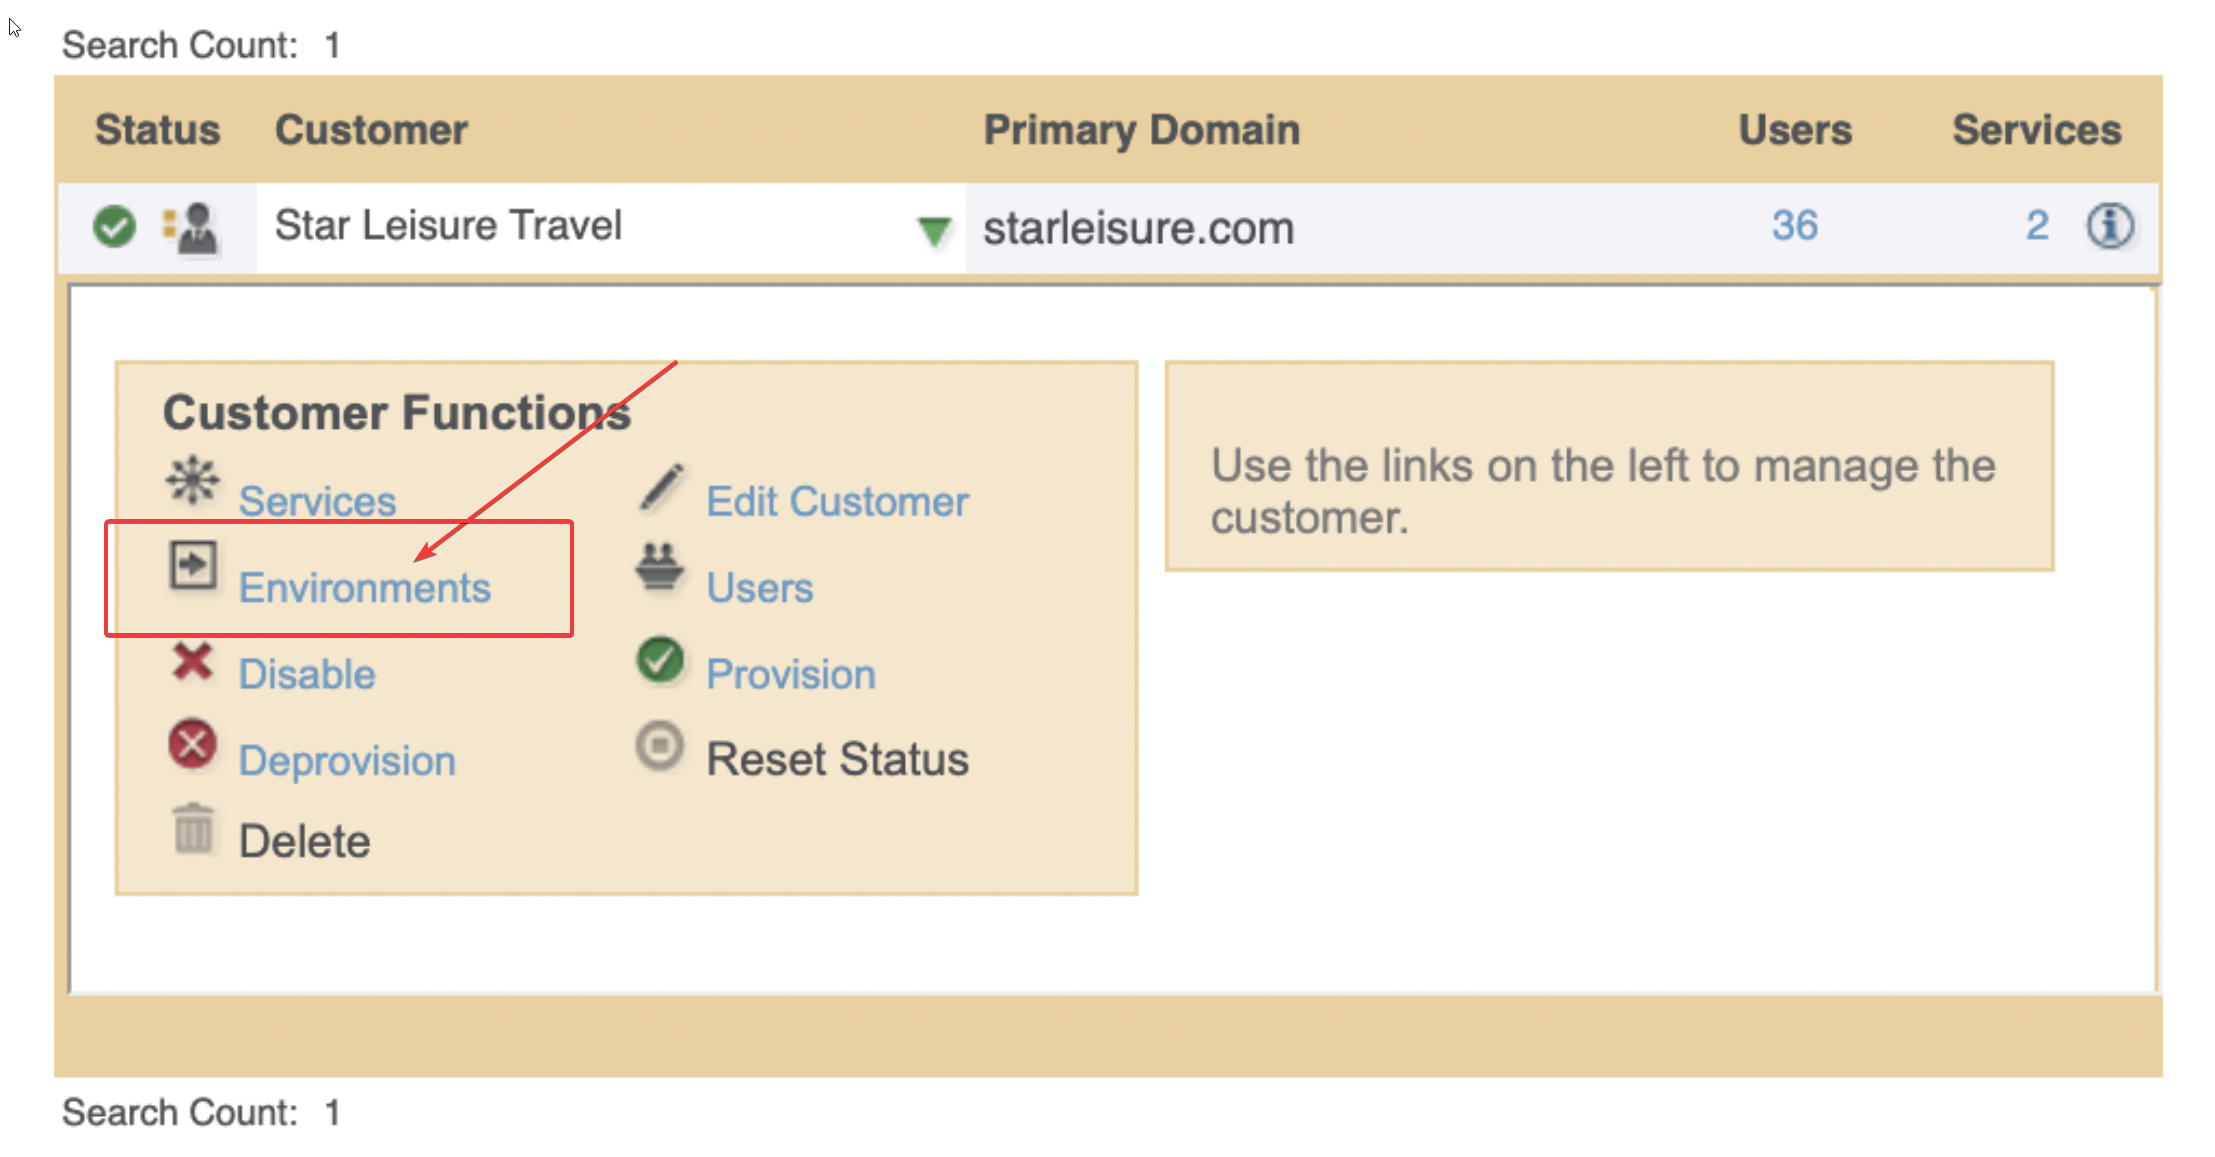
- Locate the Customer, and click on Environments to view the status of the Atria agent:
Environments
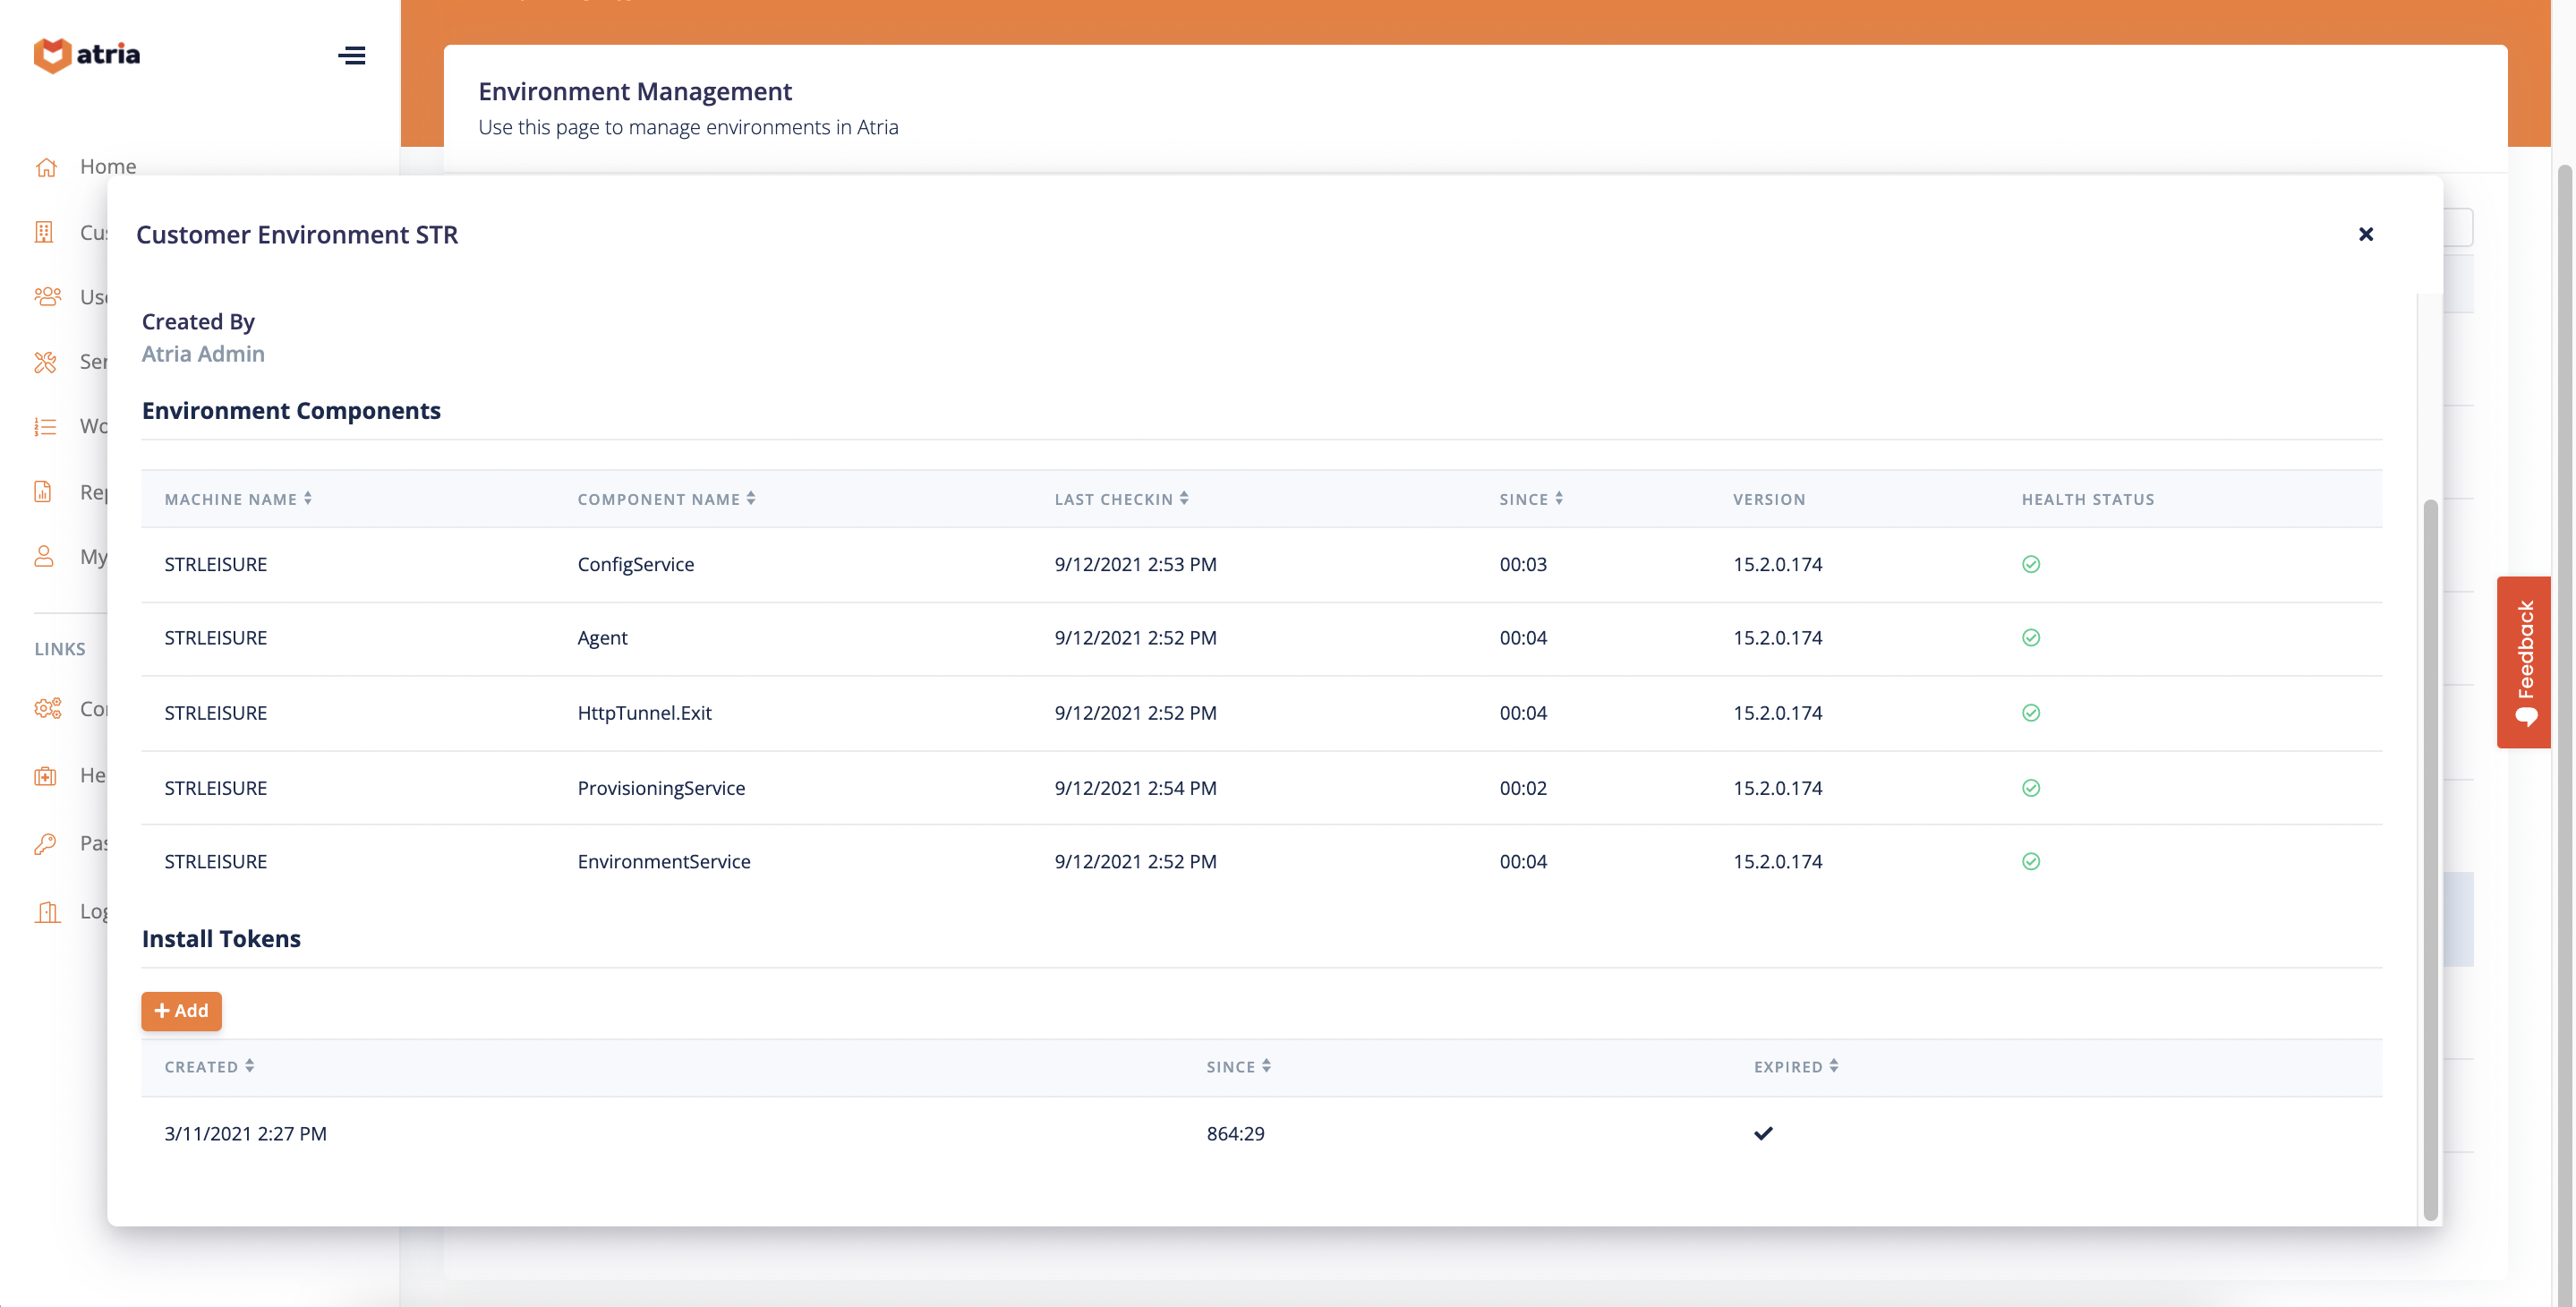
- Once the agent has successfully completed, all of the components should have a green health status. At this point the remote Active Directory is connected to Atria.
Health Status
Finishing Customer Provisioning
- Go back to the Customer, and select Provision:
Customer Provision
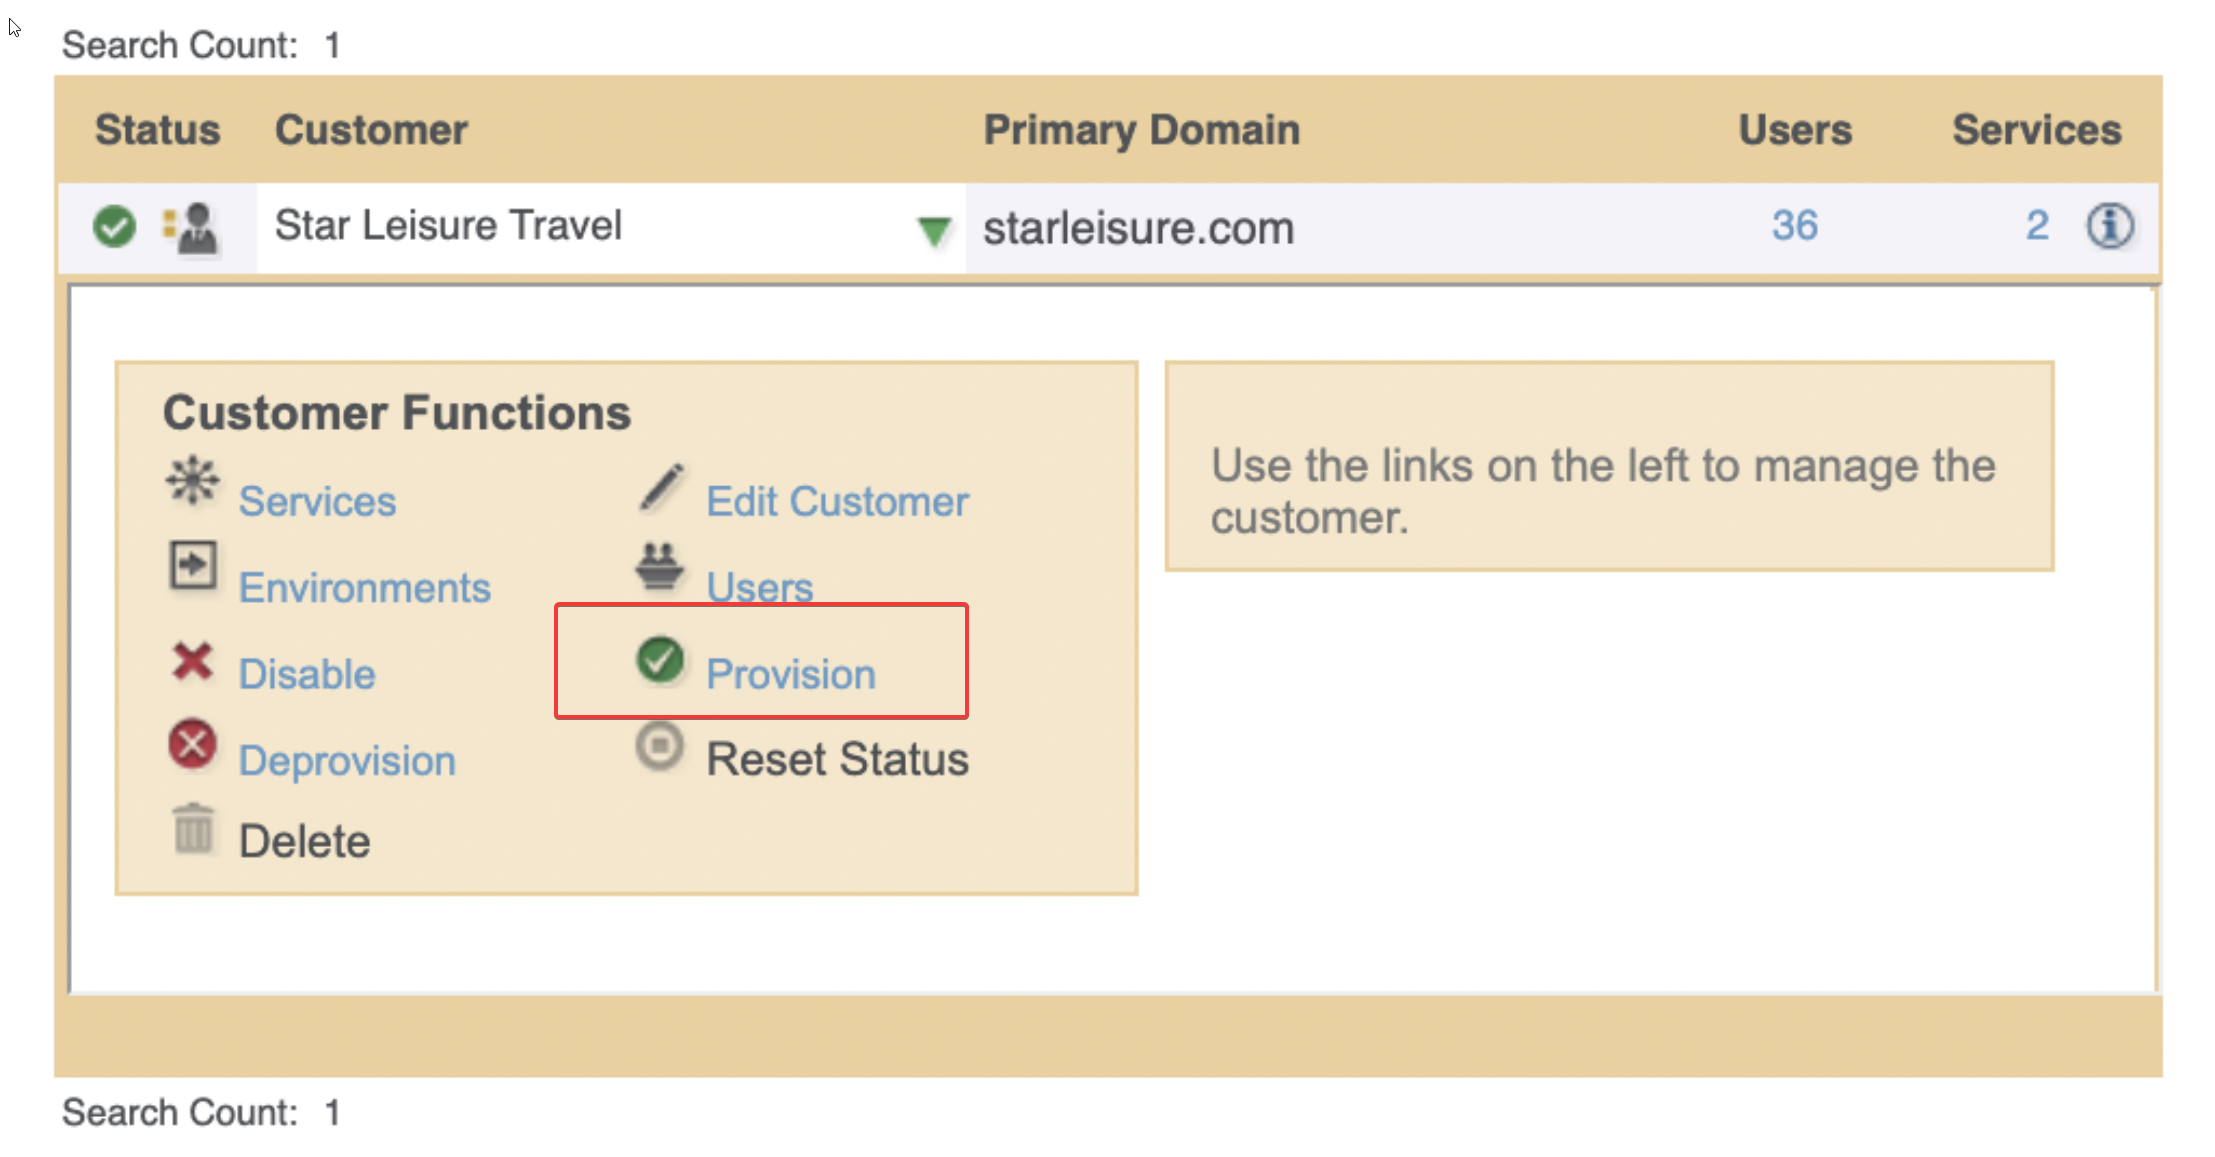
- When provisioning has completed, you can now progress to import the users.
Importing Users from Active Directory
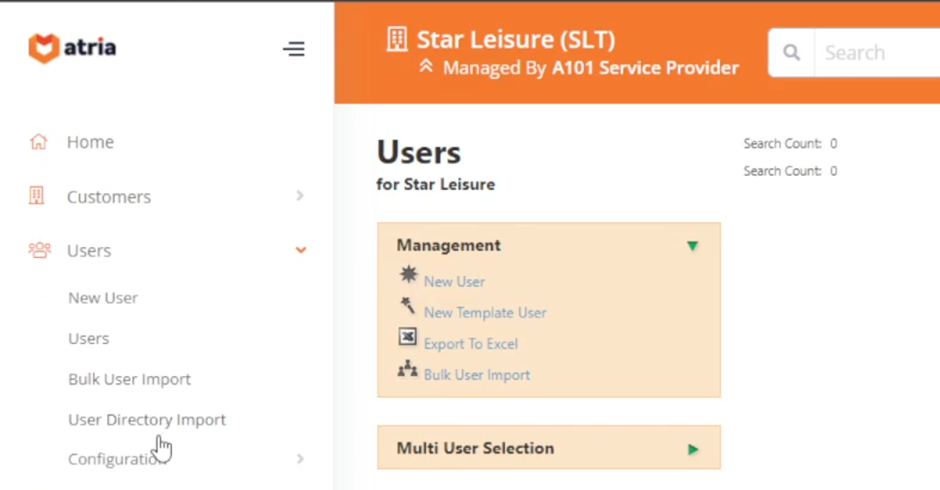
- Ensure you have the customer selected, and navigate to User Directory Import on the left menu:
User Directory Import
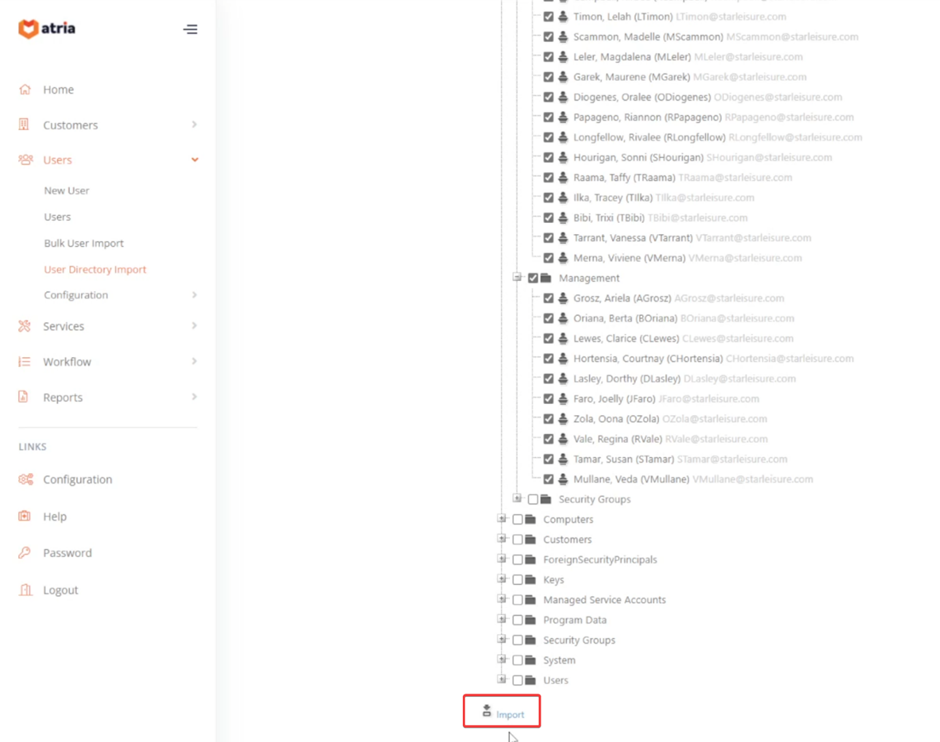
- Select the Users you wish to import from their OU, then select Import:
User Import
- Now, if you refresh the users page, depending on the customer size, users will start appearing in the user list.
The following features are now available for the customer and their users:
- Update/Change user details
- Add new users
- Reset passwords
- Delete Users
- Group management features are also available to use.
Summary
In this document, we configured a remote environment to connect with Atria. To learn how to create customers in a remote shared environment, and manage customers in both scenarios, navigate to Remote Customer Management.
If you have questions or encounter issues, contact us at support@getatria.com.