Multi-User Provisioning
Overview
Atria’s Multi-User Selection tool streamlines the process of managing multiple users at once. Whether you're enabling, disabling, provisioning services, or assigning workspace items, this tool reduces time and manual effort for administrators and customers alike.
Features
The Multi-User Selection tool is designed to perform bulk actions across selected users within a customer tenant. Administrators can use a checkbox interface to select multiple users from the user list and apply actions such as:
- Enable / Disable users
- Provision / Deprovision services
- Delete accounts
- Apply or remove services and make service changes
This functionality can be useful for onboarding, or any large user changes, enabling efficient, consistent configuration across many accounts.
How to Use Multi-User Selection
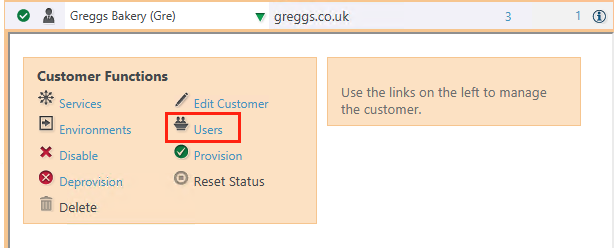
Step 1: Navigate to the Users Section
Go to the Users page under the relevant customer:
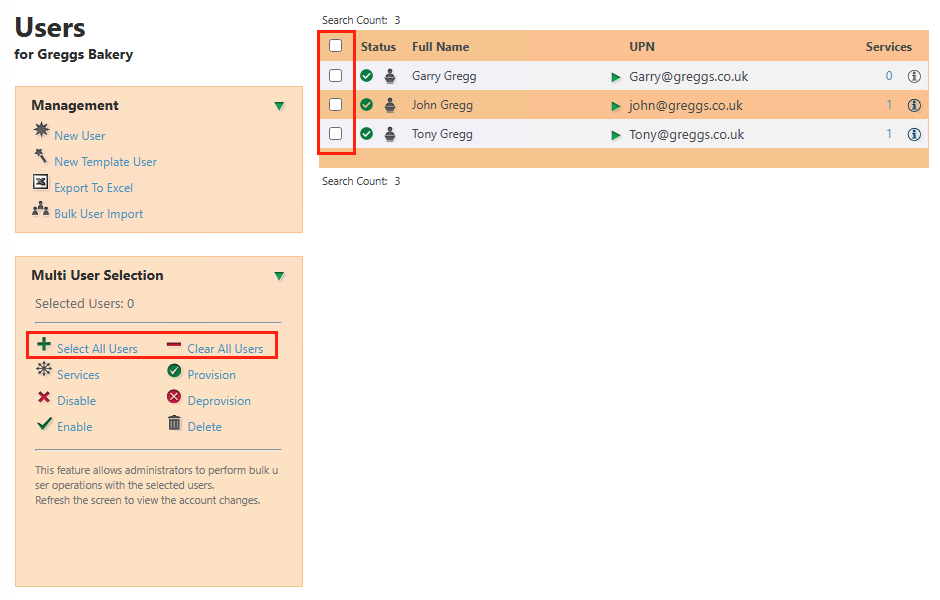
Step 2: Select Users
Expand the Multi User Selection box on the left:
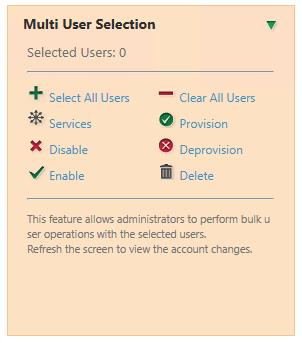
From here you can:
- Use the checkboxes next to the users, to select the desired users.
- Click Select All Users to include all users in the list.
- Click Clear All Users to deselect.
Step 3: Choose an Action
Available bulk actions include:
- Services – open service options for batch provisioning
- Enable / Disable – change user account status
- Provision / Deprovision – provision or deprovision users
- Delete – remove selected user accounts
Click the desired action to proceed. Clicking Services will open the User Services page so you can make service changes for the selected users. the status will appear as Pending(Blue) whilst you have multiple users selected.
Step 4: Confirm and Apply
Follow the prompt to complete the action. For provisioning services, confirm roles and settings before clicking Provision.
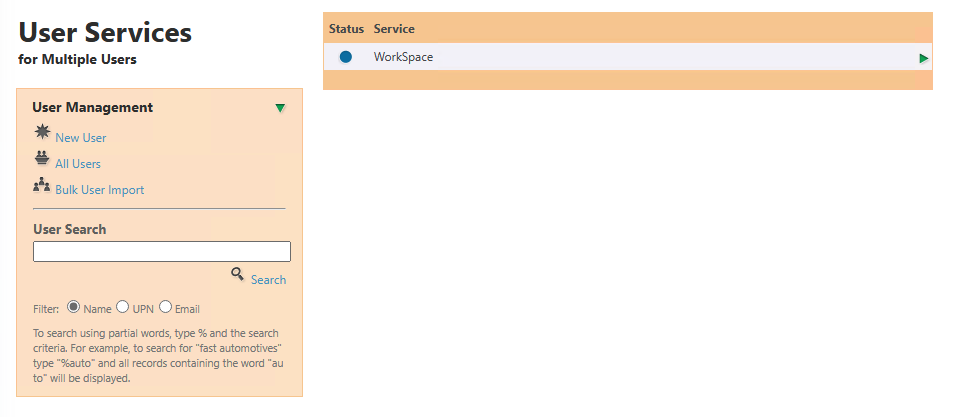
Using Multi-User Selection for Workspace Services
Multi-user selection is especially helpful when applying Workspace configurations across multiple users.
After selecting users and clicking the Services button:
- Choose the Workspace service from the list.
- In the User Service Setup, use the checkboxes next to the items to cycle through the options.
- Use the Add, Remove, or No Change options to specify how the settings should apply:
- Add (+) – Assign this item to all selected users.
- Remove (-) – Remove this item from selected users.
- No Change (◼) – Leave current assignments untouched.

Optional: tick the checkbox “Reset all selected users assignments” to standardize all users to the newly defined set.
- When ready, click Provision to apply the changes.
If you require any assistance or experience any errors, please contact us at support@getatria.com.