Creating and Editing Users
Overview
Effective user management is crucial for maintaining security and ensuring users have appropriate access to resources within Atria. This guide will walk you through the key aspects of managing users.
- Creating a User
- Editing a User
- Copying a User
- Enabling/ Disabling a User
Creating a User in Atria
Manually creating a user in Atria allows you to provision an individual account by entering required details directly through the platform.
Prerequisites
The user must have the necessary permissions to create new users. The following roles have this permission by default:
- Customer Administrator
- Reseller Full Administrator
- Service Provider Administrator
- User and Service Administrator
- User Administrator
Enter User Information
-
Access creation page using the left-side menu:
Navigate to Users > New User.- Ensure that you have the correct customer selected before proceeding.
-
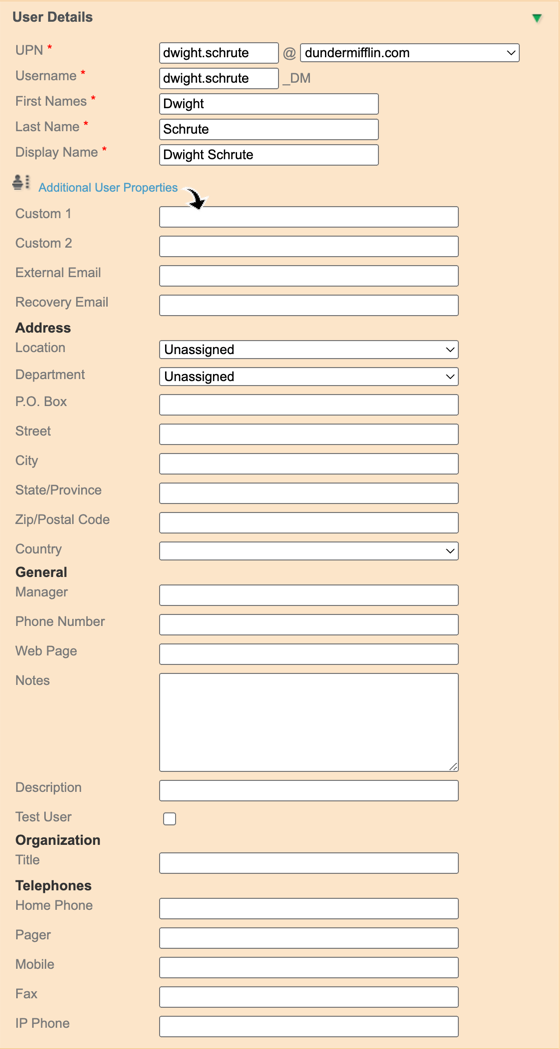
Input the required user information:
-
UPN (User Principal Name): The UPN is the unique identifier for the user within the domain.
-
Username: The name entered by users when logging into Atria, automatically generated based on the UPN but can be customized if needed. This corresponds to the samAccountName value in Active Directory. If the user is created in the multi-tenant, the relevant Customer Code is added onto the end of the username (e.g. for a customer with the code 'AB', their users would be named
{Username}_AB).
NoteThe Username cannot be modified after the user account is provisioned.
-
First and Last name
-
Display Name: How the user’s name will appear within the Atria platform and associated services.
-
Additional Details can be added by expanding the Additional User Properties tab. This includes extended Active Directory attributes, which are optional fields by default:
-
Additional Details
-
Enter a Password:
- The password must comply with the specific requirements of both the Customer’s and the Domain’s password policies. Ensure it meets criteria such as length, complexity, and any other requirements in place.
-
Configure Account Settings:
In the Account Settings section, you can configure various account-related options for the user:
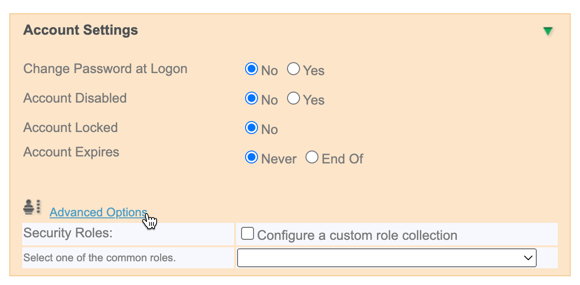
- Change Password at Logon: Select whether the user will be required to change their password upon their next login.
- Account Disabled: Choose whether to disable the user’s account.
- Account Locked: Set whether the account is locked, preventing the user from logging in.
- Account Expires: Specify if and when the account will expire.
Additional settings can be accessed by clicking on Advanced Options.
Assign Atria Security Roles: To give users access to the Atria portal, assign one of the common roles from the dropdown menu, or select Configure a custom role collection to customize the user’s role configuration. Learn how to configure Atria Security roles and permissions in Atria
-
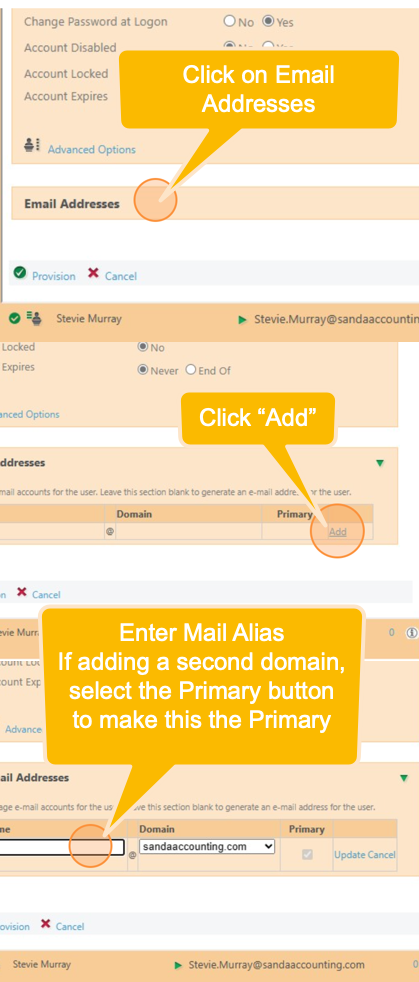
Add Email Addresses:
Provision Account and Services
- Click Provision to create the user account and apply changes.
- You'll be automatically redirected to the next page in the user setup.
- Select all of the Applications and Resources that are required for the user.
- Click Provision to add all of the relevant Applications and Resources to the user.
The user will now have been created in Active Directory. They will be located under the Customers OU, under the Customer then User Structure.
Verification (Optional)
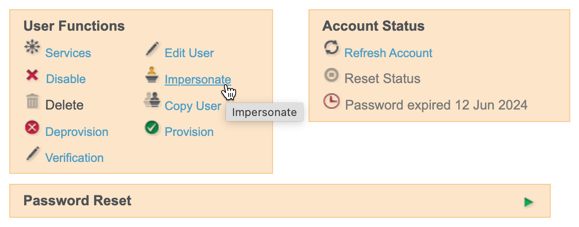
• Use the “Impersonate” feature to log in as the newly created user, which allows you to verify that the account has been set up correctly.
Below is a step-by-step tutorial to demonstrate the process:
Once a user is managed through Atria, all subsequent changes should only occur through Atria. Changes made to directly in Active Directory or EntraID risk being overwritten by Atria during provisioning.
Editing a User
Access the Users page using the left-side menu: Navigate to Users > Users > Select user from the list.
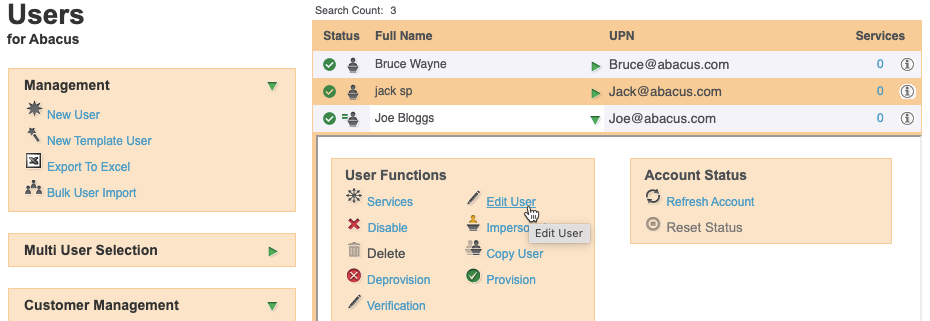
This will allow you to amend the details you set when creating the user.
Copying an Existing User
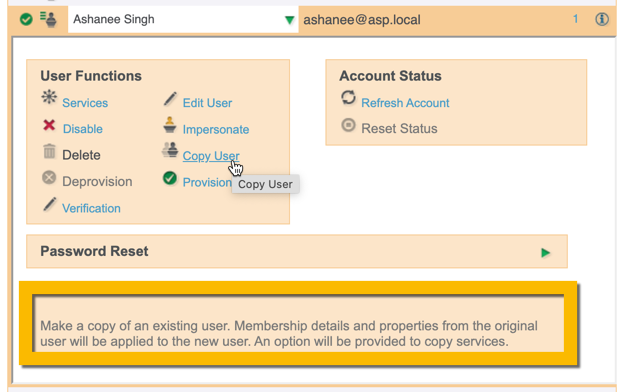
The Copy User function allows you to duplicate an existing user’s membership details and properties to quickly create a new user with similar settings. To copy a user, navigate to the existing user profile, click Copy User, and then fill out the new user’s information.
Enabling/ Disabling a User
Below is a step-by-step tutorial on how to enable a user:
Below is a step-by-step tutorial on how to disable a user: