Extracting and using the Atria Root CA Certificate for the Web Server and Atria Web Services
Overview
Atria uses certificates to encrypt and secure the communication between its components. As a part of installation process, it is required to transfer certificates from Provisioning server to Web server and to other Atria Web Services (i.e Exchange, HostedAppsAndDesktops, etc.). This article shows you how to do the process step by step.
Let's look briefly at what we are going to do in this document:
Certificate Transfer Process
- Export Atria Root CA certificate from the Provisioning Server.
- Install Atria Root CA into the Trusted Root Certification Authorities folder on the Web Server / Atria Web Services Server.
- Import Atria Root CA into the Personal folder on the Web Server / Atria Web Services Server.
Process
The following process should be completed after the provisioning server components have been installed. Please refer to Installing Atria to see the process.
Export Atria Root CA certificate from Provisioning Server
On the Provisioning Server:
-
Open Microsoft Certificate Manager: via Windows Start, search "run", open run and search for mmc.
-
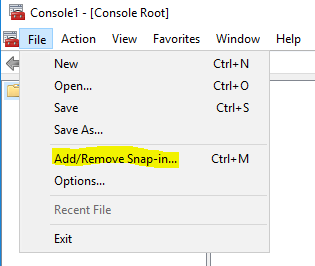
This opens Microsoft Management Console. Navigate to File and then select Add/Remove Snap in:
Add/Remove Snap in
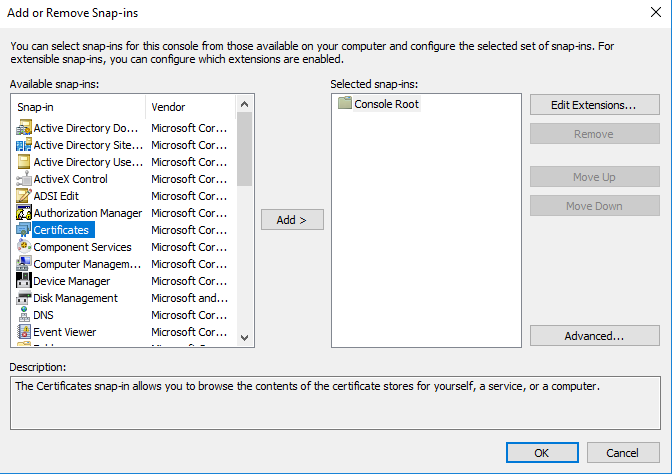
- In Add or Remove Snap-ins page, under available snap-ins, select Certifications and then click on Add:
Add Certifications
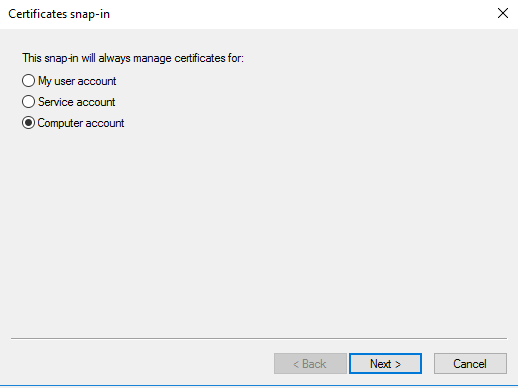
- A new form called Certificates snap-in Opens. Select Computer Account and then click on next:
Computer Account
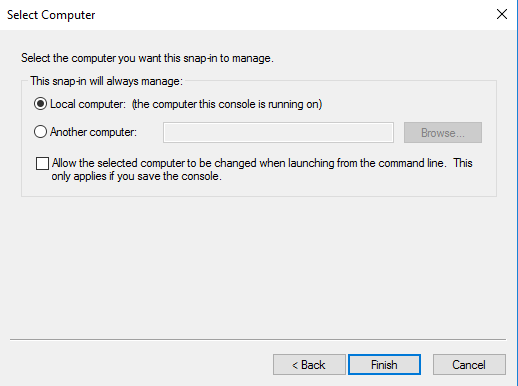
- On the new page, select Local Computer and click on finish to close the page:
Local Computer
-
Click on OK to close Add or Remove Snap-ins page.
-
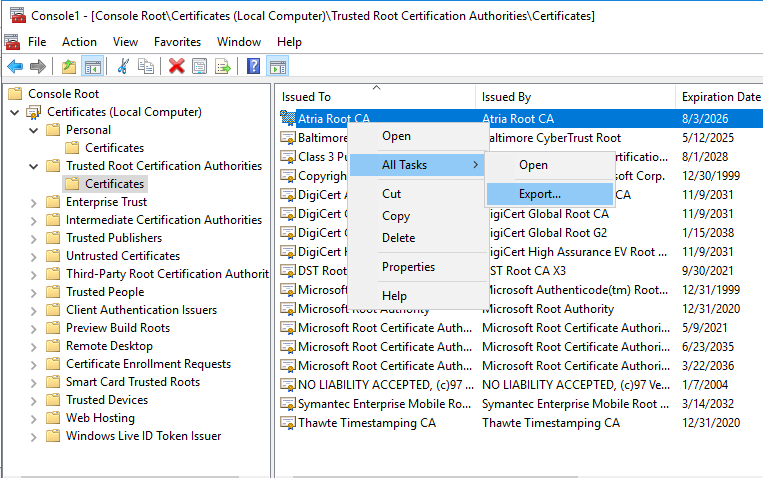
On MMC, select Certificates, expand Trusted Root Certification Authorities and then click on Certificates folder. Right click on
Atria Root CA > All Tasks > Export:
Certificate Export
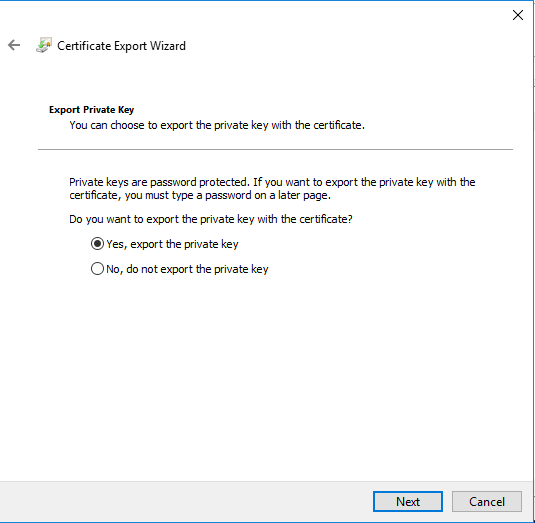
- Certification Export Wizard page opens. Click on Next and then select Export Private Key:
Export Private Key
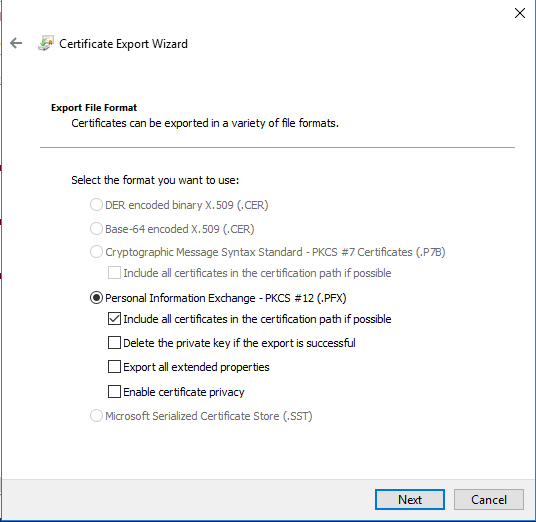
- On the next page, ensure Personal Information Exchange - PKCS #12 (.PFX) option is selected, choose default options and click on next:
.PFX Format
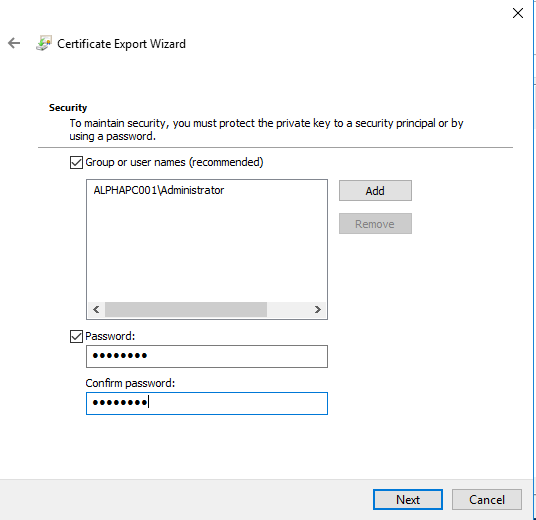
- On the security page, ensure you add your admin username to the list as well as defining a password. (This password is required to install the Certificate on the Web Server):
Credentials
-
On the next page, select an address where you want to export the certificate, enter the file name and click on next.
-
Confirm the information and click on Finish. A message saying 'The Export Was Successful' will be shown.
-
Once the Certificate is exported, copy the file and paste it somewhere on your Web server and then move onto the next step.
Install Atria Root CA in Trusted Root Certification Authorities folder on the Web Server / Atria Web Service Server
On the Web Server:
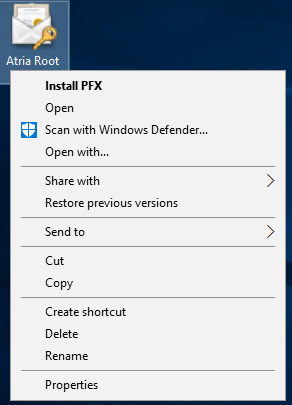
- Locate the certificate file in your web server, right click on it and select Install PFX:
Install PFX
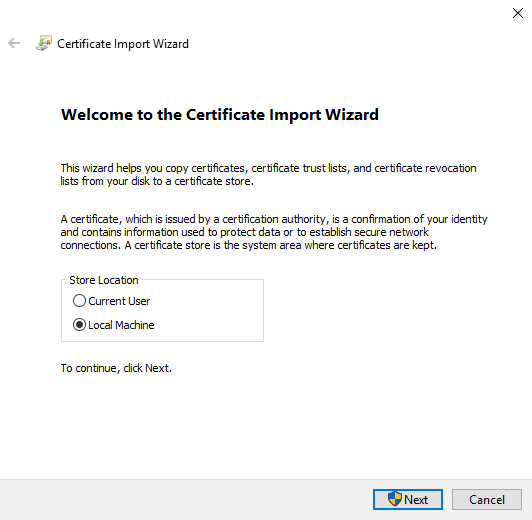
- In the certificate Import wizard, select Local Machine and click on next:
Local Machine
-
On the next page, confirm the certificate file path you are going to import and click on next.
-
In the Private Key protection page, ensure the Mark this key as exportable option is selected:
Mark Key as Exportable
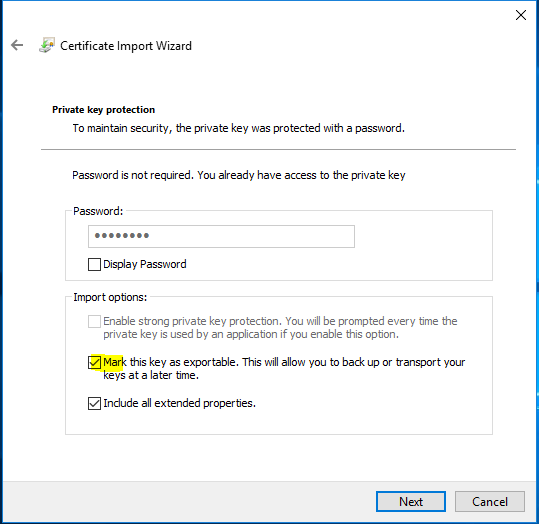
If the password is empty, you will need to enter the password you selected when exporting the file.
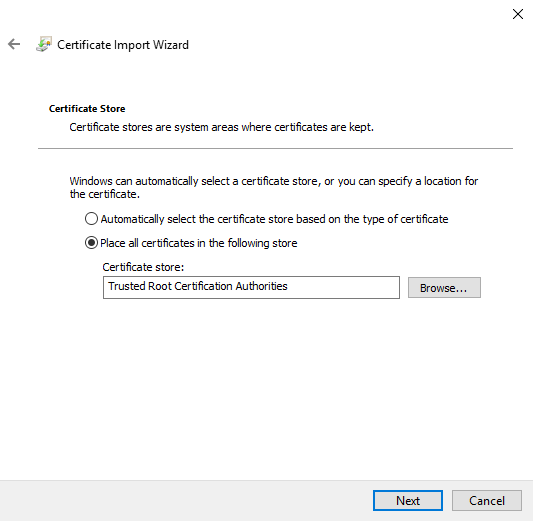
- In the Certificate Store page, select Place all certificates in the following store and then Browse and select Trusted Root Certification Authorities:
Trusted Root Certification Authorities Folder
- Confirm the import certification information and click on Finish.
Install Atria Root CA in Personal folder on Web Server / Atria Web Service Server
- Complete the above steps again but select Personal as the Certificate Store and import the certificate:
Personal Folder
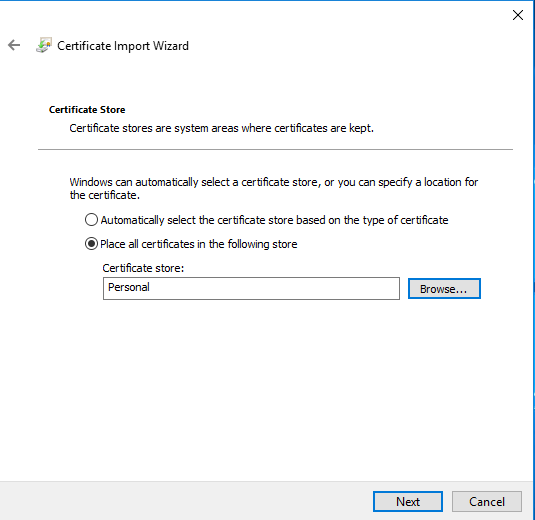
Once you have ensured that the certificate is imported twice in both the Personal and Trusted Root Certification Authorities folders, navigate to the next step in the installation process.
Summary
In this document we exported the Atria Root CA certificate from the Provisioning Server and installed it in both the Personal and Trusted Root Certification Authorities folders on the Web server / Atria Web Service Server.
If you come across any question during the process feel free to contact us at support@getatria.com.