Brand Management
Overview
Atria allows service providers, resellers, and customers to create their own brand so that the web portal interface (control panel) displays their own logo, color scheme, fonts, and messages when their users log on to the portal.
The main elements involved in branding that change the look and feel of the Atria interface are:
- Brand Name, Label
- Logo
- Favicon
- Login Text
- Home Text
- Modern UI Variables (color scheme)
- Classic UI Variables (color scheme)
- Custom CSS - further customizations to the brand
Creating a Brand
A customer will inherit all brands that have been saved in the higher hierarchy (by the Reseller / Service Provider). To create a new custom Brand:
- Go to the menu
Customers > Configuration > Branding > Brands. - Under
Management > New Brand. - Select if it is for a System Brand or a Customer Brand.
- Enter a Brand Name and Brand Code.
- Edit the brand created and customize it based on your requirements.
- Save the new brand.
Brand Editor
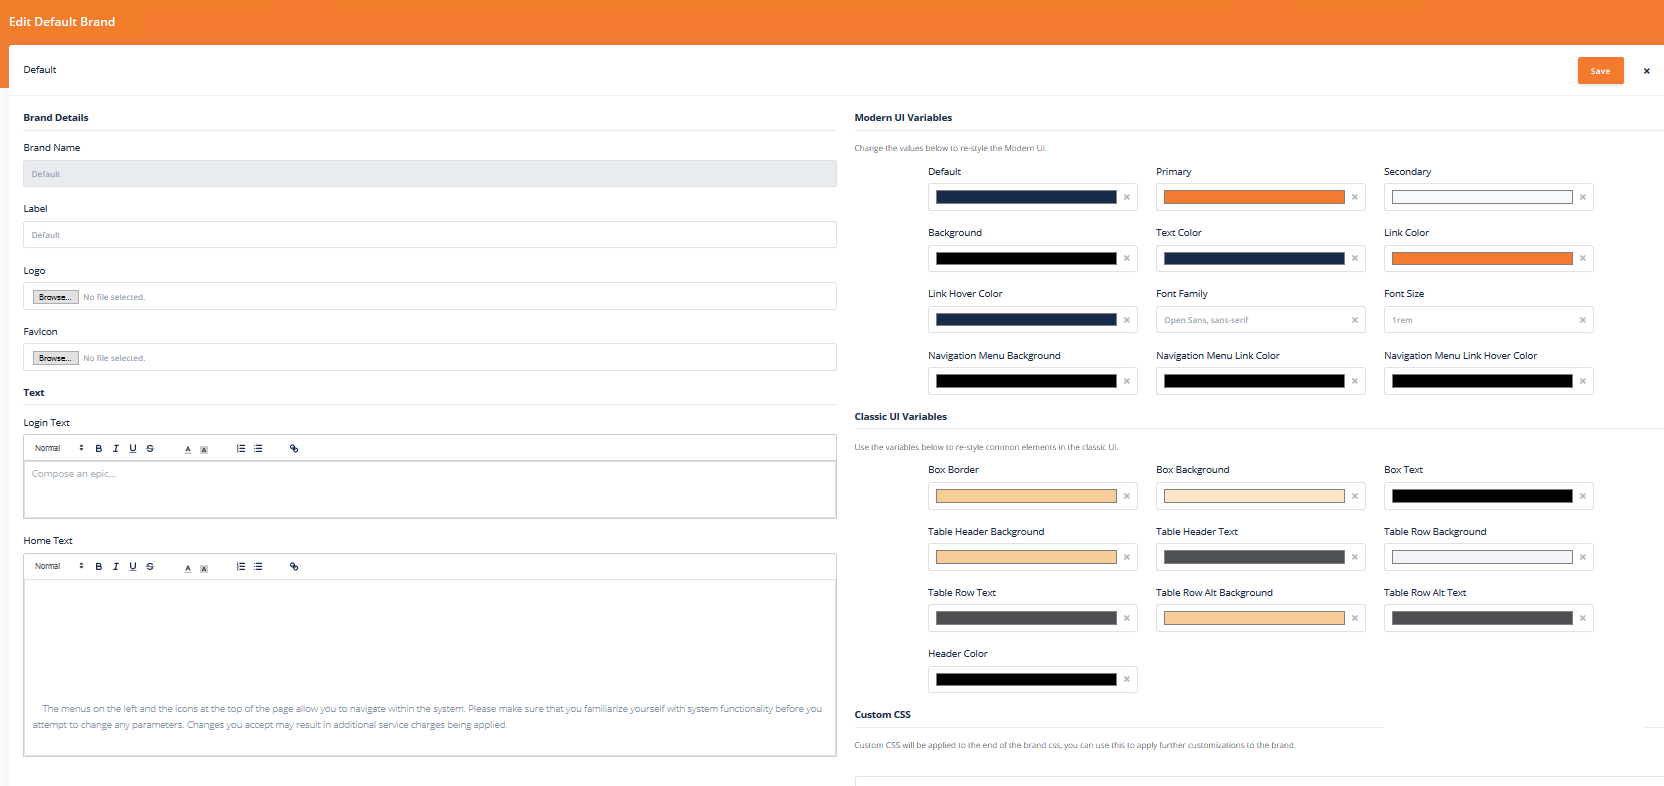
Once the new brand has been created, it can then be applied:
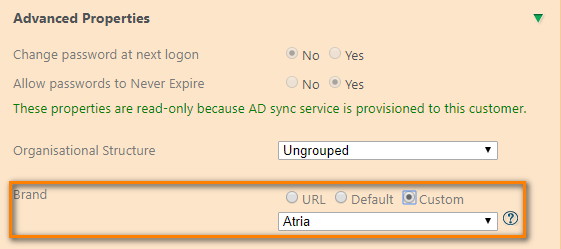
Applying to an Individual Customer
-
Edit the Advanced Customer Properties.
-
Select the Brand.
Brand Selection
Applying to a Portal URL
- Go to
Customers > Branding > Brands. - Click on URL Branding in the Related Pages Menu.
URL Branding

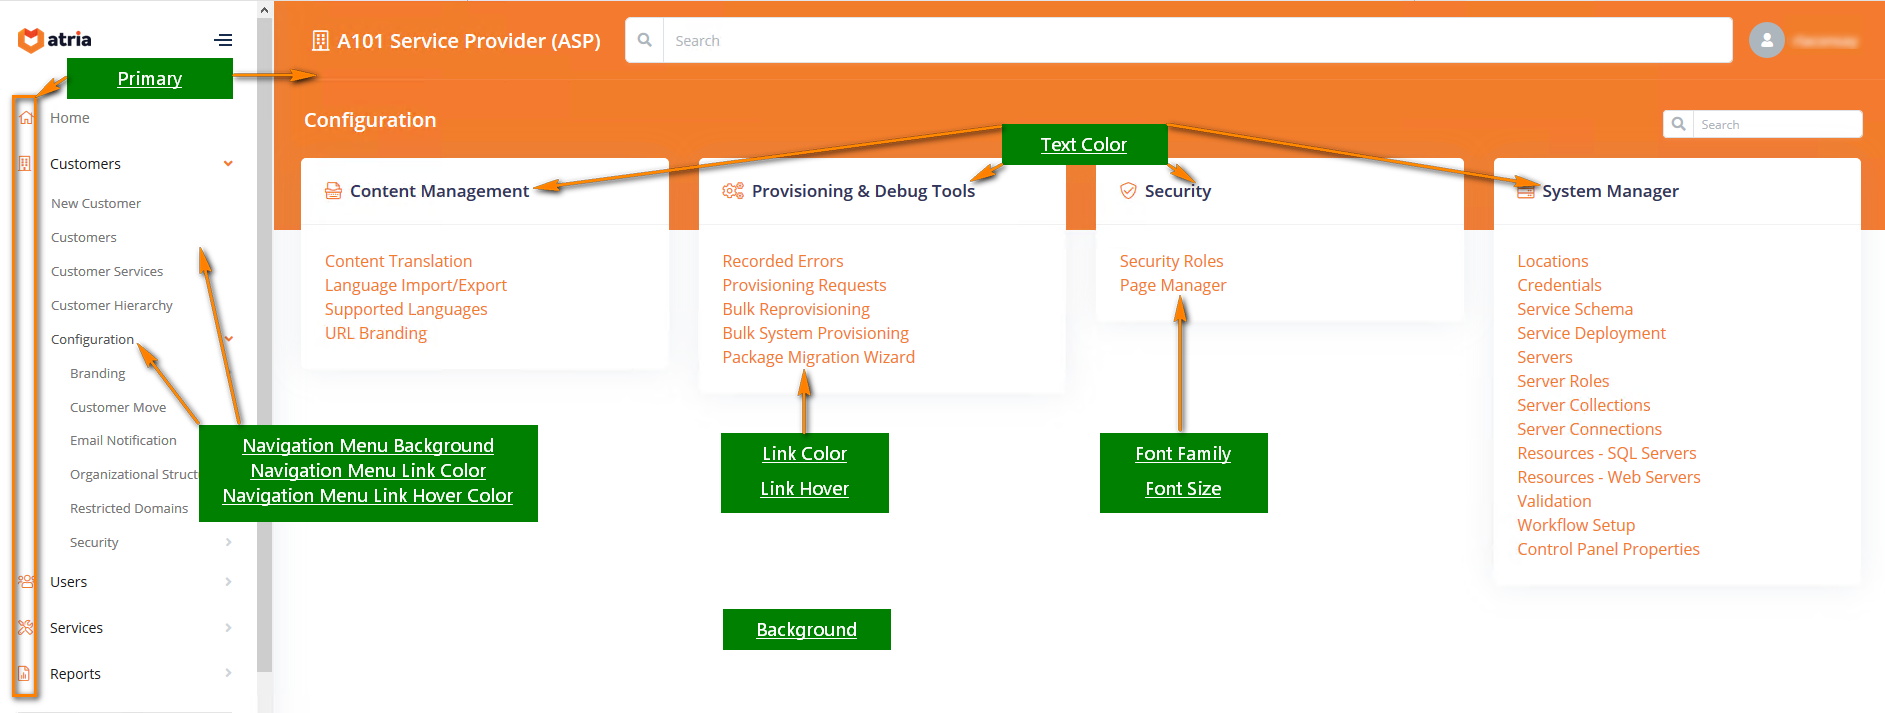
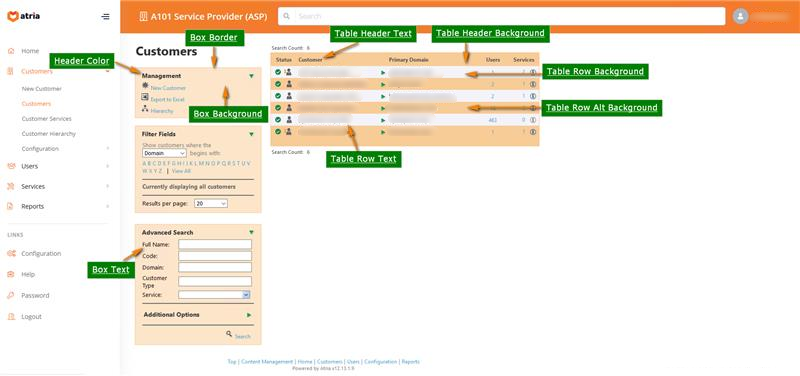
Details on the UI Variables
Modern UI Variables
Classic UI Variables
Setup Customers Folder for Branding Resources
- Navigate to the Web Server:
C:\inetpub\Automate101\Atria\Atria\wwwroot - From this folder, create a
customersfolder. - Add image resources (e.g.,
img,icons, etc.) to this folder for branding.
Customers Folder

- The
customersfolder will not be touched during an upgrade. - You may create sub-folders within
customersto separate branding resources for different customers.
Custom CSS
Advanced branding changes can be done by adding Custom CSS to the brand. Below are examples of changes that can be made:
Customizing the Login Page
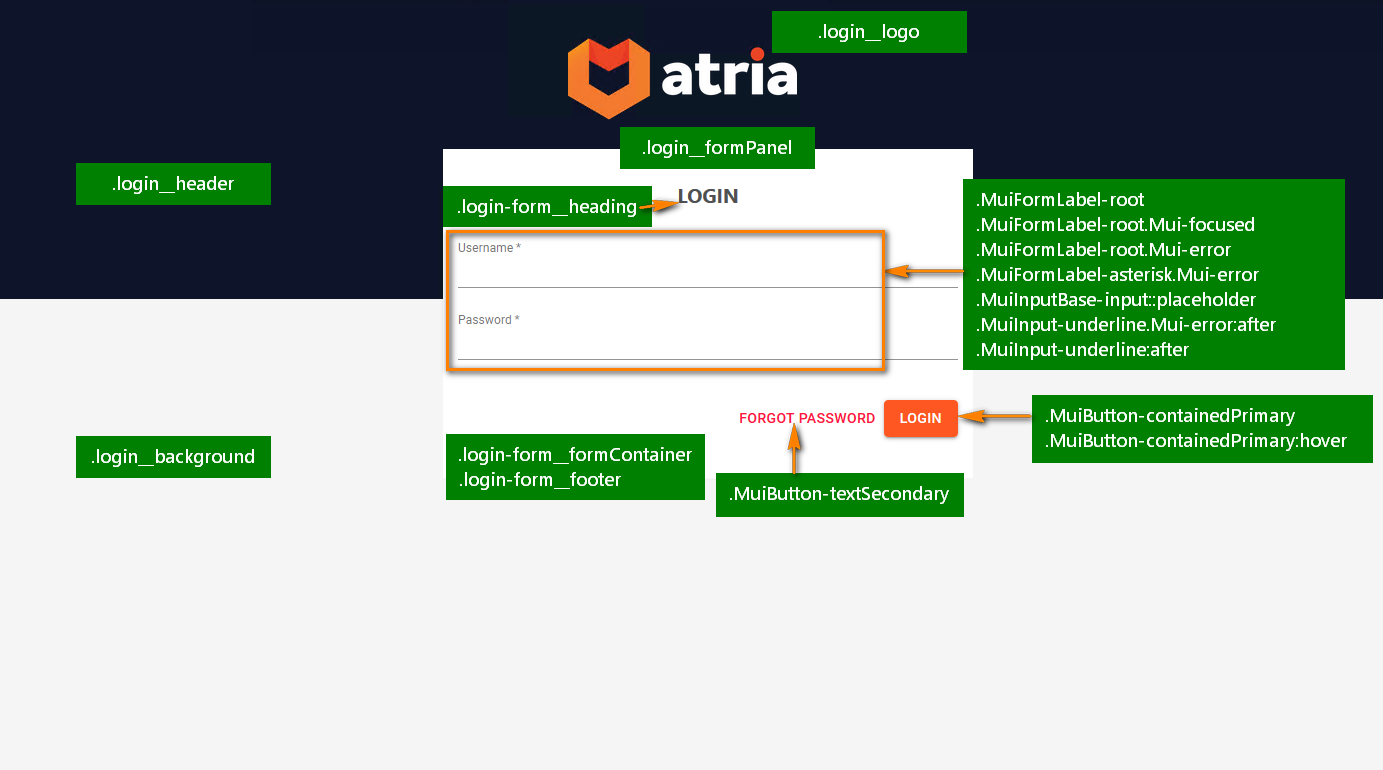
For the location of the image and logo, make sure to use /customers/(logo name) or if it's on another folder /customers/(custom folder)/(logo name)
Example CSS Code
/* LOGIN */
.login__background {
  position: absolute;
  top: 0;
  left: 0;
  width: 100%;
  height: 100%;
  background-color: transparent;
}

.login__logo {
  background-image: url("/customers/<logo name>");
  background-repeat: no-repeat;
  background-size: contain;
  position: absolute;
  left: 50%;
  margin-left: -120px;
  top: 80px;
  width: 250px;
  height: 200px;
}

.login__header {
  height: 300px;
  background-color: transparent;
}

.login__formPanel {
  position: absolute;
  top: 200px;
  min-height: 300px;
  left: 50%;
  margin-left: -250px;
  width: 500px;
  background-color: white;
  padding: 15px;
}

.MuiFormLabel-root {
  color: #01689b;
}

.MuiFormLabel-asterisk.Mui-error {
  color: #01689b;
}

.MuiButton-containedPrimary {
  background-color: #01689b;
}

.MuiButton-containedPrimary:hover {
  background-color: #B5D3E7;
}
Resizing the Home Page Logo
/* MAIN.Master */
.navbar-brand-img {
  height: 86px !important;
  width: 200px !important;
  max-height: 86px !important;
  border: none;
}

.new-ui .sidenav .navbar-brand {
  padding: .5rem;
}
If you have any queries or issues, feel free to contact us at support@getatria.com.