Atria Billing Setup User Guide
Overview
This article describes how to configure Atria to utilize the latest billing features. This document outlines the billing setup attributes that should be configured.
Billing Setup Overview
Atria has several configuration settings to support the monthly billing process, the following table defines terms related to billing that are referenced in Atria.
| Term | Meaning |
|---|---|
| BillPeriod | Determines the point in a month that a billing period ends. |
| Customer Account Code | Used to identify an organisation in an external finance system, the Billing Identifier on the edit customer page |
| ‘Billed By’ | Used to define who invoices a customer in multi-tiered channel scenarios |
| Product SKUs | Uniquely identify products in external finance/billing systems |
| Billing Rules | Logic rules used to exclude items from the Atria billing output |
| Billing Period End Date | The end date of a billing period |
Bill Period
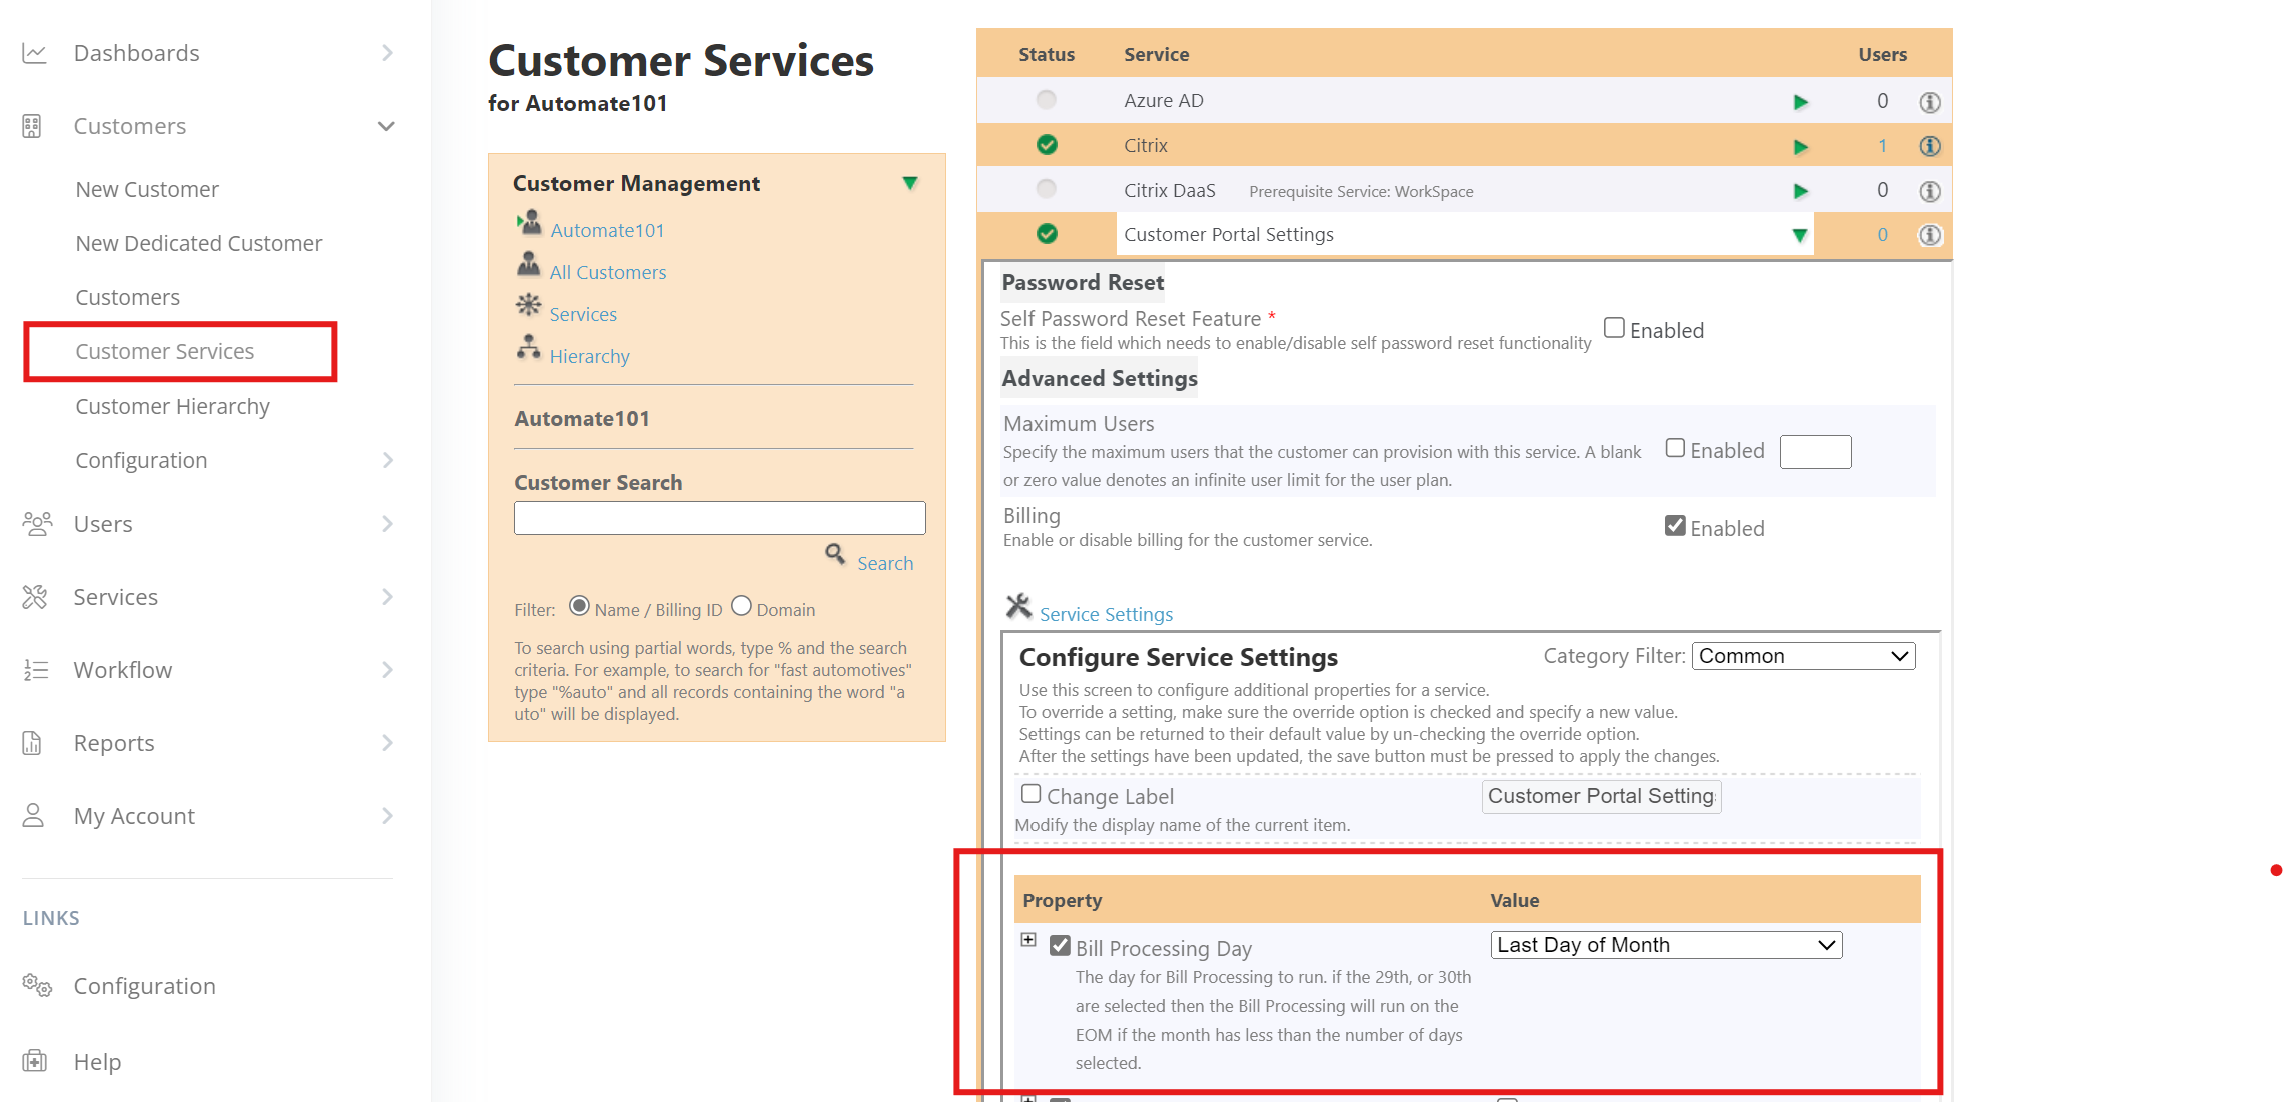
Atria supports a recurring monthly billing cycle for Atria delivered services. The Bill Period by default is a calendar month, the end of the period can be adjusted to end on a specific date by configuring the Bill Process Day.
For example, you may want to end your billing period on the 25th of each month, allowing you more time to get your invoices out to resellers/customers.
To configure:
- Login as Service Provider
- Navigate to
Customer Services - Select the
Customer Portal Settingsfrom the list of Services - Expand
Service Settings
The Bill Processing Day cannot be configured for individual resellers or customers, the setting is system wide. If set differently on a customer, the setting will be ignored.
Customer Account Codes
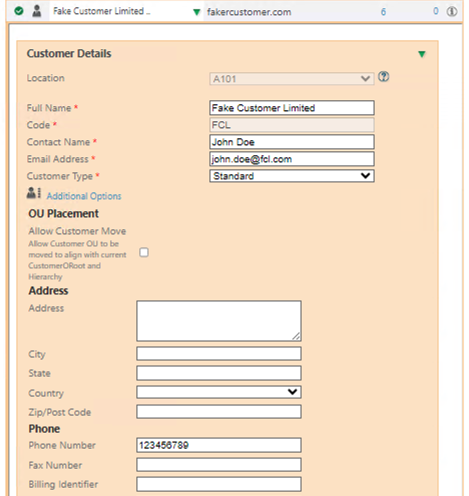
To link your Atria customers to your billing system customers, Set the Billing Identifier field against the Customer in Atria. Atria will include the Billing Identifier as the Customer Account Code in the Billing output.
To configure Customer Account Code:
- Navigate to
Customers - Select a Customer, click Edit Customer, and expand the Additional Options:

- Enter the Customer Account Code as the Billing Identifier.
- Save and Provision the Customer.
Setting up Billing relationships
The "Billed By" setting is set on a Customer to define a Billing Relationship. The Billed By determines who will invoice the Customer for services consumed by the Customer.
The "Billed By" can be set at Reseller or Customer level, the setting will be inherited from Reseller to Customer. In situations where there are no resellers, or tiered relationships, the Billed By can be defaulted to the Service Provider customer at the root Reseller level, this will then apply to all customers.
To change Billed By from the default:
- Select/ open the desired Customer.
- Navigate to
Customer Services - Select the
Customer Portal Settingsfrom the list of Services - Expand
Service Settings - Change the Category Filter to Customer
- Enable and edit the Billed By Customer.
- Click Apply Changes and Provision.
Resellers Billing their Customers
Use when a reseller is responsible for on-billing their sub-customers for services.
Scenario:
ABC Services Ltd (Service Provider)
    Virtual Services Ltd  (Reseller) - Billed by is ABC Services Ltd
        Jones Jewels Ltd  (customer) - Billed by is Virtual Services Ltd
        Celebrity Tours   (customer) - Billed by is Virtual Services Ltd
        Yellow Bricks Ltd (customer) - Billed by is Virtual Services Ltd
    Direct Bus Group      (customer) - Billed by is ABC Services Ltd
In this scenario, the Service Provider "ABC Services Ltd" will aggregate data into two invoices
- Virtual Services Ltd will be billed for Jones Jewels Ltd, Celebrity Tours, Yellow Bricks Ltd
- Direct Bus Group will be billed for their services.
The Service Provider does not invoice Customers of the Reseller.
To setup Atria to aggregate Billing Data correctly
- Set the default Billed By on the ABC Services Ltd, Reseller Service to be "ABC Services Ltd"
- For Virtual Services Ltd, on their Reseller service - set the Billed By to be "Virtual Services Ltd" - this means that all Sub-Customers will inherit this setting.
Direct Bus Group, and any other Customers created outside of Virtual Services Ltd, will inherit the default setting with the Billed By set to the Service Provider "ABC Services Ltd"
Change the Billed By for a Reseller
For when a Reseller needs to be billed for their sub-customers.
- Locate the Reseller Customer, Navigate to
Customer Services - Expand the Reseller Service, within the services, find
Customer Portal Settings - Scroll down to
Advanced settingsthenService Settings - Choose the "Customer" Category Filter from the dropdown list
- Check the ‘Billed By Customer’ checkbox and select the Reseller Customer, to be the Billed By customer.
- Select Apply, then Save to provision the service.
All Sub-customers will pick up this default, it will also apply to all new Customers.
Configuring Product SKUs
In Atria, there are a number of different entities which can result in billable items.
For example
- Customer Services
- User based Services
- Domains
- Workspace Items
Atria allows a Product SKU to be stored against each item that may need to be invoiced to a Customer. The benefit of a SKU is that it is an identifier isolated from product
The SKU field is free form text, it is set in different places depending on the type of entity:
- User plan based SKUs - for services provisioned to user such as Email, Microsoft 365 Plans and Hosted Desktops.
- Customer plan based SKUs - for services provisioned to customers such as Storage, SQL Hosting and Virtual Servers.
- Workspace Apps - where SKUs may apply to an application or resource.
User Plan based SKUs
To set a User Plan based SKU such as Microsoft Online, assign a stock code for each user plan when configuring Service Plans within System Manager.
- Navigate to
Configuration > System Manager > Service Deployment. - Ensure the Service Filter is set to Top Environment Services.
- Expand the Service, then Expand User Plans.
- Expand the desired User Plan, and open the Prices Section.
- Enter the SKU into the Stock Code field.
- Apply Changes then Save.
Customer Plan based SKUs
To configure the SKU for a customer plan such as Windows Web Hosting:
- Navigate to
Configuration > System Manager > Service Deployment. - Ensure the Service Filter is set to Top Environment Services.
- Expand the Service, then Expand Customer Plans.
- Expand the desired Customer Plan, and open the Prices Section.
- Enter the SKU into the Stock Code field.
- Apply Changes then Save.
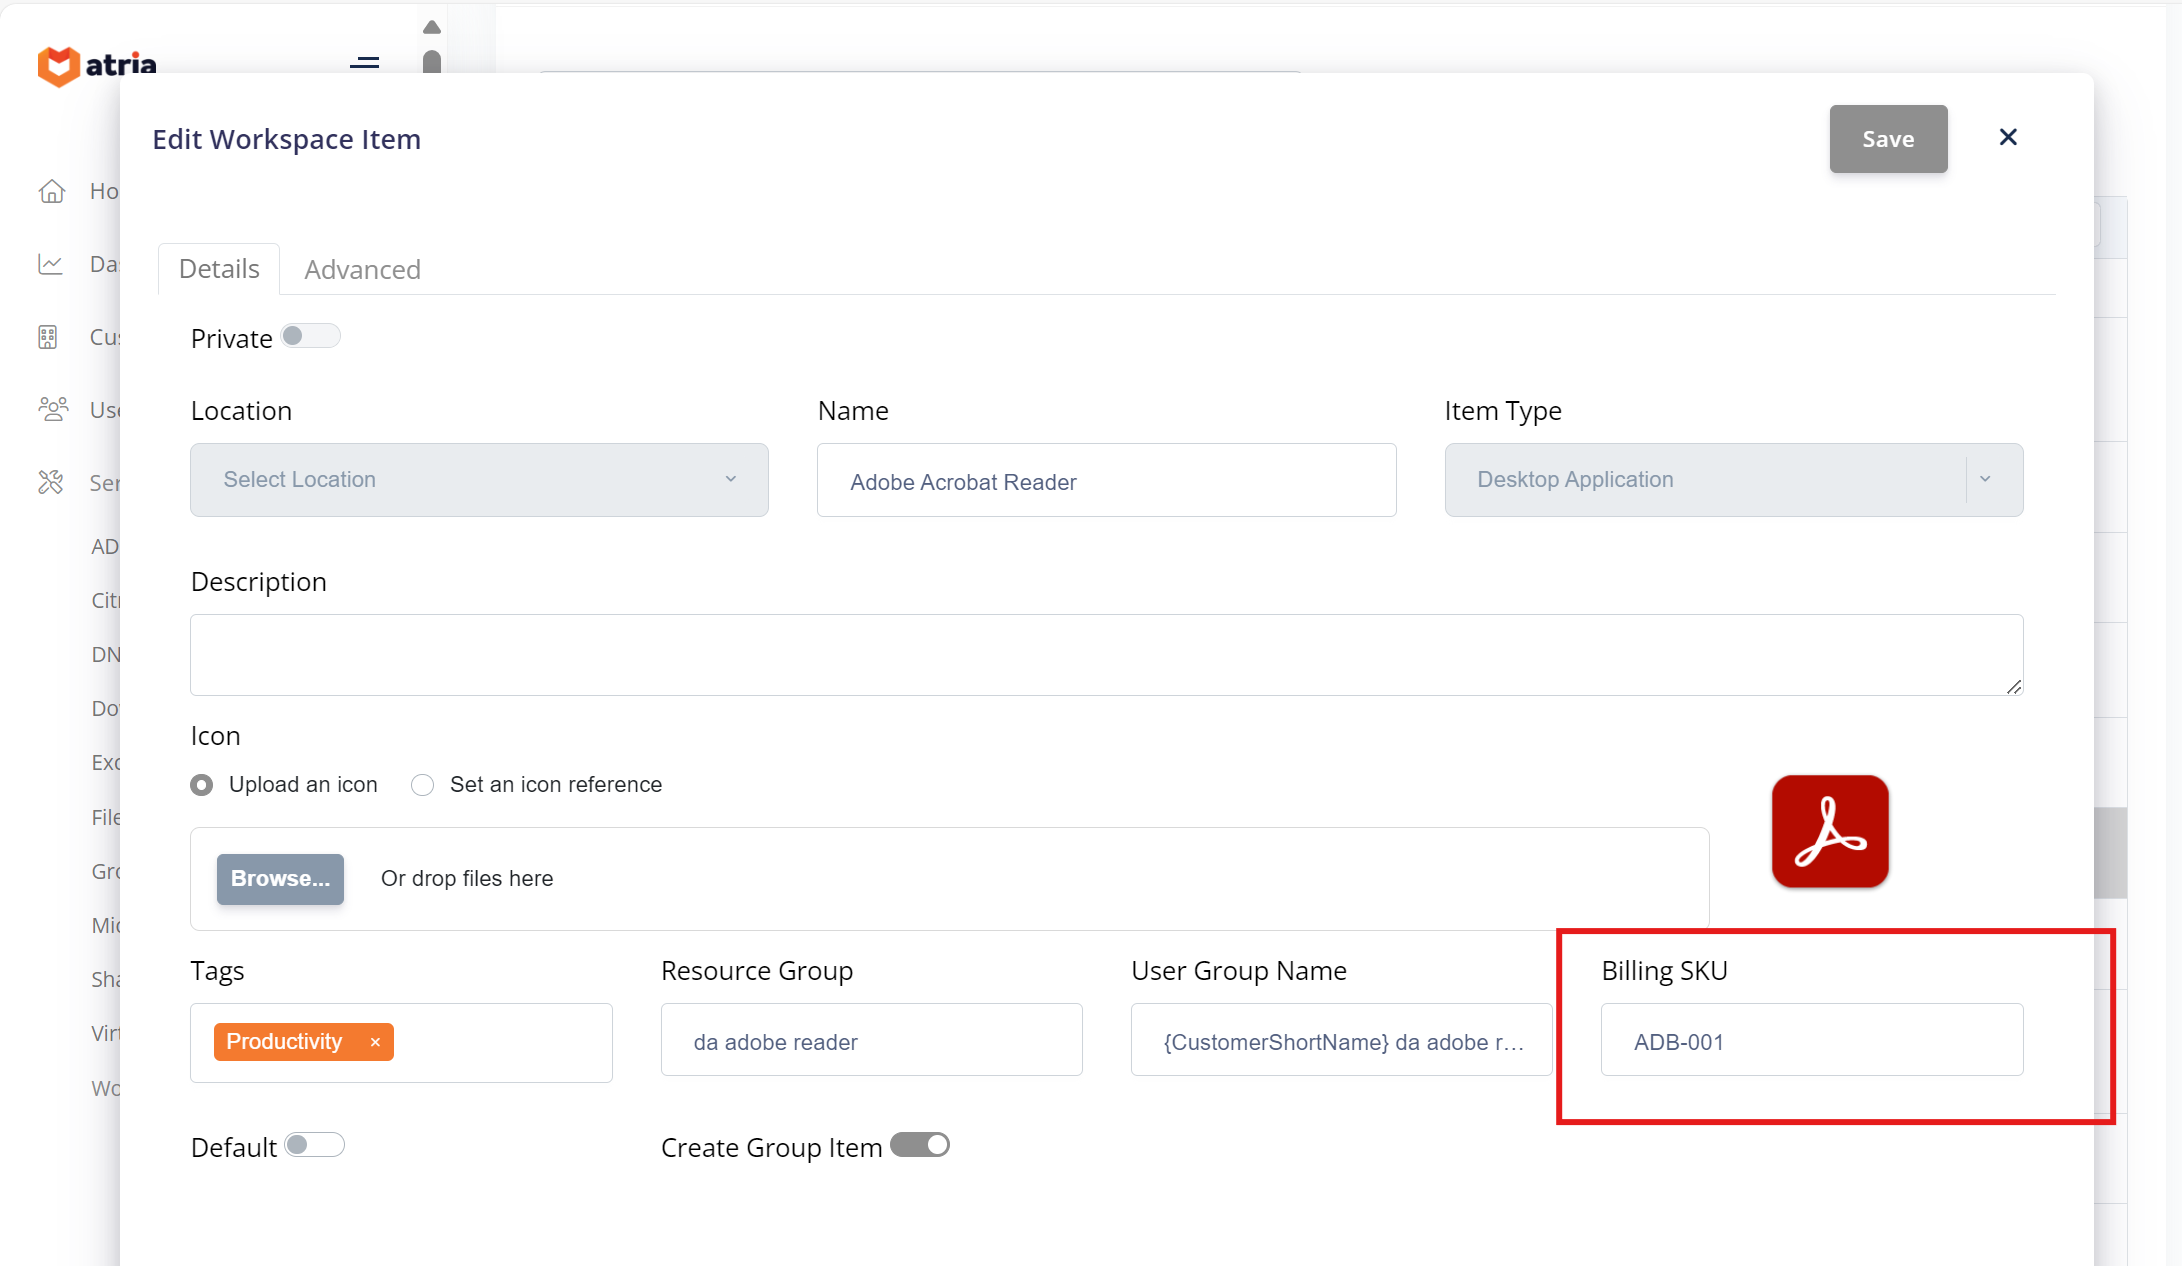
Workspace Items
- As a Service provider administrator, navigate to Workspace Items.
- Select "Workspace Items".
- Edit the chosen item, and add a SKU:

Hosted Apps and Desktops Customer Service SKU
To set a SKU, assign a stock code for each user plan when configuring the Hosted Apps and Desktops service for a customer.
- Navigate to Customers and select the customer.
- Navigate to
Hosted Apps and Desktops > Service Plan Configuration > Advanced Settings > Configure User Plans > Prices. - Enter the SKU into the Stock Code field.
- Apply Changes then Save.
Citrix Applications SKU
To create a SKU for Citrix Applications
- Navigate to the Citrix Applications Management screen:
Services > Citrix > Configuration > Applications. - Then set the SKU for each application and save.