Microsoft Online Service - Shared Mailboxes
Overview
This article covers the functionality and usage of the Shared Mailbox administration feature provided as part of the Atria service for Microsoft Online. This is a Customer admin feature that is intended for use by Customer Administrators or Service Desk staff.
A Shared Mailbox in Exchange Online is a mailbox that multiple users can use to read and send emails from, making it handy for teams to manage shared tasks or respond to inquiries. It doesn’t need a separate Exchange license, meaning team members can collaborate without logging into a different account.
Atria allows Shared Mailboxes to be managed by end-customers and service desk staff without needing to login or have access to the Microsoft 365 admin portal.
Applies to Atria Version
- 15.x onwards
- Requires: Microsoft Online Service to be deployed and provisioned to the Customer.
- Default Roles with Access:
- Reseller Administrator
- Microsoft Online Service Administrator
Prerequisites
Shared Mailboxes can only be created if a tenant has a Microsoft Online subscription that has been activated.
- Exchange Online is activated when the first license containing Exchange Online is assigned to a user. This triggers the internal Microsoft provisioning process for Exchange Online
Shared Mailbox Management
To navigate to the Shared Mailbox Management Feature:
- Locate the customer, or login as an administrator within the Customer.
- Navigate to
Services > Microsoft Online > Shared Mailboxes
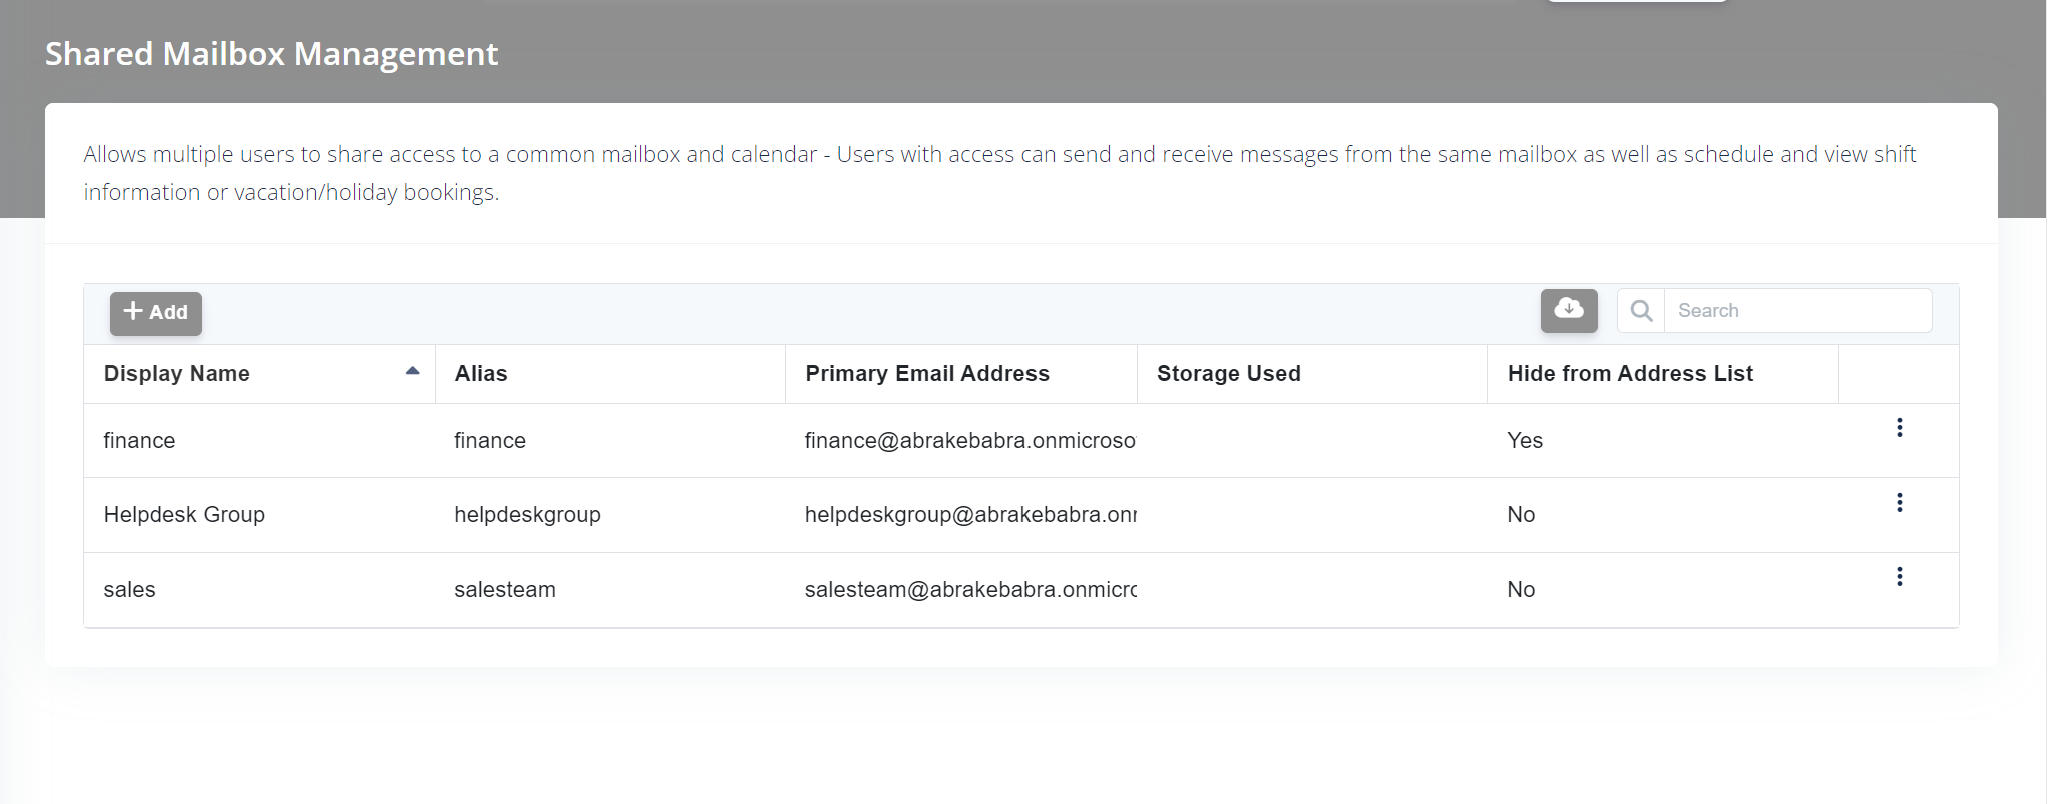
All current Shared Mailboxes will be retrieved in real-time from Microsoft Exchange Online and displayed in the list.
Shared Mailbox List

From this page you can:
- Create new shared mailboxes.
- Edit existing mailbox configuration.
- Delete mailboxes using the right-hand context menu.
Creating a New Shared Mailbox
- Open the new Mailbox Form:
- Click on
Addto show the New Shared Mailbox form.
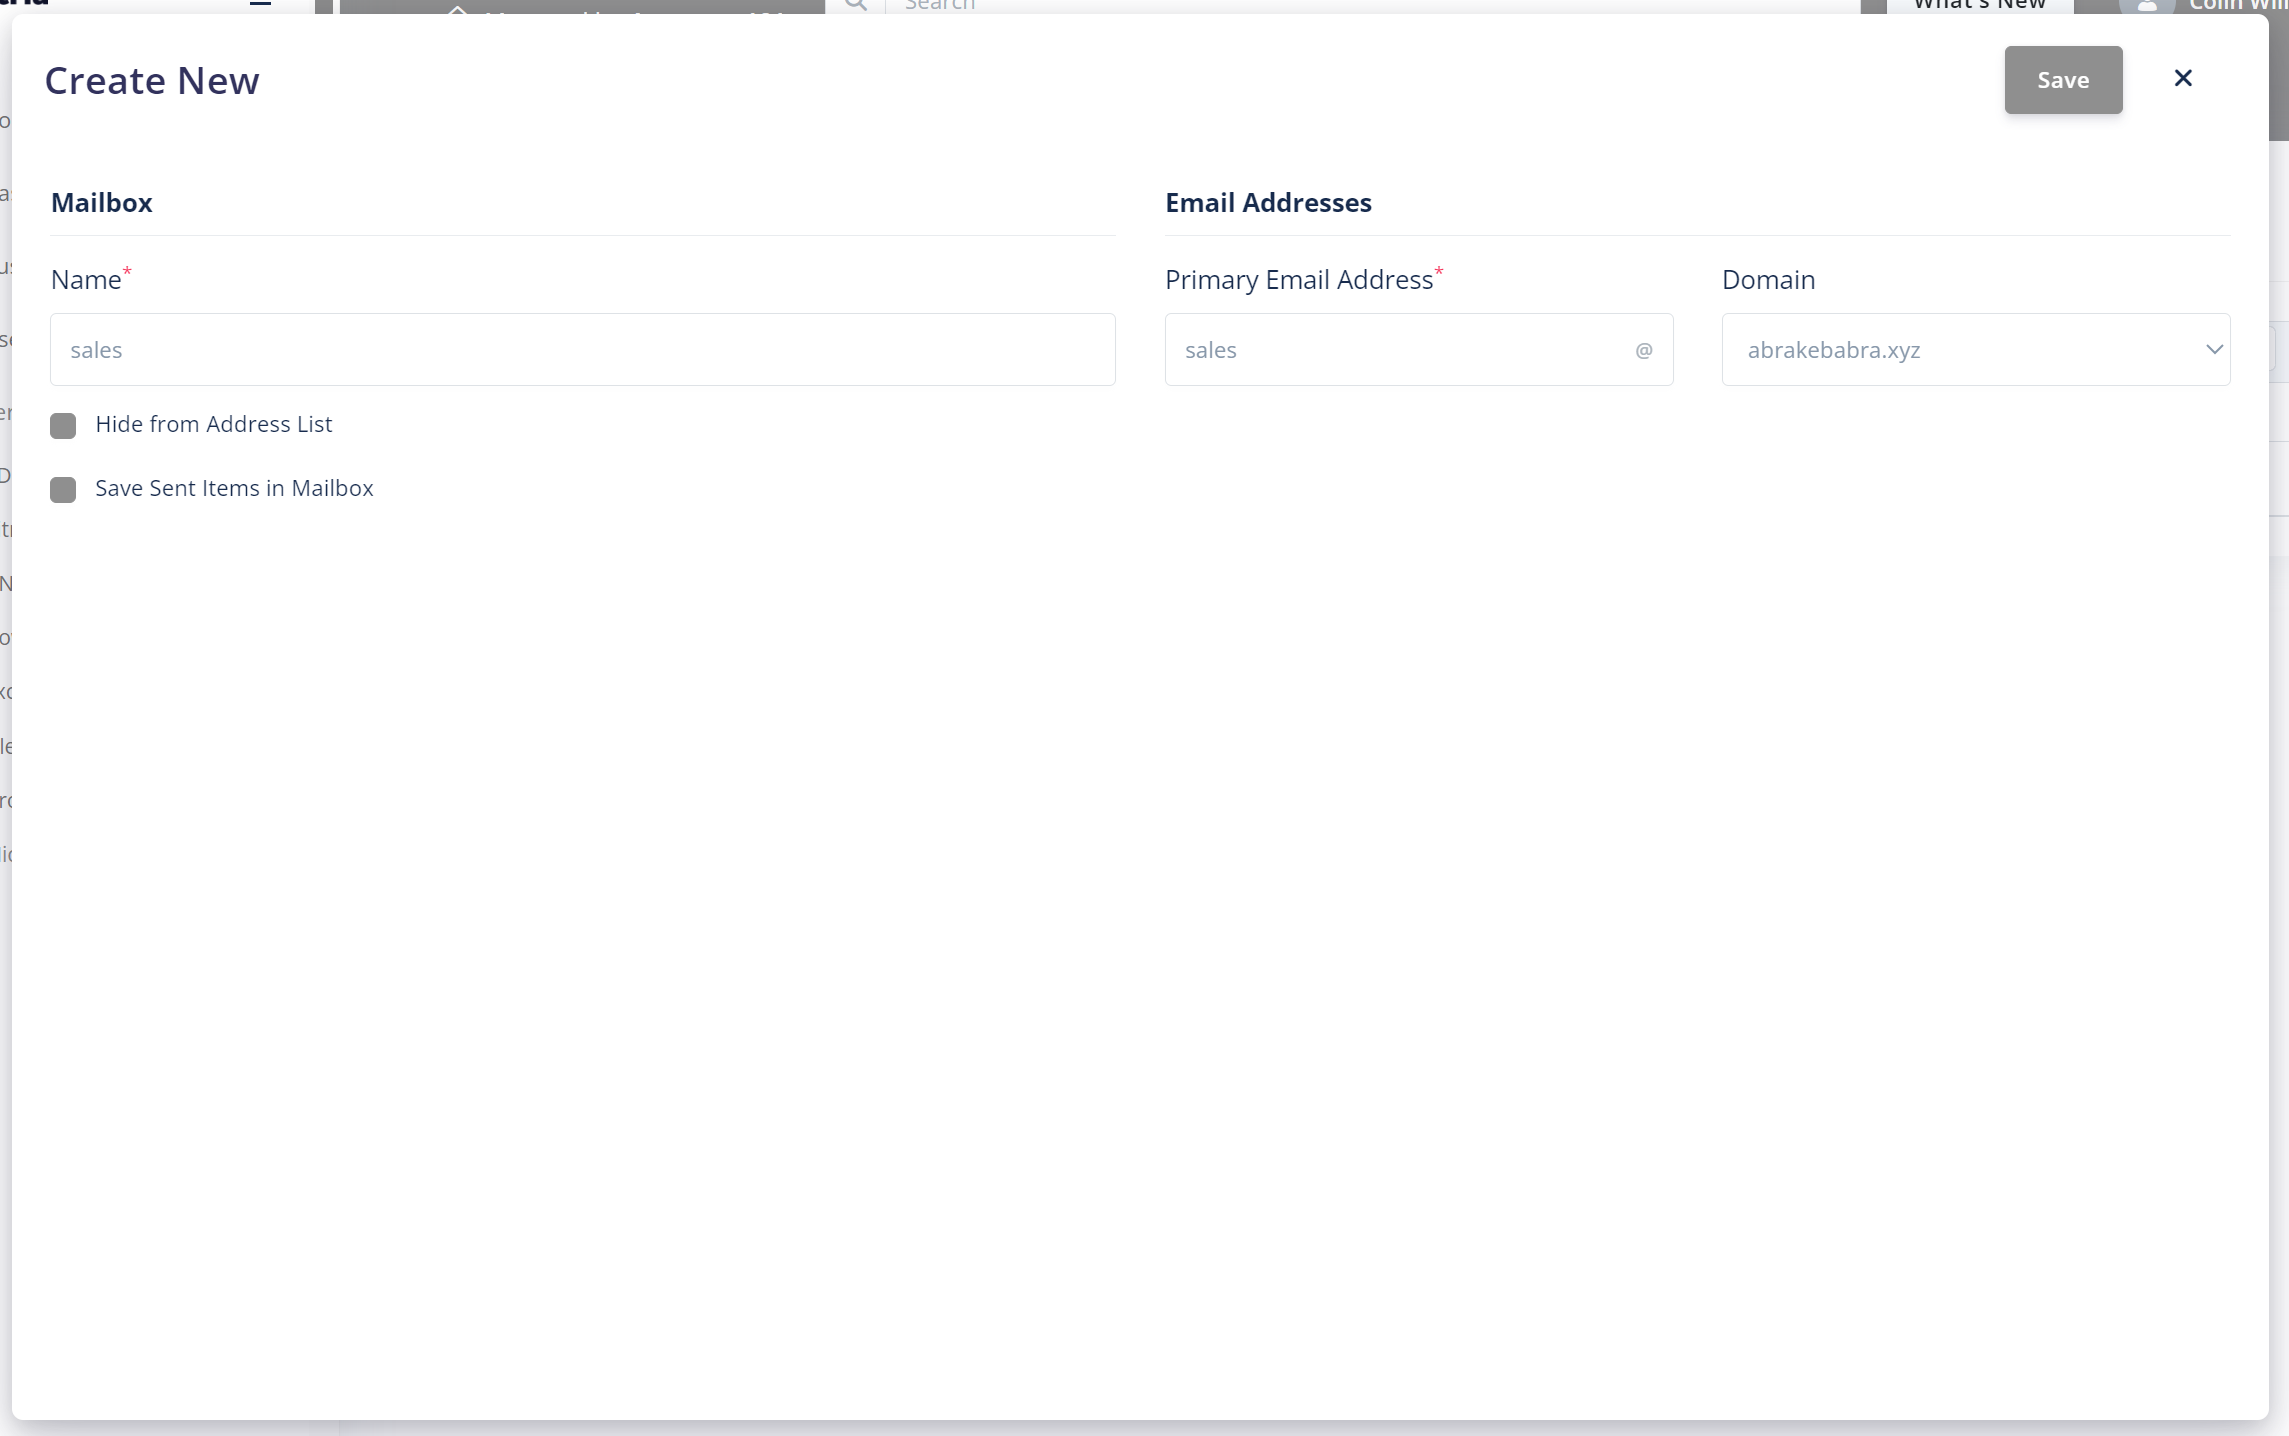
New Shared Mailbox

- Enter the Mailbox Name:
- In the Name field, type the name of the shared mailbox (e.g., "Sales"). This is the name that will be displayed in the Outlook Address Book and in the Address bar for new emails.
- Set the Email Address:
- In the Primary Email Address field, specify the email prefix (e.g., "sales").
- Select the appropriate domain from the drop-down list — all domains enabled within your Microsoft 365 tenant will be available in the drop-down list.
- Configure Additional Options:
-
Hide from Address List: Check this option if you want to keep this mailbox private. This doesn’t affect how the mailbox works, it just means that it will not be displayed in the address book for your organization.
-
Save Sent Items in Mailbox: This option ensures that any items sent from this mailbox are stored in the sent items folder of the shared mailbox.
- Save the Mailbox:
- Once the information is filled in, click the Save button to create the shared mailbox.
It will take around 20 seconds for the creation process to complete.
Editing an Existing Shared Mailbox
Click on any Mailbox to display configuration and edit the mailbox.
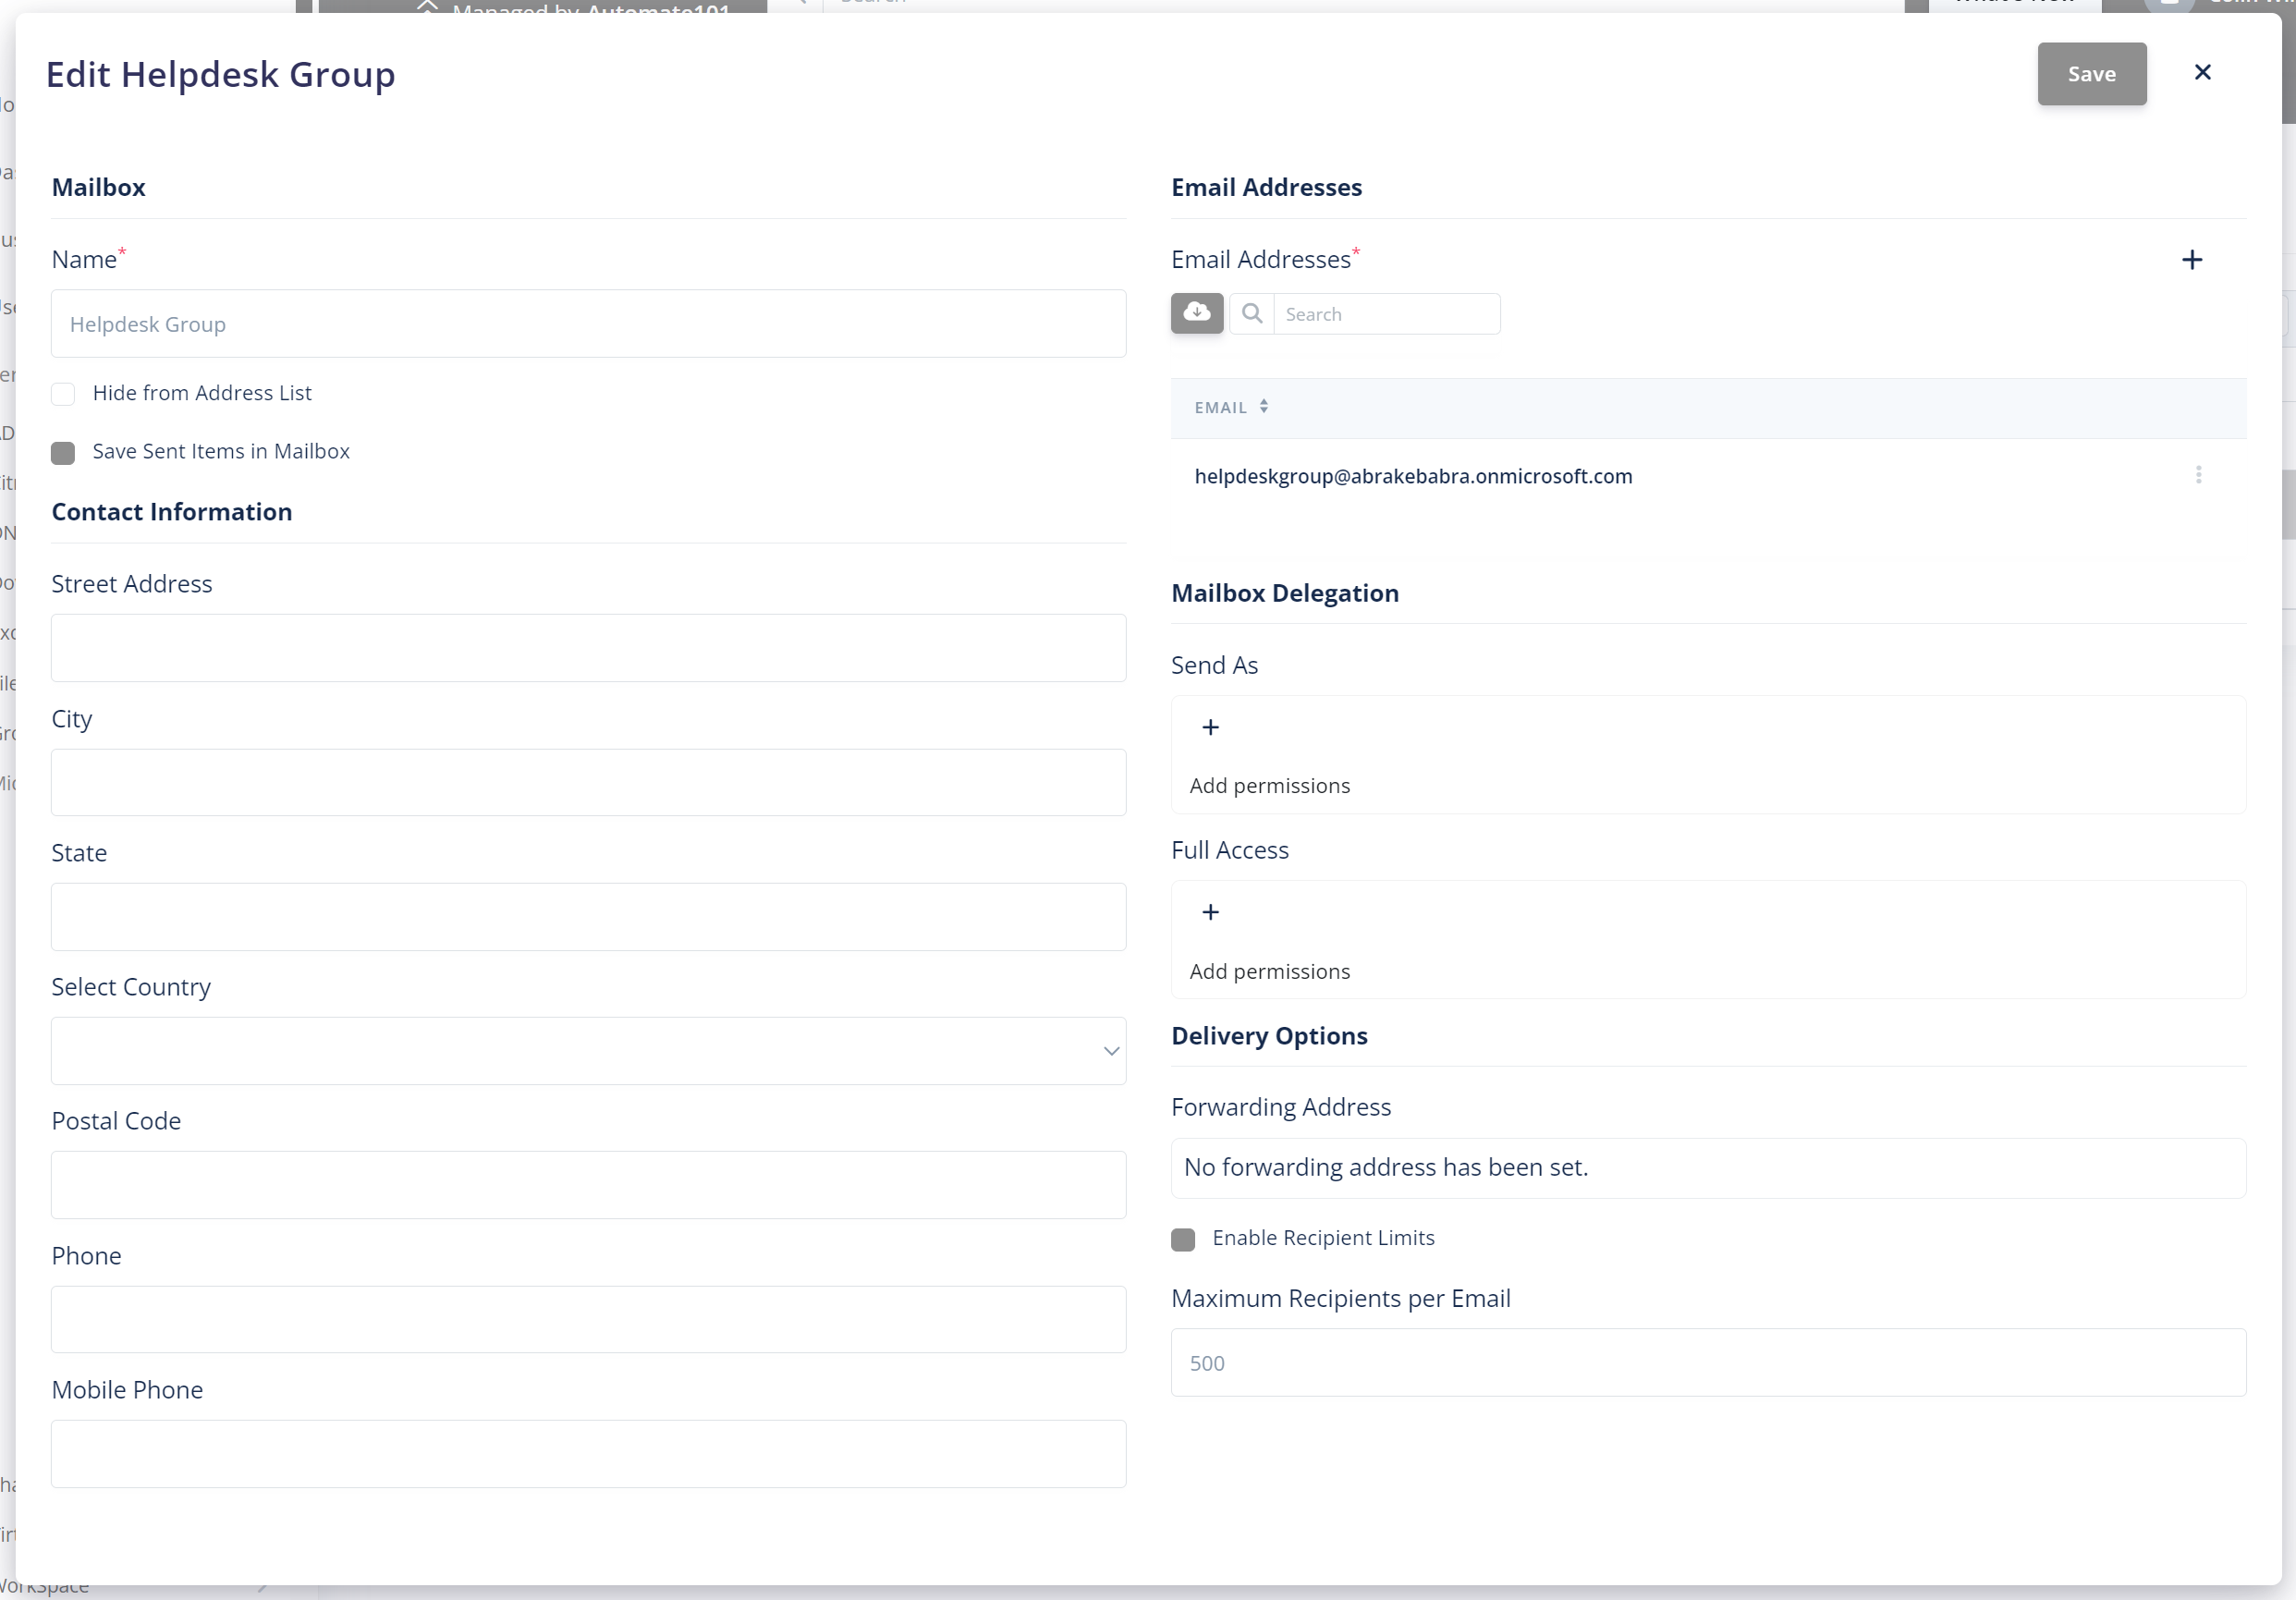
Edit Shared Mailbox

Modify the Mailbox Name: You can update the shared mailbox’s name by editing the Name field. This is how the mailbox will appear to users in Outlook and in the Global Address Book.
Email Addresses: The current Primary Email Address is displayed in bold. You can add more email addresses (aliases) by clicking the "+" button next to Email Addresses. You can also change the Primary address by clicking on the email alias and selecting the Primary option.
Primary Email Address (Reply Address): This is the main address associated with the shared mailbox. When users send emails from the mailbox, this address will be shown to recipients and will be used for replies.
Email Aliases: You can assign multiple email addresses (aliases) to the same shared mailbox after it has been created, but the Reply-to Address will always default to the Primary Email Address.
Mailbox Delegation:
- Send As: Add users who are allowed to send emails on behalf of the shared mailbox. Click the "+" button to add permissions.
- Full Access: Grant users full access to the mailbox, allowing them to read and manage emails. Click "+" to add users or groups.
Contact Information: Update the mailbox's contact details, including Street Address, City, State, Country, Postal Code, and Phone Numbers.
Delivery Options:
- Forwarding Address: Set an email address where incoming emails will be forwarded automatically.
- Enable Recipient Limits: If you want to restrict the number of recipients, check this box and set the Maximum Recipients per Email field.
Save Changes: Once you have made the necessary edits, click the Save button to apply the updates to the shared mailbox.