Workspace - Reseller & Customer Provisioning
Overview
Assigning the Workspace Service to a Customer involves selecting a Customer Plan (if more than one has been created) and selecting a set of Workspace Items to assign to the Customer.
After the Workspace Service has been assigned to the Customer:
- Private Workspace Items can be created or imported for control of applications and services within that Customer.
- Workspace Roles can be created within the Customer to simplify ongoing management.
- Users can be assigned the Workspace Service and Workspace Items
Reseller Level
This step is required for deploying shared Workspace Items through Workspace Lists. If you are only deploying private items, you can skip to Customer Level.
- Navigate to
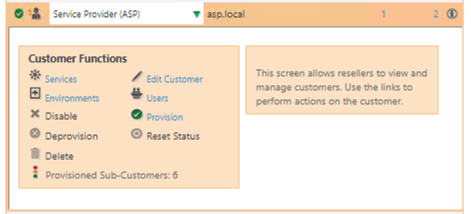
Customersand select the Service Provider/ Reseller you want to provision Workspace to. - Click Services under Customer Functions:
Services
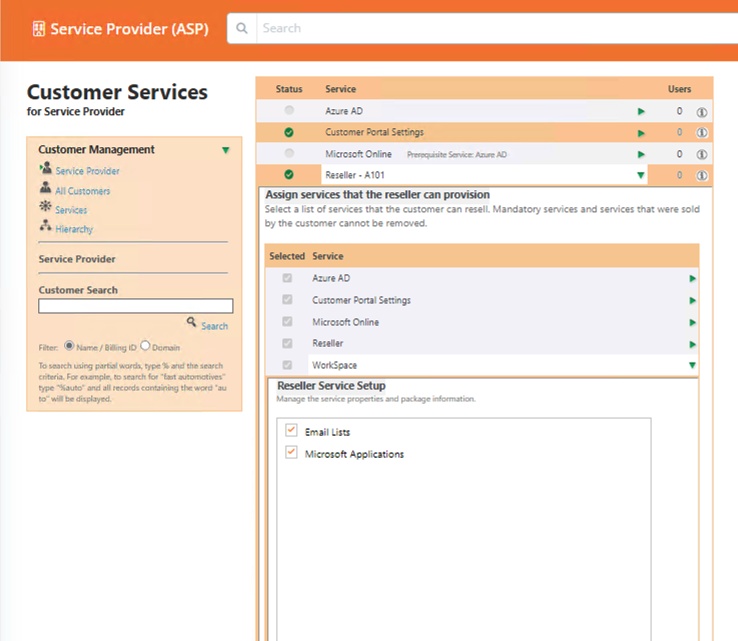
- Open the Reseller Service, enable and then open WorkSpace:
Enable Workspace
- Select the lists you wish to deploy, one of your customer and user plans, and Click Apply Changes:
Lists
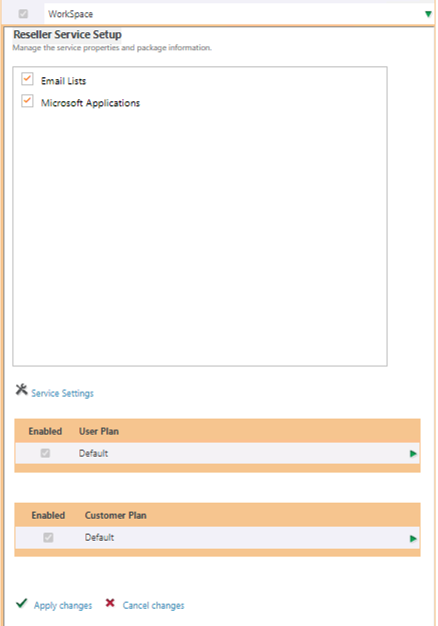
At this stage you should have at least 1 customer and user plan created. If not, head back to the Deployment page and complete this step.
Customer Plan User Profile Settings
The Customer Plan applies settings which determine the default User configuration for User Profile and Terminal Server Settings. Plans settings can be overridden at Reseller and Individual Customer level. You can also enable/disable which settings are applied.
For more information on configuration of Customer Plans - visit Configuring Workspace Customer Plans.
Items available for Selection
The Items available for selection within the Customer Provisioning Interface are determined by the Reseller Service. Workspace Lists provide a mechanism to control the visibility and use of Workspace Items through the Reseller hierarchy. As a Reseller within Atria, the Workspace Lists are controlled by the Service Provider who owns the Atria System. For more information on Workspace Lists, review Workspace List Management Features
Workspace Items that are dependent on Azure AD groups are shown if the Customer has been assigned the Microsoft Online Service.
Customer Level
As Workspace Items are assigned to a Customer, they are added to the Customers own Workspace List - this is the set of items that become available when assigning Workspace to users .
As Items are provisioned to the Customer, the provisioning process executes for each Workspace Item. If a Workspace Item Type has an Active Directory or Azure AD group, this group will be created - the Unique Identifier (ObjectId or GUID) of the group, and its name will be stored against the Customers reference to the Workspace Item.
Once the group has been created, any specified automations for the Workspace Item Type are executed, along with any specific automations specified for the Workspace Item itself.
- Navigate to
Customersand select the Customer that you want to provision Workspace to. - Click Services under Customer Functions.
- Expand WorkSpace:
Customer Provisioning
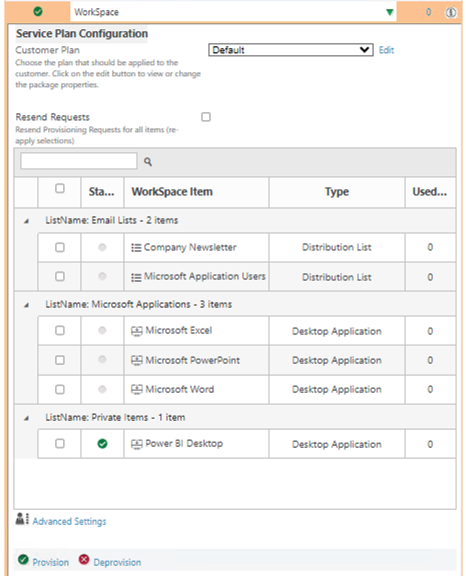
- Select your customer plan, and enable the items you want to provision for the Customer.
- Click Provision to provision Workspace with the chosen items.
Customizing Workspace Items for a Customer
Once a Workspace Item has been assigned to a Customer, some of the settings and processes associated with the item can be modified to provide specialization for that one customer.
Examples:
- Change the name of the item
- Add or change properties associated with the item
- Add or change automations associated with the item
To change an items configuration,
- login as the Customer (or ensure the Customer is in Context)
- Navigate to
Services > Workspace > Customer Workspace Items - From the list of items, search or locate the item, then click to view.
- Properties that are editable can be changed through the Item editor.
Example
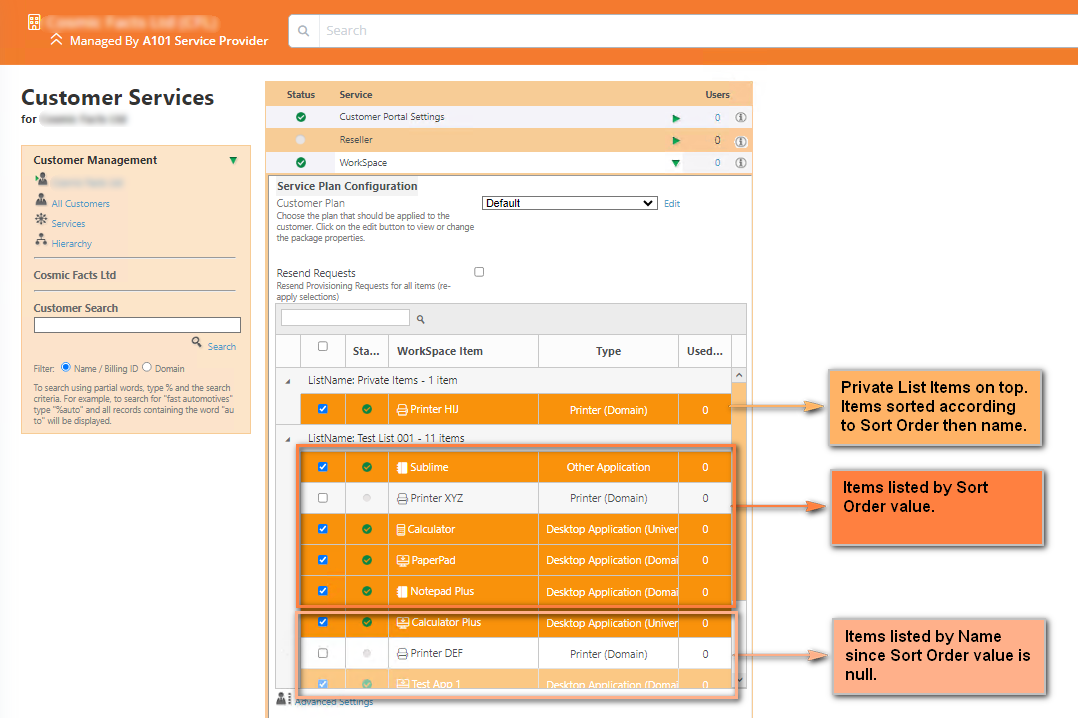
- Order by
- Workspace Item Type SortOrder
- Workspace Item SortOrder,Name
Summary
At this stage, Workspace should be deployed to all of the customers that you desire. The next guide is our final guide for core Workspace and will show you how to deploy Workspace to individual users.