Workspace Deployment Guide
Overview
This guide walks through the process of deploying Workspace into an existing Atria deployment.
Step 1: PowerShell Deployment
The method at this stage varies depending on which Atria version you are using. If you don't know which version you are running, you can view this at the bottom of the Home page on the Atria Web UI.
- v15.23 or before
- v15.24 onwards
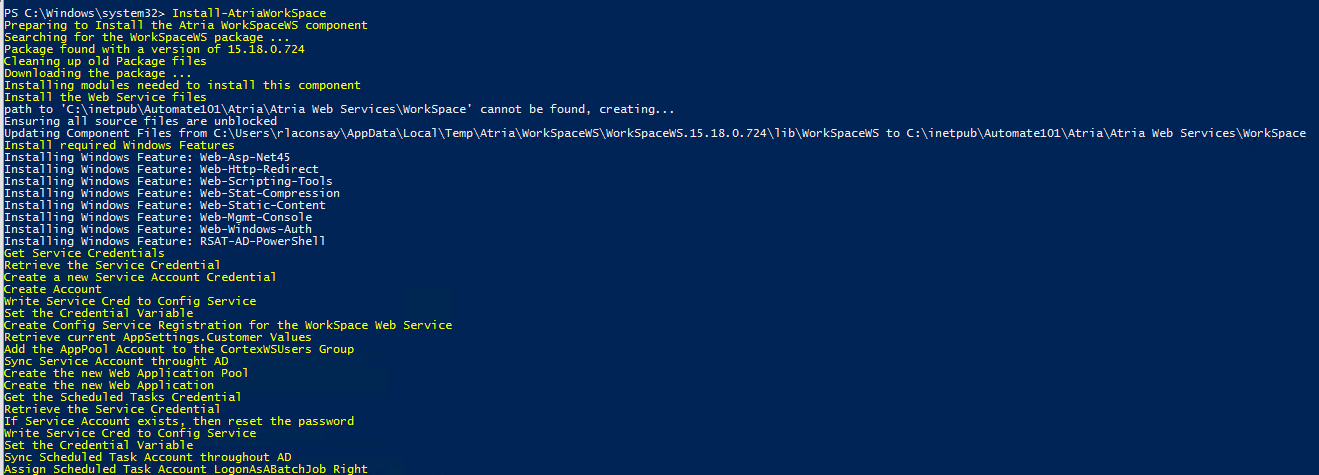
- On the provisioning server, run the following command in an elevated PowerShell session:
Install-AtriaWorkSpace
This will install the Workspace Web Service:
Web Service Install
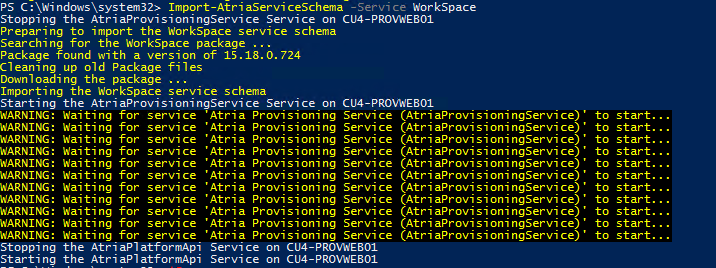
- Import the Workspace Service into Atria:
Import-AtriaServiceSchema -Service WorkSpace
Service Schema Import
- Query the Workspace Web Service Credentials from IIS:
C:\Windows\system32\inetsrv\appcmd.exe list apppool /name:"$=Atria WorkSpaceWS AppPool" /text:* | findstr "name: userName: password: password"
Credential Query

Make note of these credentials as they will be required at a later stage.
- On the provisioning server, run the following command in an elevated PowerShell session:
Install-AtriaWorkSpace
This will install the Workspace Web Service:
Web Service Install
- Import the Workspace Service into Atria:
Import-AtriaServiceSchema -Service WorkSpace
Service Schema Import
- Setup the WebServiceConnect Credentials within IIS:
- Verify whether the WebServiceCredentials exist:
Get-AtriaInstallerCredential -Component WebServiceConnect -Server '(Provisioning Server Name)'
WebServiceConnect Credentials

The outcome of this will vary based on whether you have recently installed Atria or not.
- If the command returns a credential:
- If the command returns blank:
- Run the following commands to determine the password:
$cred = Get-AtriaInstallerCredential -Component WebServiceConnect -Server (Provisioning Server Name)
$cred.GetNetworkCredential().Password
Make note of the credentials as they will be required at a later stage.
- Create the WebServiceConnect Credentials:
Set-AtriaInstallerCredential -Component 'WebServiceConnect' -Server (Provisioning Server Name) -Credential (Get-Credential)
-
When prompeted for credentials, set the username in the following format:
-
Domain\Atria_Connect_####
-
Where Domain is the Name of your domain, and #### is 4 random characters (e.g. HjkL).
-
Create a password
-
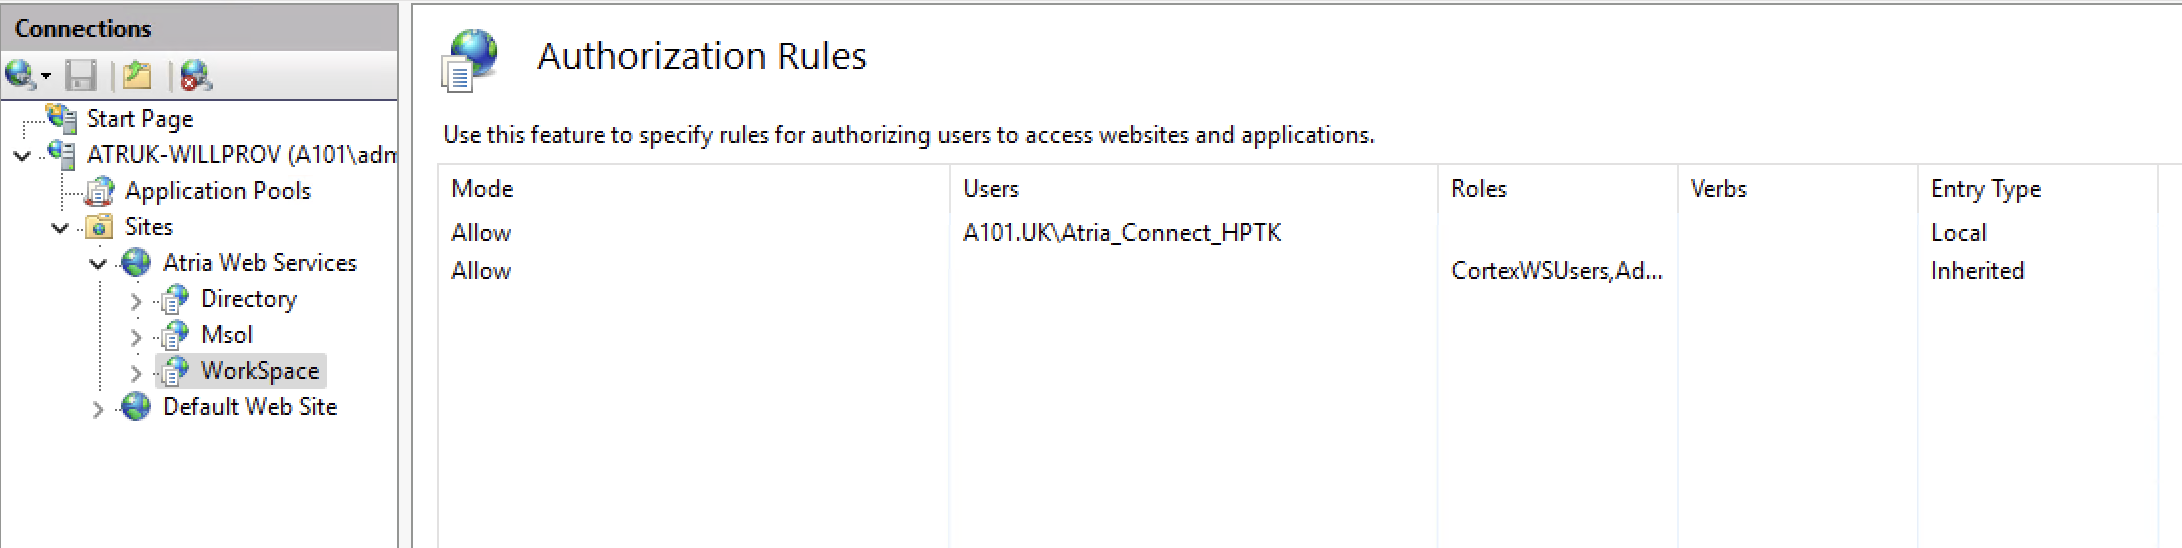
Run
Update-AtriaWorkspacein your PowerShell window to implement the credentials in IIS:
Authorization Rules
Make note of the credentials as they will be required at a later stage.
Step 2: Customer and User Plans
At this stage in the process, it is important to understand what Customer and User Plans are in the context of Workspace.
-
User Plans are a user level configuration option that can be used for tracking billing.
-
Customer Plans are a customer level configuration option that can be used for configuring Terminal Services and Profile Settings.
Both User Plans and Customer Plans can be fully customised to allow for any configuration options. Further info on the way that user and customer plans can be used can be found here: Service Plans
Further info on Workspace specific Customer plan configuration can be found here: Workspace Customer Plans.
Step 3: Atria Deployment
-
Enable the Workspace service in
Configuration > System Manager > Service Deployment.- At the Top Level:
-
Select Top Environment Services in the Service Filter.
-
Open Workspace with the green arrow.
-
To enable the service at this level, you must select at least 1 user and customer plan. If you have already setup any User or Customer Plans, they can be selected here. If not, then open both sections and select the plans named Default. These plans contain the default configuration for Workspace.
-
Click Save
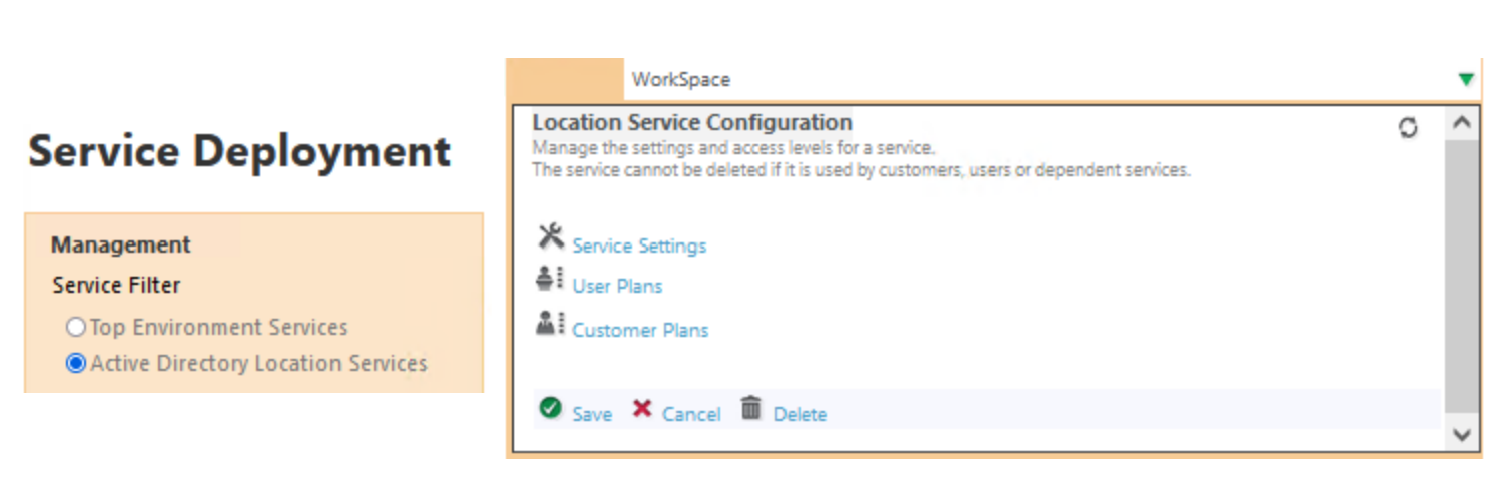
- At the Location Level:
-
Select Active Directory Location Services in the Service Filter.
-
Open Workspace with the green arrow:
Service Deployment
- Open User and Customer Plans and enable any extra plans you have created. Default ones will already be enabled.
The Publish tick box will enable the plans at reseller level for all resellers throughout the hierarchy.
- Click Save
- Select Server Roles on the left, or from within the System Manager, expand your Provisioning Server, and enable the Workspace Role:
Server Roles
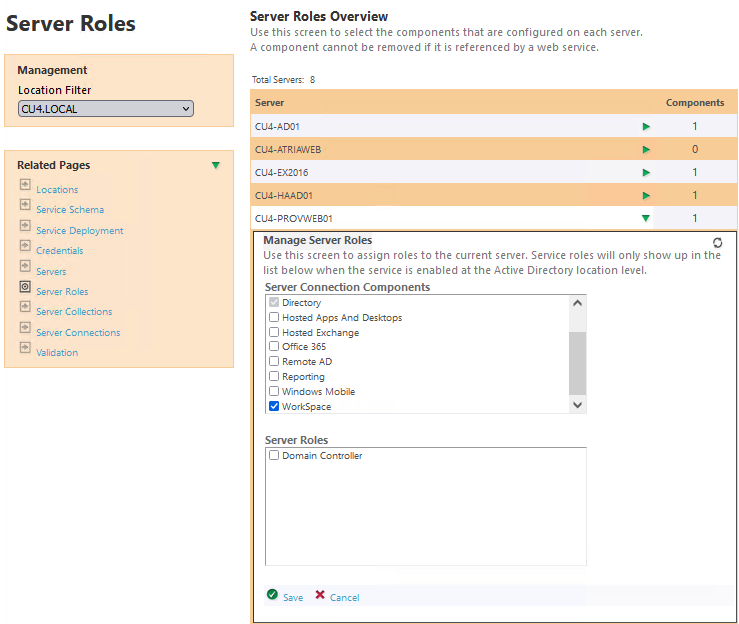
- Click Save
- v15.23 or before
- v15.24 onwards
- Select Credentials on the left, or from within the System Manager, and Add a new record within the credentials generated in the PowerShell Deployment and the Domian:
Credentials

- Select Credentials on the left, or from within the System Manager.
- If the Atria_Connect_#### credential is already there, you can move onto the next step:
Credentials

- If not, then Add a new record within the credentials generated in the PowerShell Deployment and the Domian.
- Select Server Connections on the left, or from within the System Manager, click New Connection and enter the details below:
- Server Role: Workspace
- Server: Choose your provisioning server.
- Credentials: Choose the credentials setup in the previous step.
- URL Base: /WorkSpace/Api
- Protocol: http
- Port: 8095
- Timeout: 200000
Server Connection
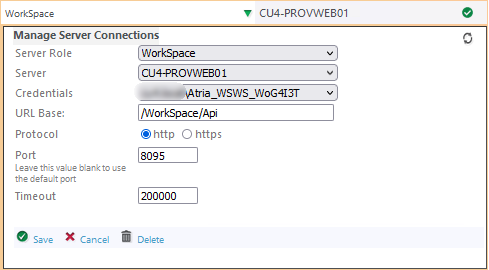
- Click Save
Scribe
We have created a Scribe to describe this process step-by-step:
Summary
You have now completed the installation of Workspace. To continue, follow the rest of this guide to learn more about the service and configure it for your environment. The next section will cover the first step in this process: Creating Workspace Item Types.
If you need any help or assistance, please contact us at support@getatria.com.