How to Migrate from Hosted Exchange to Exchange Online
Overview
This guide outlines how to migrate from the Atria Hosted Exchange Service to Microsoft Exchange Online. It includes both service changes and data migration steps.
The Microsoft migration method used is based on:
Scenario
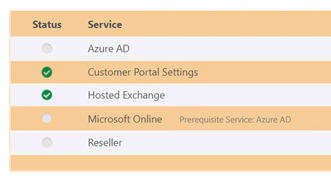
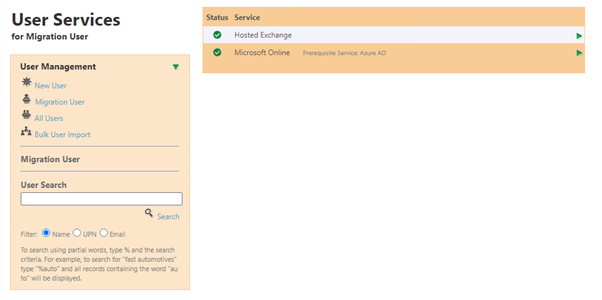
We’ll migrate all users of Initech Software from Hosted Exchange to Microsoft 365. The screenshot below shows that only Hosted Exchange is currently provisioned.
This guide uses the Classic Exchange Admin Center, but you can use the modern version if preferred.
Prerequisites
- Microsoft Online Service is provisioned and connected to Partner Center. More information on the Microsoft Online service can be found here: Microsoft Online Overview.
- You have a solid understanding of managing customers, users, and provisioning or de-provisioning services within Atria.
- You manage the customer’s public DNS.
- Domains are currently configured for Hosted Exchange.
Migration Process
Step 1
Step 1 – Provision Azure AD
Provision the Azure AD service to the customer.
- Direct CSP (Tier 1): Create a new tenant if needed
- Indirect CSP (Tier 2) or existing tenant: Link tenant to Partner Center:
If the customer doesn't have a tenant, create one with a unique onmicrosoft.com domain.
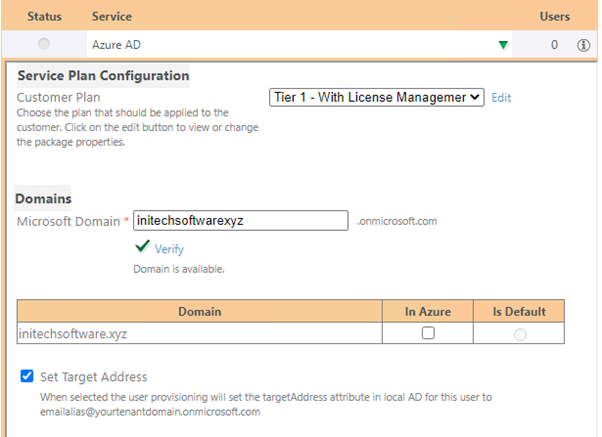
Setting the Target Address forwards all emails to the specified mailbox without retaining a local copy. Consider carefully based on your cut-over timing and whether users stay connected to the old or new mailbox.
Step 2
Step 2 – Verify Customer Domain
Use one of the methods here:
If using DNS TXT:
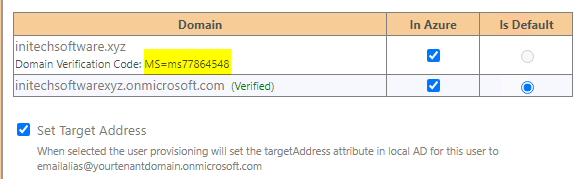
- Atria will show the required TXT record:
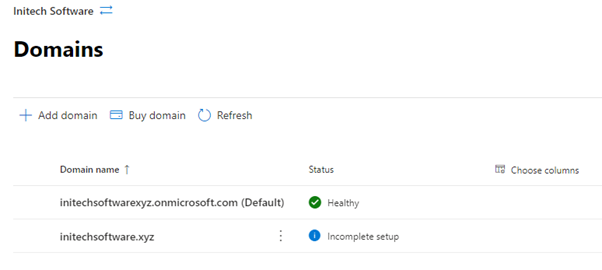
- The Azure Portal will show that the domain has an incomplete setup:
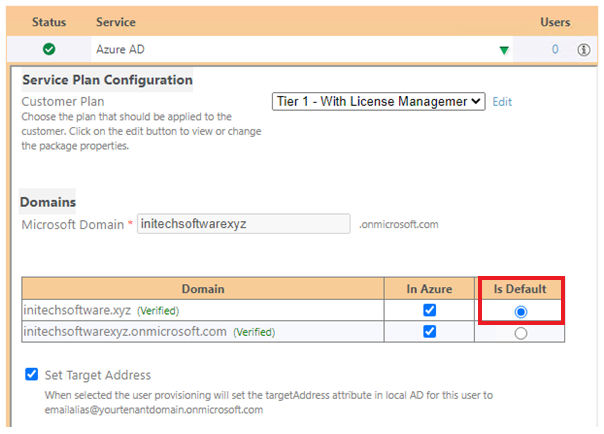
- Add the TXT record to your public DNS provider and complete the verification process in Office 365:

- Once the domain is verified you can set the domain to be “Is Default” on the Azure AD service in Atria:
Step 3
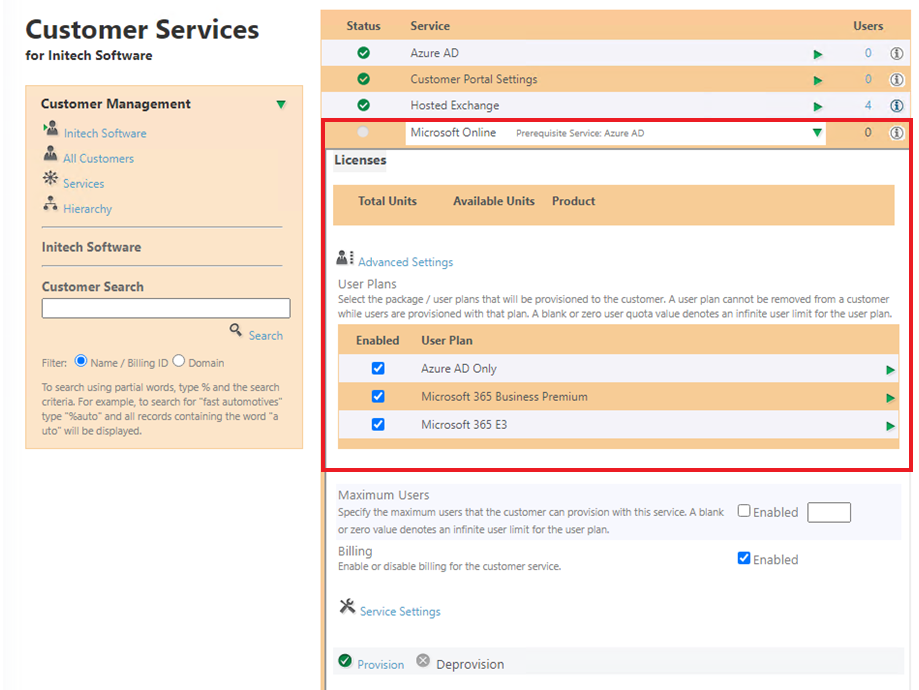
Step 3 – Provision Microsoft Online Service
In Atria, provision the Microsoft Online service and select the desired plans:
Step 4
Step 4 – Sync Azure AD
In Atria:
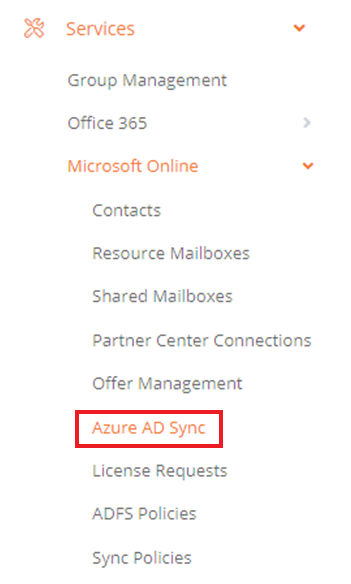
- Go to Microsoft Online > Azure AD Sync:
- Select Full Sync and click Sync Tenant:
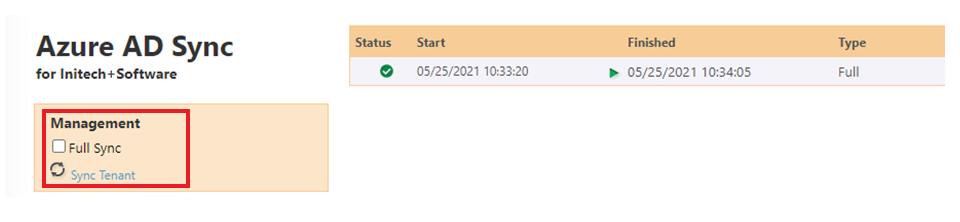
This syncs users between Atria AD and Azure AD.
Recheck that users have the correct domain and primary email addresses. Re-provisioning may be needed if provisioning fails.
Step 5
Step 5 – Provision Microsoft Online to Each User
For each user:
- Open Services
- Expand Microsoft Online
- Select the desired user plan
- Click Provision
To bulk-assign, use Multi User Select.
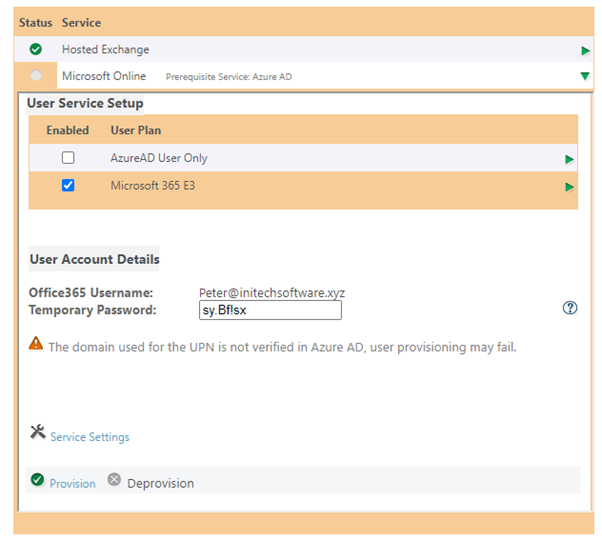
A temporary Azure AD password is shown. Resetting the password in Atria updates it in both AD and Azure AD.
Step 6
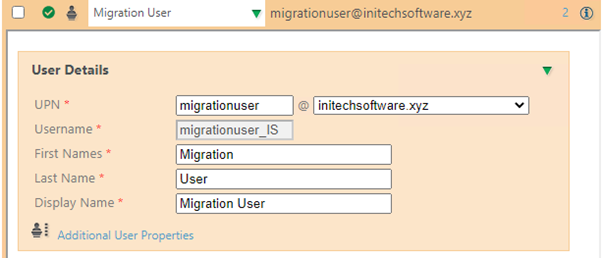
Step 6 – Create a Migration User
Create a dedicated user with access to all mailboxes.
- Provision them with the Hosted Exchange and Microsoft Online services.
Step 7
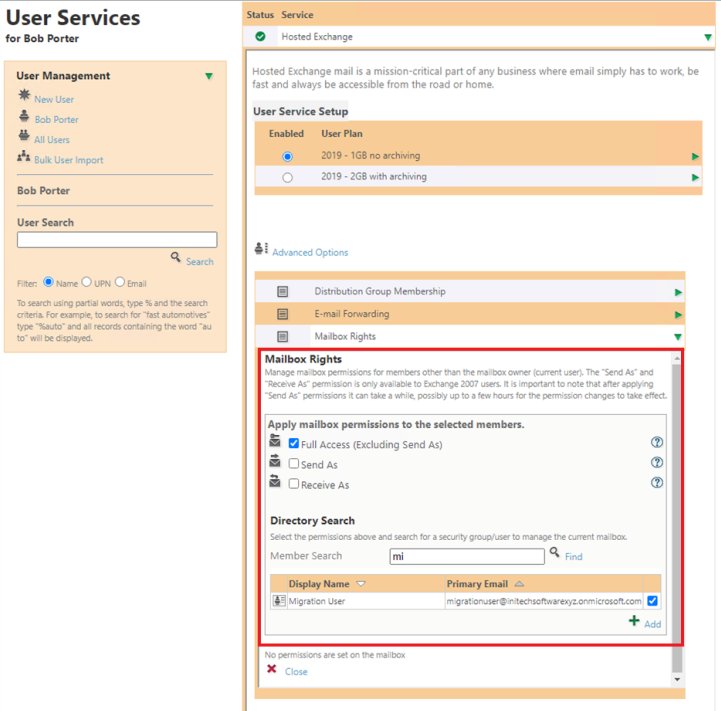
Step 7 – Assign Full Mailbox Access
Go to Hosted Exchange > Advanced Options > Mailbox Rights for each user:
- Add the Migration User with Full Access (excluding Send As) permission.
You can contact support@agetatria.com for a script if you have many users.
Step 8
Step 8 – Set Up the Migration Endpoint
In Office 365:
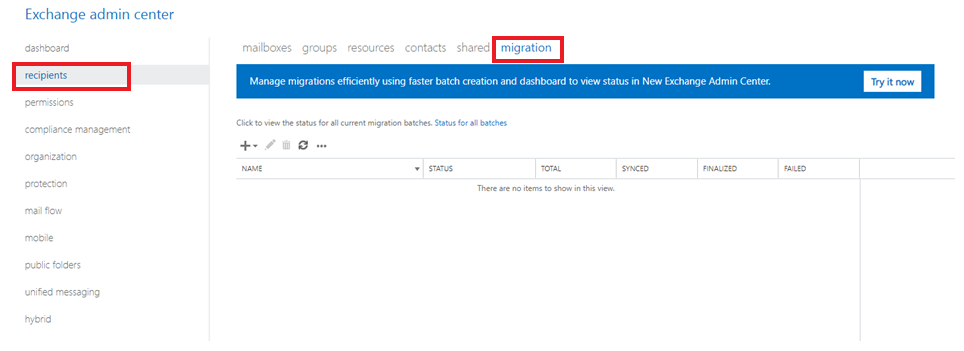
- Go to Exchange Admin Center > Classic Exchange
- Go to Recipients > Migration:
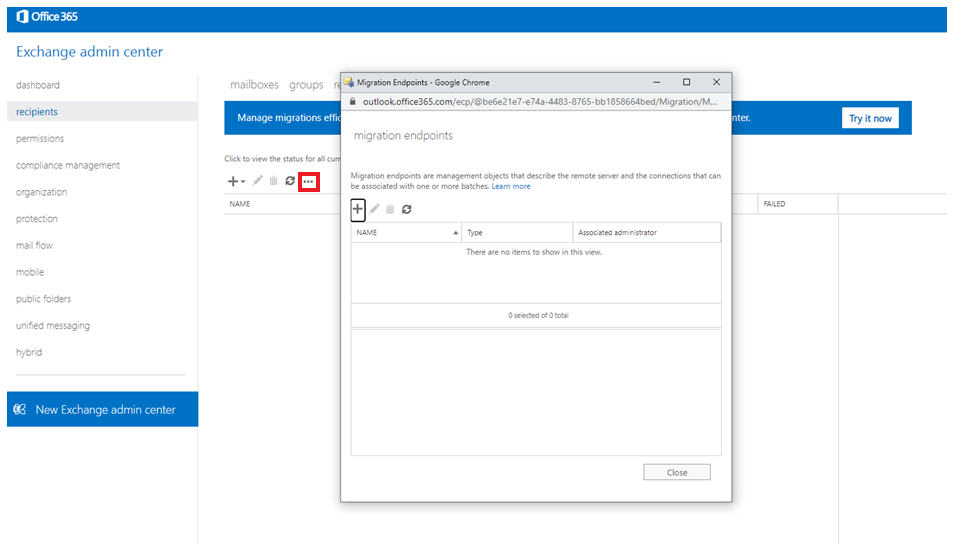
- Add a new Migration Endpoint via the ellipsis (...):
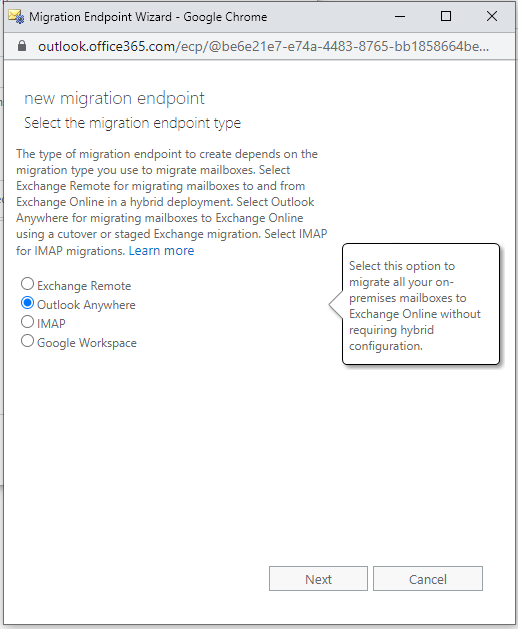
- Choose Outlook Anywhere:
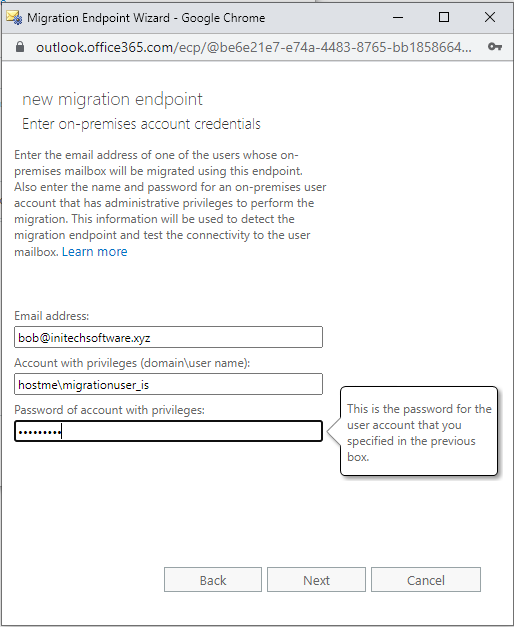
- Enter:
- A migrated user’s email
- Migration user credentials (
domain\username)
- The following information may be automatically provided. If not, enter server info:
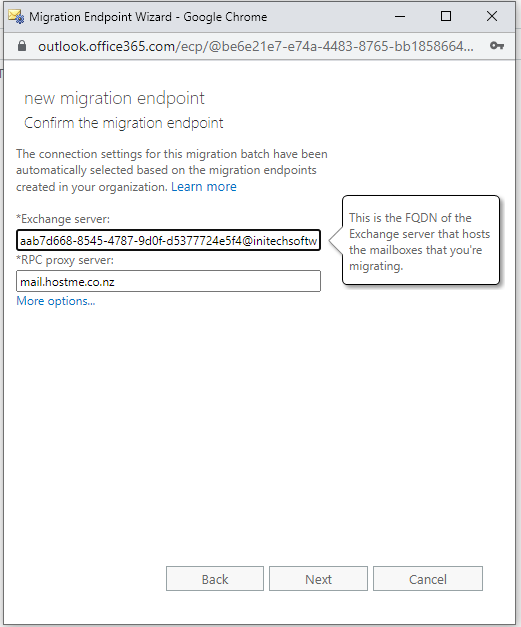
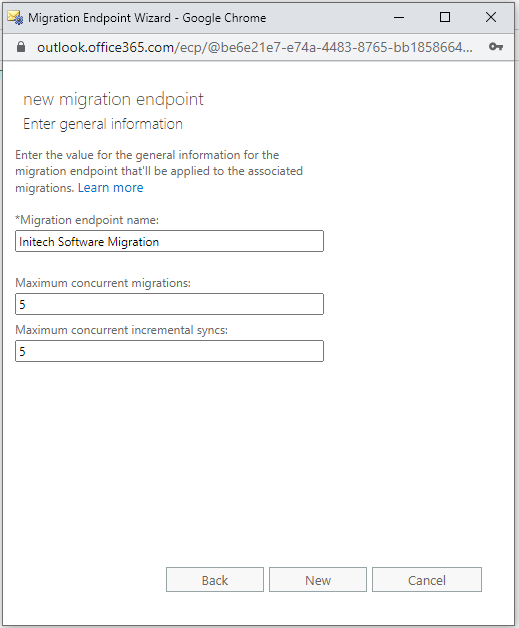
- Set migration limits and name the endpoint:
Step 9
Step 9 – Start Migration Batch
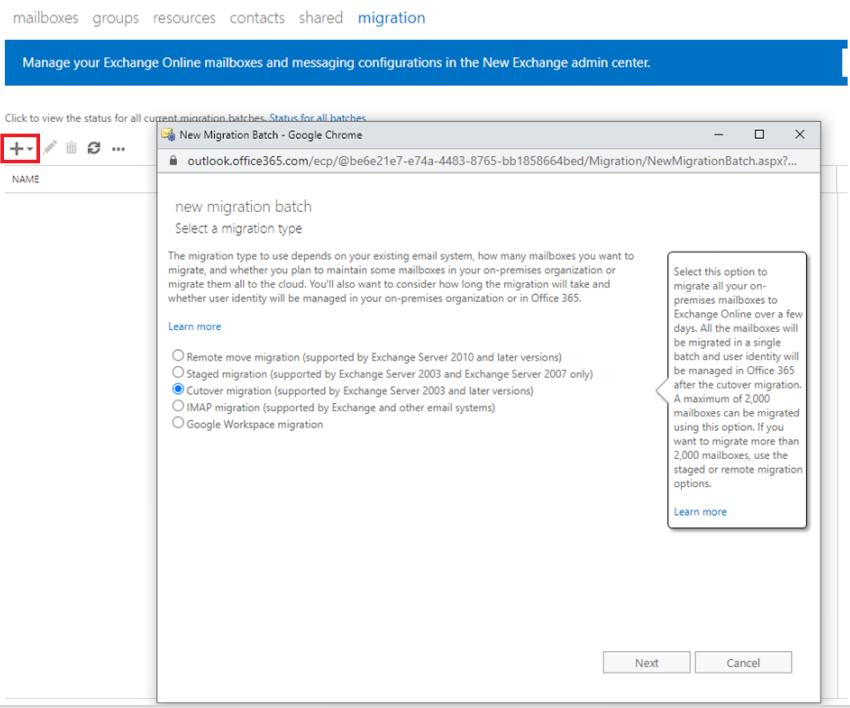
- Click + > Migrate to Exchange Online
- Choose Cutover Migration:
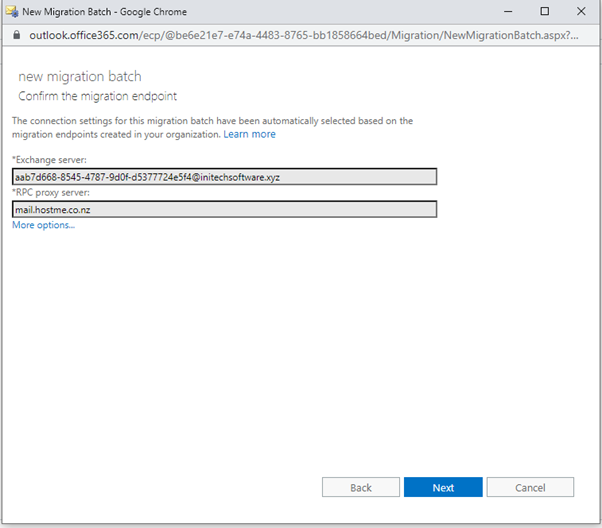
- The Migration Endpoint will already be selected, click next:
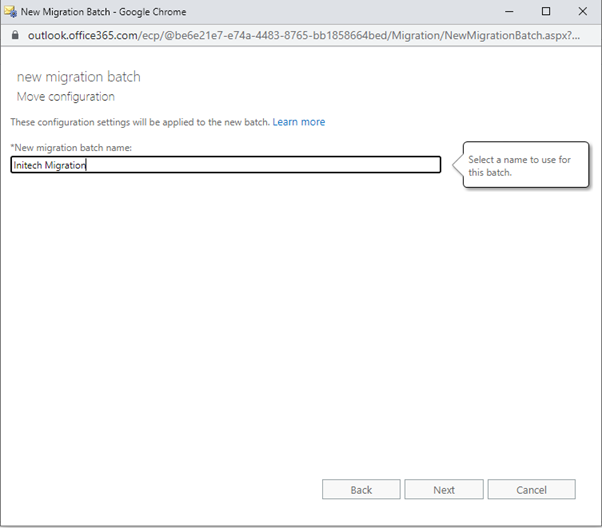
- Name the migration and click next:
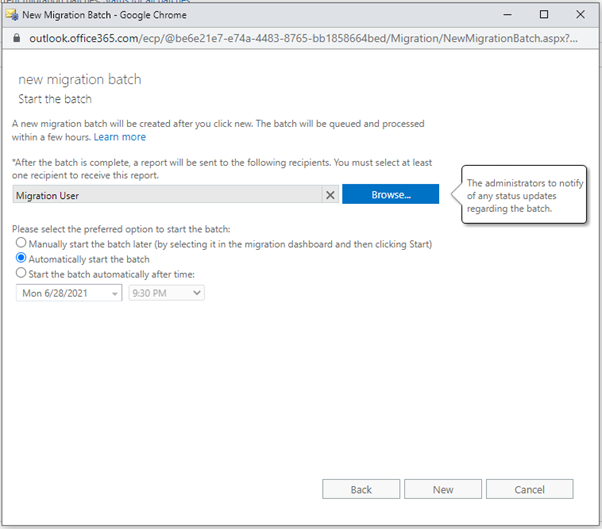
- Select a time for the migration to start or select to start Automatically:
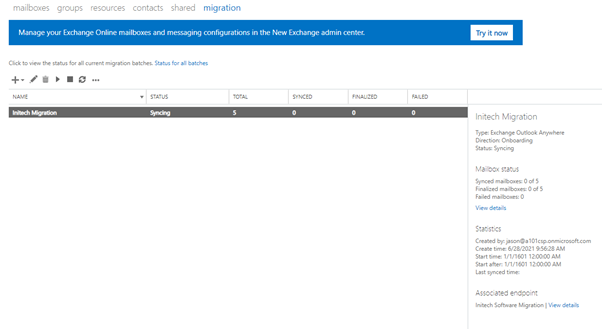
- Once the migration starts there will be a status of Syncing:
- All mailboxes that the Migration User has access to will be migrated.
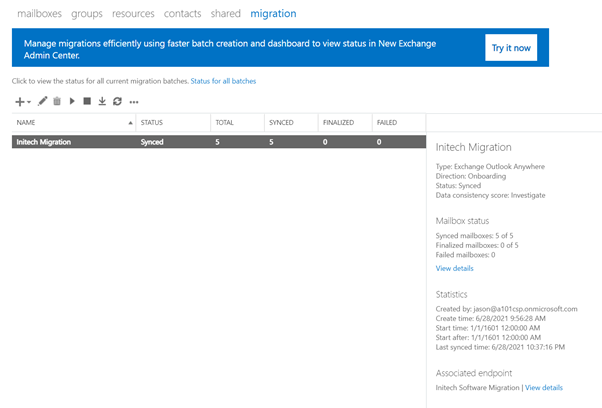
- When the migration has completed the status will change to Synced:
Step 10
Step 10 – Update DNS to Point to Microsoft 365
- In Office 365, go to Settings > Domains to get DNS values.
- Gather the additional settings for your domain to receive email directly and configure it with your domain provider.

Step 11
Step 11 – Remove the Migration Batch
Back in the Classic Exchange Admin Center:
- Go to Recipients > Migration
- Delete the batch and endpoint.
The “Finalized” column is only relevant for hybrid migrations.
Step 12
Step 12 – Remove the Migration User
- Deprovision the migration user and any services they were assigned.
Step 13
Step 13 – Deprovision Hosted Exchange
Once all users are verified and mail is working in Office 365:
- Deprovision Hosted Exchange from each user and the customer.
If you have any questions or require assistance, please contact us at support@getatria.com.