Migrate Atria Database to a Different Server
Overview
This article will guide you through the process of moving the Atria database from one server to another. We recommend that you update to the latest version of Atria before following this process. Please refer to Updating Atria for a guide on this.
Prerequisites
- On the destination database server, create a firewall rule allowing inbound traffic over the SQL port.
- If you are using SQL Server, this is 1433.
- On both the source and destination servers, create a firewall rule allowing inbound traffic over the File and Printer Sharing Ports.
- These are typically 137, 138, 139, and 445.
These rules are setup to allow the backup, copy-over, and restore processes between the source and destination servers.
Process
On your provisioning server, run the following commands using an administrative PowerShell session:
Import-Module Atria.Tools -Force
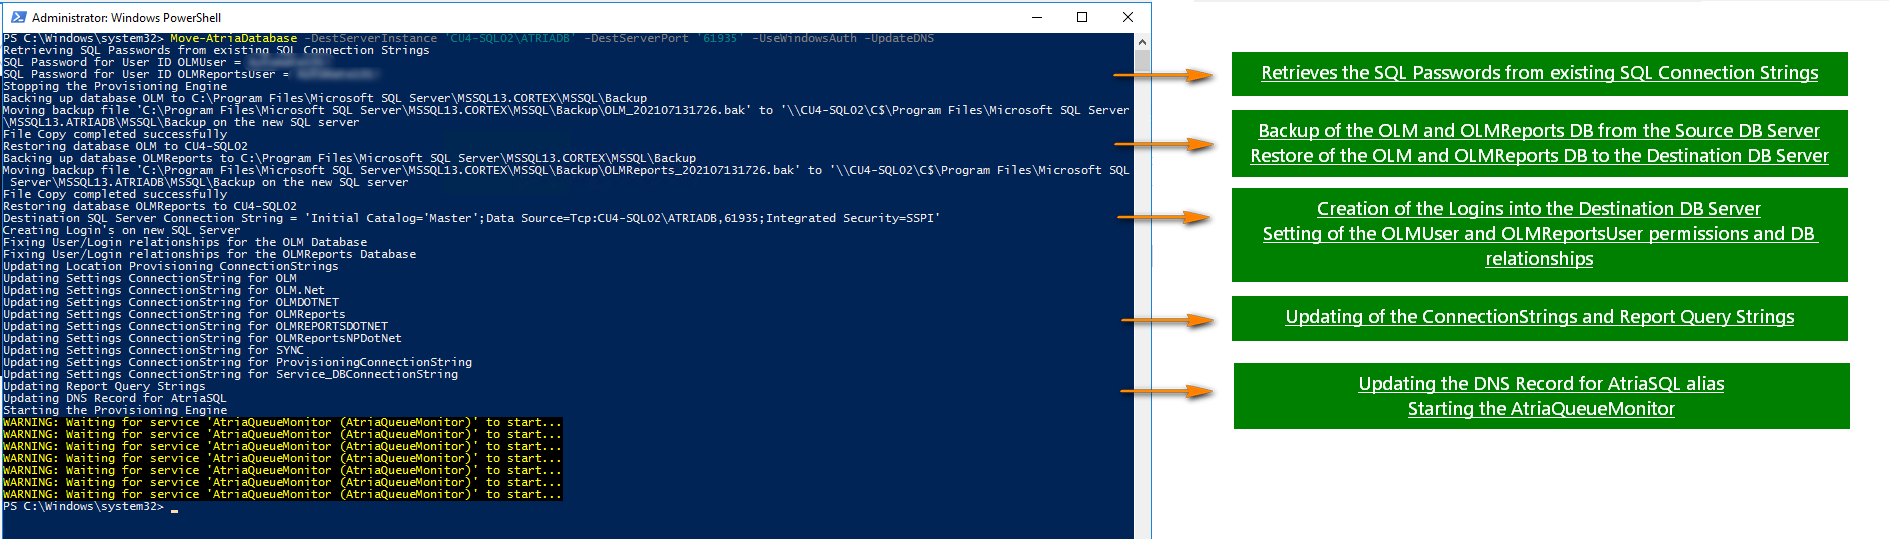
Move-AtriaDatabase -DestServerInstance 'DestinationSQLServer' -DestServerPort 'DestinationSQLPort' -UseWindowsAuth -UpdateDNS
Parameters:
- -DestServerInstance: Destination of the SQL Server (i.e. SQLDB02\ATRIA)
- -DestServerPort: SQL Port of the Destination SQL Server
- -UseWindowsAuth: Current user login should have permissions into the Database Servers
- -DestSQLCredential: Can pass a Get-Credential for the SQL Account Login that has permissions on the Database Servers
- -UpdateDNS: This will do the action of transferring the DNS alias 'AtriaSQL' into the new server
This command may take a while to run depending on the size of the database.
After the command has completed:
- Stop the SQL Service on the Old Database Server
- Run
iisresetin an administrative command prompt on both the Provisioning and Web Server. - Test your Atria instance to ensure all is working.
For any questions or assistance needed, please contact us at support@getatria.com.