Moving RabbitMQ_BASEPATH to a Directory Instead of the Default User Profile
Overview
By default when installing and configuring RabbitMQ, the BASEPATH for all config, logs, plugins, and instances are pointed to the %appdata% of the User that did the installation. Using this article, the RABBITMQ_BASEPATH will be moved to a specific directory which avoids any dependency on a User.
Related Articles
https://www.rabbitmq.com/relocate.html
https://www.rabbitmq.com/configure.html
Steps on Moving the RABBITMQ_BASEPATH
If any of the steps below have errors or if there are any issues, please stop the process and contact support@automate101.com immediately.
-
Prepare the existing RabbitMQ account username and password from the Primary Environment and Remove Environments (if any)
- Using PowerShell (Administrator), navigate to 'C:\Program Files\Automate101\Atria\ConfigService'
- Initiate a 'Get-AtriaComponent | FT' to initialize a contact with the ConfigService
- Use the below script to decrypt the appSettings.Secret.json of the ConfigService component
$encUtil = New-Object -TypeName 'Atria.Common.Utils.SymmetricEncryptionUtil'
$ConfigDecryptor = New-Object -TypeName 'Atria.Common.Configuration.ConfigurationEncryptor' -ArgumentList $encUtil
$configJson = ConvertFrom-Json ((Get-Content .\appsettings.secrets.json)-Join "")
$configDict = New-Object 'System.Collections.Generic.Dictionary[String,String]'
$configJson.PSobject.Properties | %{$configDict.Add($_.Name, $_.Value)}
$ConfigDecryptor.DecryptConfig($configDict)- Take note of the username and password of the RabbitMQ account from the secret:messaging values
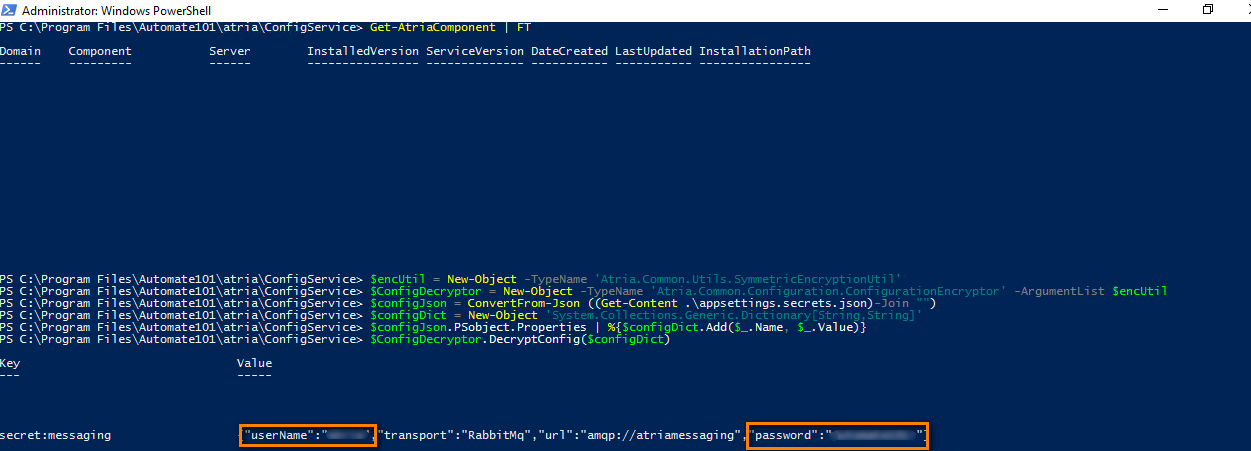
Sample from remote environment:
 warning
Do these on the Provisioning Server of the Primary Environment and Remote Environments
-
Once the username and password details are noted, proceed with navigating to the RabbitMQ sbin directory in PowerShell. Folder version might differ depending on what was installed. (i.e. C:\Program Files\RabbitMQ\rabbitmq_server-3.8.18\sbin)
![]()
-
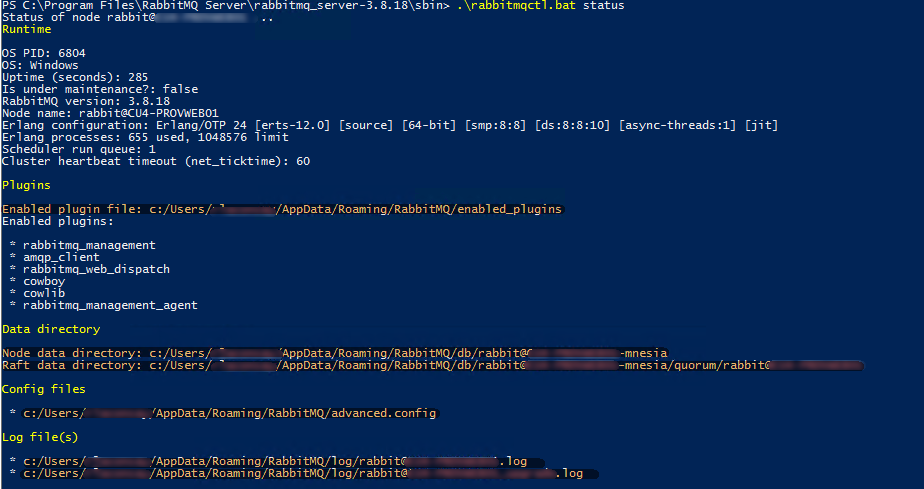
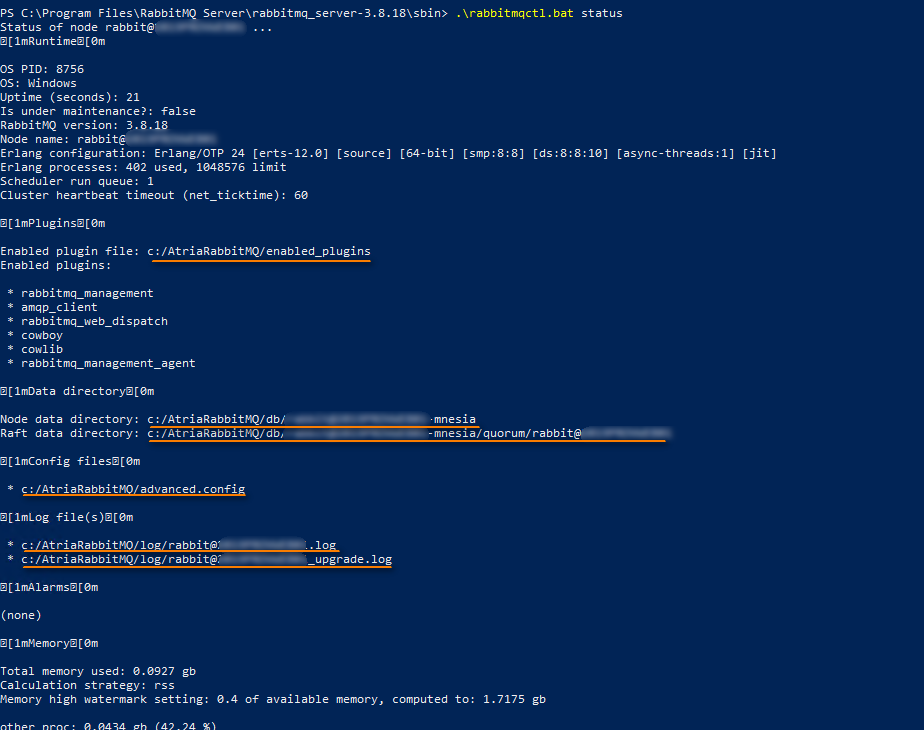
Check the status of RabbitMQ to determine where the directory path of the config, logs, plugins, etc. are located .\rabbitmqctl.bat status
-
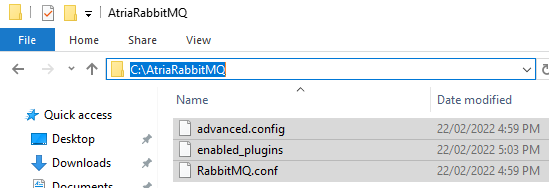
Create a directory to where RabbitMQ_BASEPATH will be pointed going forward (i.e. C:\AtriaRabbitMQ)

-
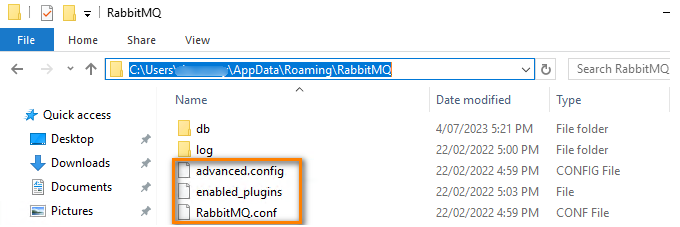
From Step 3, get the information to where the config files are located. Navigate to the %appdata% of that user profile and then copy the advanced.config, RabbitMQ.conf, and plugin files going to the new directory location in Step 4.
-
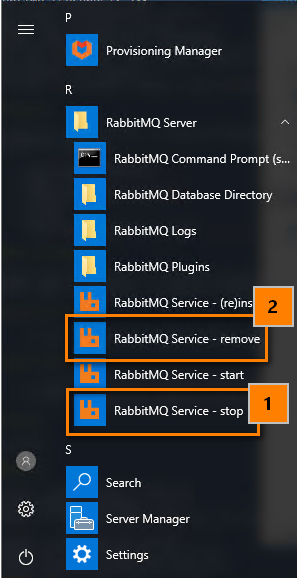
On the Windows Menu, navigate to RabbitMQ Server and select STOP and then REMOVE. (Note: this does not remove the RabbitMQ service but rather the configuration and settings only)
-
Open PowerShell (admin) then run the commands:
  $rabbitdir = 'C:\AtriaRabbitMQ' (depending on the directory that was created on Step 4)
  [Environment]::SetEnvironmentVariable("RABBITMQ_BASE", $rabbitdir, "Machine")
-
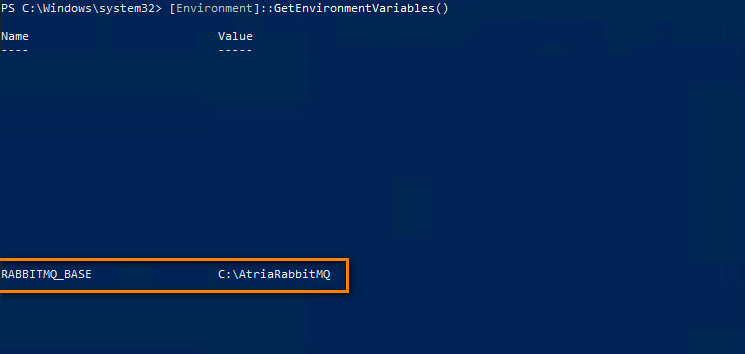
Restart the PowerShell session, then list to check the RABBITMQ_BASEPATH Environment Variable. If the environment variable is missing, a restart of machine might be needed. [Environment]::GetEnvironmentVariables()
-
Navigate to the RabbitMQ sbin folder. This depends also on the RabbitMQ version.
cd 'C:\Program Files\RabbitMQ Server\rabbitmq_server-3.10.2\sbin'Set the RABBITMQ_BASEPATH
SET RABBITMQ_BASE=C:\AtriaRabbitMQ -
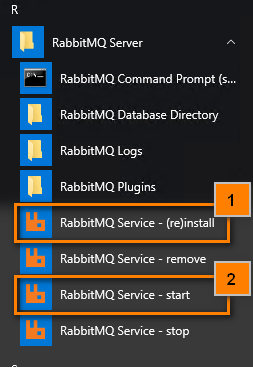
On the Windows Menu, navigate to RabbitMQ Server and select RE(INSTALL) and then START.
-
Check the status of RabbitMQ, this should now show that the paths have been changed to the new one. .\rabbitmqctl.bat status
-
Add back the RabbitMQ accounts and passwords that came from the Primary and Remote Environments. Primary Environment Account (the only account tagged as administrator):
.\rabbitmqctl add_user '<username>' '<password>'
.\rabbitmqctl set_permissions -p / '<username>' ".*" ".*" ".*"
.\rabbitmqctl set_user_tags '<username>' administrator
.\rabbitmqctl delete_user guest

Remote Environment Account (if any Remote Shared or Dedicated Customer):
.\rabbitmqctl add_user '<username>' '<password>'
.\rabbitmqctl set_permissions -p / '<username>' ".*" ".*" ".*"

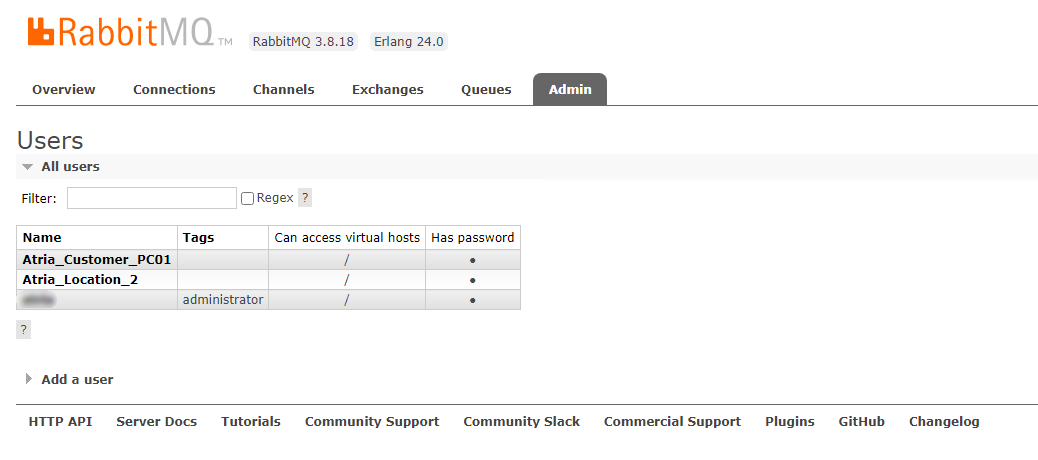
- Once RabbitMQ accounts are added, try to login into the RabbitMQ Web Management using the RabbitMQ administrator account. (i.e. http://atriamessaging:15672) This depends on the FQDN, if SSL is enabled it will be on port 15671. Navigate to the Admin to see the list of Users. All added accounts should be here.
-
Start the Atria Services on the Primary Environment:
AtriaConfigService
AtriaAgent
AtriaPlatformApi
AtriaProvisioningService -
Restart the Atria Services for each of the Remote Environments AtriaConfigService AtriaAgent AtriaProvisioningService
-
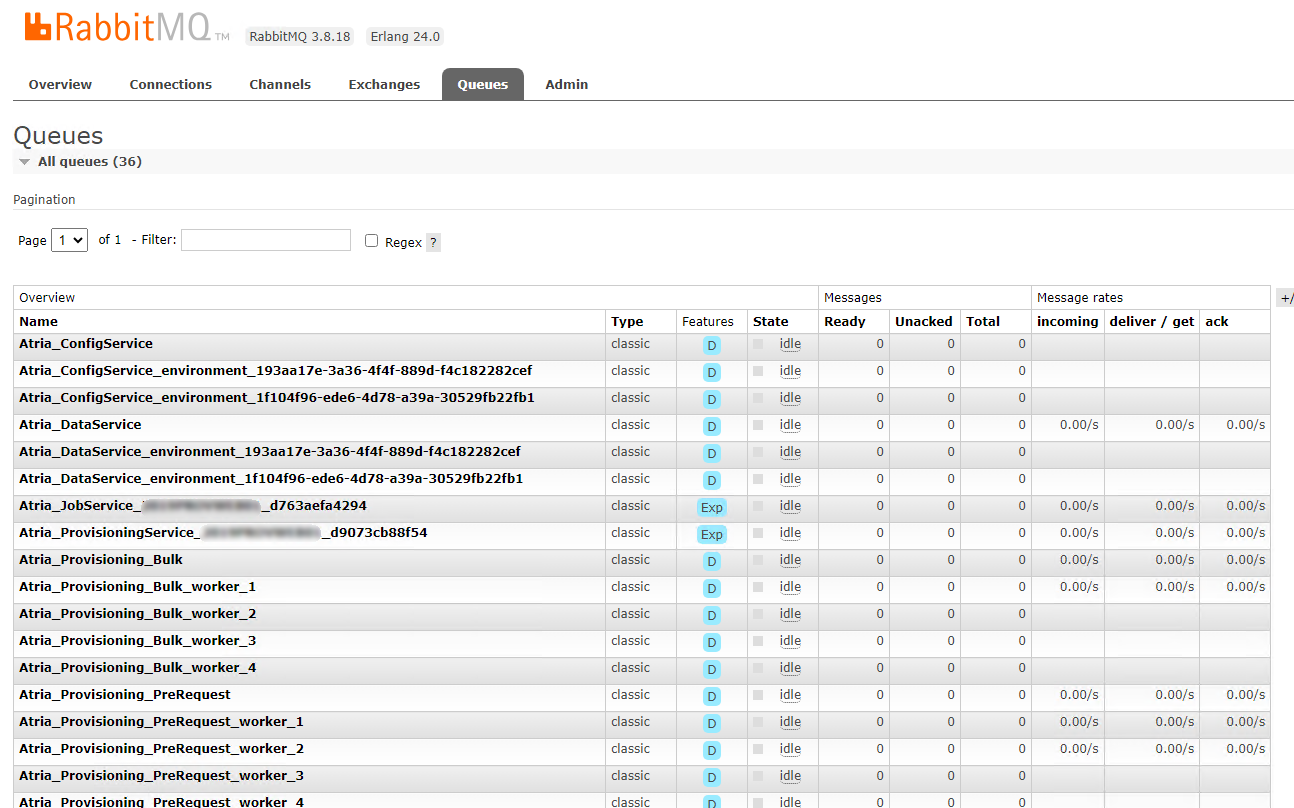
When all services are started/restarted, the queues in RabbitMQ will be generated
-
Once services are all started and queues are ready, you can run a Provisioning request to validate.
If any of the services fails to start or if there are any issues, please stop the process and contact support@automate101.com immediately.